NAA P-51D Mustang: Tail Wheel Project Update

NAA P-51D Mustang: Tail Wheel Project Update

This project is growing arms and legs; every time I check back to the NAA documentation I find yet another part associated with the assembly in this area.

I am beginning to appreciate just how complex the interaction is with all the parts that share this very small space and wonder sometimes if I will ever complete this task!.

For this period of build I have had to revert to an earlier version of Inventor; which unfortunately means many of the parts already modeled cannot be included in the assembly build at this time as the version variants from a later release will not be compatible with this one. Also the material finishes are not as good as the Inventor 2016 as you can see below.

So I am focusing my attention on building the supporting elements for the Tail Wheel mechanics; including the fuselage frames local to this area.

P-51D Mustang: Rear Fuselage

The fuselage frames are surprisingly complicated to build, partly due to the limitations of the software but also due to the flanges having to align with the surface form of the main fuselage as shown. I mainly used the sculpting technique but found that it is not possible to apply a fillet to the edge of a sculpted solid that is derived from a spline curve, so these had to be added when creating the lofting sketches.

I have added a few parts (where I can) for the tail Wheel assembly; these parts in blue; and also an additional component in yellow which is a Support Assy – Rudder & steerable tail wheel control bell crank. This part by the way was a nightmare to build trying to get all the edges to align correctly with the sloping webs.

I have mentioned before the importance of having quality copies of the original materials to work with and this particular archive (from FlugArchiv) was done to a very high standard.

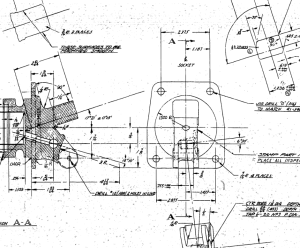
2015-07-07_02-06-47Occasionally though you do get the odd drawing that is almost impossible to use but having gained some experience in developing these aircraft structures it was not too difficult to determine the missing information.

This is the one I have for the lower section of one fuselage frame.

NAA P-51D Mustang: Document Management

NAA P-51D Mustang: Document Management

An update on the organisation of the document management and archive register.

The USAF Parts catalog for the P-51 is organised by assembly and sub assembly types. For the Tail Wheel assemblies we have one main installation assembly and two sub assemblies for the Shock Strut and Steering Mechanism as follows:

2015-07-02_00-29-57  2015-07-02_00-30-32  2015-07-02_00-32-05

For the document register I have grouped the records and created separate worksheets that comply with the assemblies as setout in the USAF Parts List, listing the assemblies with a Category designation i.e TW-IN (Tail Wheel Installation) TW-SS and TW-SM.

2015-07-02_00-35-30

In the last column I have identified the NAA drawing by type; defining these as follows;

  1. Part: An individual drawing fully detailing a single part or item.
  2. Part Assembly: A fully detailed part drawing that includes additional fitted components like bearings, bushes or rivets.
  3. Main Assembly: A top level assembly listing individual parts, sub assemblies or components.

Note: The Part Assembly is technically a sub assembly which unusually comprise a fully detailed single part to which other elements have been added. Currently for this to work for me in the Cad environment I have maintained the part definition but modeled as a multi-part file. I may decide to change this to an actual Cad assembly file.

To clarify the above and ensure that all parts are accounted for I have created a sub listing of the contents for each Part Assembly as shown in the following scrap view:

2015-07-02_01-02-46

Some of the parts included in the Part Assembly are bushings, which are typically a press fit and reamed to a specified diameter. The bushing included in the Part Assembly is modeled to “as-fitted” condition, but as a matter of record I maintain a separate model file built to the “pre-fitted” manufactured dimensions.

I have also extracted a separate list from the USAF Parts List for the NAA standard parts from which I have identified the information I have in the archive and the data I will need to source elsewhere.

2015-07-02_01-13-08

The NAA standard part drawings in many cases supersede earlier standards for which we have a reference listed. I have these listed in this spreadsheet in 3 columns (on the right); with the first entry being the “Old standard”; the second as the “New Standard” and the final entry being the archive reference. I have had to do this as occasionally the drawings refer to the old superseded standards number.

At this stage I have all the records for the Tail Wheel assembly organised into manageable chunks of information so that I can track progress as marked and manage the eventual build of the final Cad model assemblies.

NAA P-51D Mustang: Tail Wheel Assembly Update

NAA P-51D Mustang: Tail Wheel Assembly Update

I rather enjoy building these Cad models and the challenges they represent, however I still have a lot of work to do with organising the archive materials and the document register; which I briefly mentioned in previous posts.

I have decided to adopt a BIM methodology for the organisation and restructuring of the archive datasets and to look at the options for managing the content and format of the tagged properties within the 3D CAd models.

This all needs to be done, so I will take a break from modelling the parts for a while to concentrate on developing the above. So on this last day I decided to tackle some of the smaller parts for the eventual Tail Wheel assembly for the P-51; which surprisingly were interesting parts to build.

2015-06-26_21-14-15 2015-06-27_00-36-57

#73-34189: Bell Crank: Steering Pulley               #97-34172:Retainer: spindle lockpin

2015-06-27_18-08-13 2015-06-27_00-39-04

# 97-34191: Bracket Torque Tube Pulley      #73-34515: Bell Crank – Retract position lock

There are also a lot of parts that don’t have drawings in this archive; mainly aviation standard parts for bolts, washers, seals and bushes for which I need to knuckle down and source the dimensional information so that I can build the requisite part model libraries.

There is still a lot to consider as I move forward with this project!

NAA P-51D Mustang: Tail Wheel Down Position Support

NAA P-51D Mustang: Tail Wheel Down Position Support; Derived Parts (Inv)

I mentioned in an earlier post that we don’t have many of the forgings/castings for this aircraft but the few that we do have are not stated as such in their description and thus occasionally overlooked.

In this case the forging/casting was noted in the NAA machining drawing; which I do have.  This gives me an opportunity to explain one of the strengths of the Autodesk Inventor product, namely derived parts!

Derived parts are a powerful but easy-to-use tool that comes in two basic flavors: you can derive a part from another one, or you can derive a part from an assembly. Using derived parts, you can easily create machining models and drawings from an as-cast model, and you can create a mold from the same model.

2015-06-25_23-39-08 2015-06-25_23-38-08

These images show the casting model I created from the original NAA drawing #73-34162 for the Tail Wheel Down Position Support.

This model took me quite a while to do due to the creation of all the fillets which got a bit crazy sometimes and I ended having to redo them several times to get them the way I wanted.

2015-06-25_23-39-27 2015-06-25_23-37-48

The machining model is a separate Cad part file created from NAA drawing #73-34161 which has the casting body and sketches derived from the first Cad model above. I can now go about working on the derived model; creating the machined elements and holes; without affecting the original model file above as shown.

The great thing about working this way is that should the original casting model change then this will be propagated to any other cad part files to which this item is derived but conversely any changes in these Cad part files are not reflected in the casting model.

I still have a few minor details to finish this model but thought it may be prudent to touch on the derived part capabilities of the Inventor product.

Another use for derived components is when you only have Inventor LT (Lite version) which is a parts only product and unlike its big brother does not handle assemblies. Using the derived feature it is possible to create a proxy assembly for checking the alignment of parts as shown below.

This is the armor plating for the Mustang P-51 Firewall; with the top section modeled separately from the bottom section. In this example, I have derived the top part into the lower part file as a surface model to assess the alignment and curvature continuity.

NAA P-51D Mustang: Tail Wheel Progress Update

NAA P-51D Mustang: Tail Wheel Progress Update

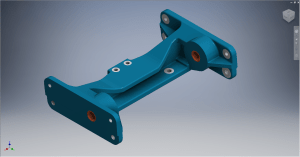
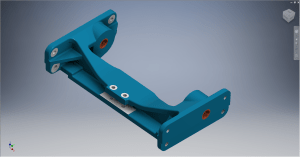
I’ve been busy building the 3d models and working through the vagaries of the Mustang P-51 Tail wheel assembly. This is a selection of the new parts built to date:

Mustang P-51 Spindle
#73-34004 Housing Tail Wheel Spindle
Mustang P-51D Spindle
#73-34004 Housing Tail Wheel Spindle
Mustang Idler
#99-34153 Support: Tailwheel Declutch cable idler
Mustang Bell Tail Wheel Door
# 97-34502 Bellcrank: Tail Wheel Door
#73-31114: Support: Tail Wheel Shock Strut
2015-06-23_14-51-42
#73-31114: Support: Tail Wheel Shock Strut
Mustang P-51
#97-34120 Mast Assy – Tail wheel steering
Mustang P-51
#97-34120 Mast Assy – Tail wheel steering

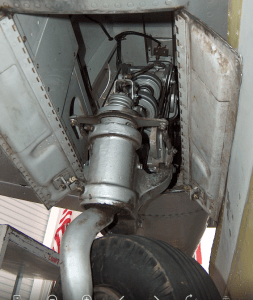
This last image is a photo showing the Housing for the Tail Wheel Spindle with the model in a similar orientation and finish for comparison.

2015-06-22_16-57-13           2015-06-22_12-21-05

For the latest version of these models please refer to this article.

NAA P-51D Mustang: Tail Wheel Housing EndCap

NAA P-51D Mustang: Tail Wheel Housing EndCap

Mustang P-51 Tailwheel Housing End Cap     2015-06-20_14-36-17

This item #91-34005 is the cap to be fitted to the end of the tail wheel housing described in the previous post.

The drawing that this was based on details the finishing and machining from a forging. Unfortunately and is now seeming to be quite typical for the tail wheel area again I am missing key information…its not that the drawing is lacking the necessary detail for its intended purpose as it is based on an existing unit its just that I don’t seem to have the existing forging drawing as a reference.

2015-06-20_14-48-06

The missing information; relating to diameters and material thicknesses; would have been on the forging drawing and the draughtsman did not really have any cause to replicate this information on his finishing drawing…though it would have been enormously useful!

However this is not always the case as depending on the draughtsman some do include this type of information as reference dimensions.

I have therefore interpolated the missing details as best I can based on the information available and where possible cross referenced against other drawings.

The forging drawing is actually listed in the NAA register but the archive record lists the wrong reference drawing so its likely that there is a copy of this forging somewhere in the archive!

For my initial purposes though I think the data is sufficient for the end goal of creating a working tail wheel assembly as part of the mechanism study.

North American P-51 Mustang: Wings

NAA P-51D Mustang: Wing Geometry

Started work today on the wing geometry and ordinates.

This is the last ordinate data-set drawing I have in my P-51 archive and probably the most challenging, thus perhaps the reason why I left it until last!

2015-06-06_22-51-32The quality of the scanned drawing is not that great with much of the data missing or obscured and requiring a fair amount of interpolation to derive the correct values.

The interpolated data is derived through the use of various techniques within Excel, including polynomial curve formulas to determine the values I need from the known data.

So far this has worked out rather well enabling me to make a start on a geometry plan for the wing which will verify the relative dimensions of the Leading Edge, Front Spar and the 25% Chord line.

This drawing is still “work in progress”, which is shown for reference.

The wing ordinates are cross-referenced against 3 different sources to ensure correctness.

Update June 2018:

I have revisited this spreadsheet to include generated excel profiles to check the ordinates and also to derive the XYZ coordinates for input into CAD, centered about the front spar position. The missing and unknown values are now sorted thanks to a new resource…the spreadsheet is complete and verified. See Mustang Ordinates for full details.

P-51D WING ORDINATE

P-51 Wing Profiles

North American P-51 Mustang Project: Ordinates

NAA P-51 B/C/D Mustang

This is one of those projects that gets started and then for some reason gets put on the back-burner until now. One of the key reasons was due to the challenge of obtaining a good surface representation for the lower cowling for the P-51 B/C where I was having problems with the duct intake profile.

As usual I started with listing the ordinates in a spreadsheet and converting these to millimeters and extracting the X,Y.Z coordinates for further work in CAD.

I prefer to work in millimeters as I know that at so2015-05-30_19-31-32me stage the end profile may need micro adjustment which is so much easier to do using millimeter units.

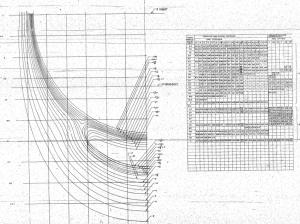
This is a scrap view from the NAA drawing showing the ordinates table and the contours.

Thankfully for this part most of the ordinates were quite legible with only a few requiring interpolation; which would be done as a consequence of developing the data in CAD.

As it turns out there were a few orphaned ordinates that for some unknown reason did not align with the CAD developed surfaces; so these were simply ignored instead of trying to invent a purpose for them being there!

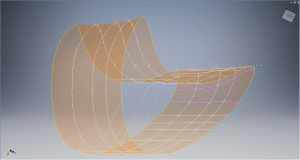
2015-05-30_20-39-59The drawing (right) shows the end result of transferring the spreadsheet data into a CAD product. This drawing is simply a record of the translation process and surmises the ordinates in relation to the Thrust line and Fuselage Reference line.

The main body of the cowling did not present any real problems but the intake duct portion did.

This area is less than 3 inches deep and is actually quite a complex surface; so any small deviation from exactness results in some crazy surface deformations. The original data tables are actually extremely good requiring only one small adjustment to get the result I was after…the trick was identifying which ordinates to use for the end profile and which ones we needed to check we have it done right.

After many (about a dozen) test developments of surface development and interrogation of the original data tables to ensure correct translations I eventually determined the correct ordinates and profiles to use to get this right.

2015-05-30_19-30-34

The resulting surface is based on the selected original ordinates with only one requiring micro adjust. In most cases the adjustment is simply an error in interpreting the sometimes indistinct values in the original data where a 6 could be an 8 or a 3 could be 5.

The 2 magenta coloured contours are generated profiles from a surface section cut overlayed on the ordinate controlled contours from the NAA tables which provides a check to ensure the surface conforms to the original design.

This surface will be converted to a T-Spline surface to facilitate final development.

It may be that this particular part does not warrant this level of exactness nor indeed the time expended in getting to this point. However it is a testament to the many fine designers of this era to be able to reproduce their work that was done to an extraordinary degree of accuracy.

Update Jan 2021: A comprehensive Ordinate/CAD package incorporating all known ordinate data points is now available for download. See this post for details.