Technote: P-38 Lightning Coolant Rad.

Technote: P-38 Lightning Coolant Rad Scoop.

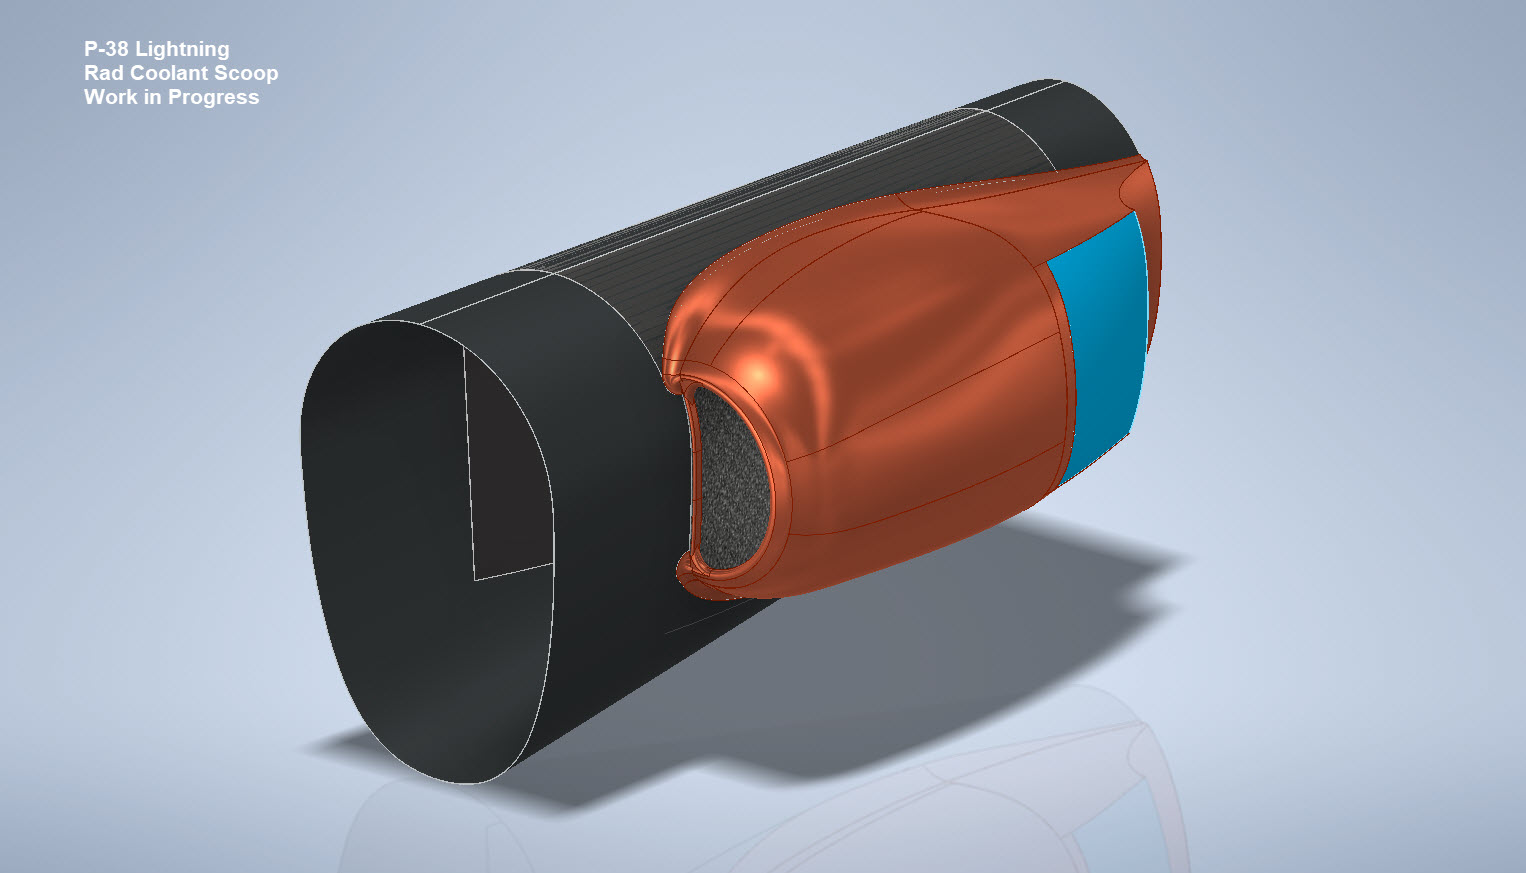
My latest endeavour is to model the Coolant Rad Scoop and later on the Engine Cowl for the P-38J. This is the Coolant Rad Scoop which was very challenging. There is not a lot of dimensional information on the drawings for this scoop which is larger and wider than the previous versions.

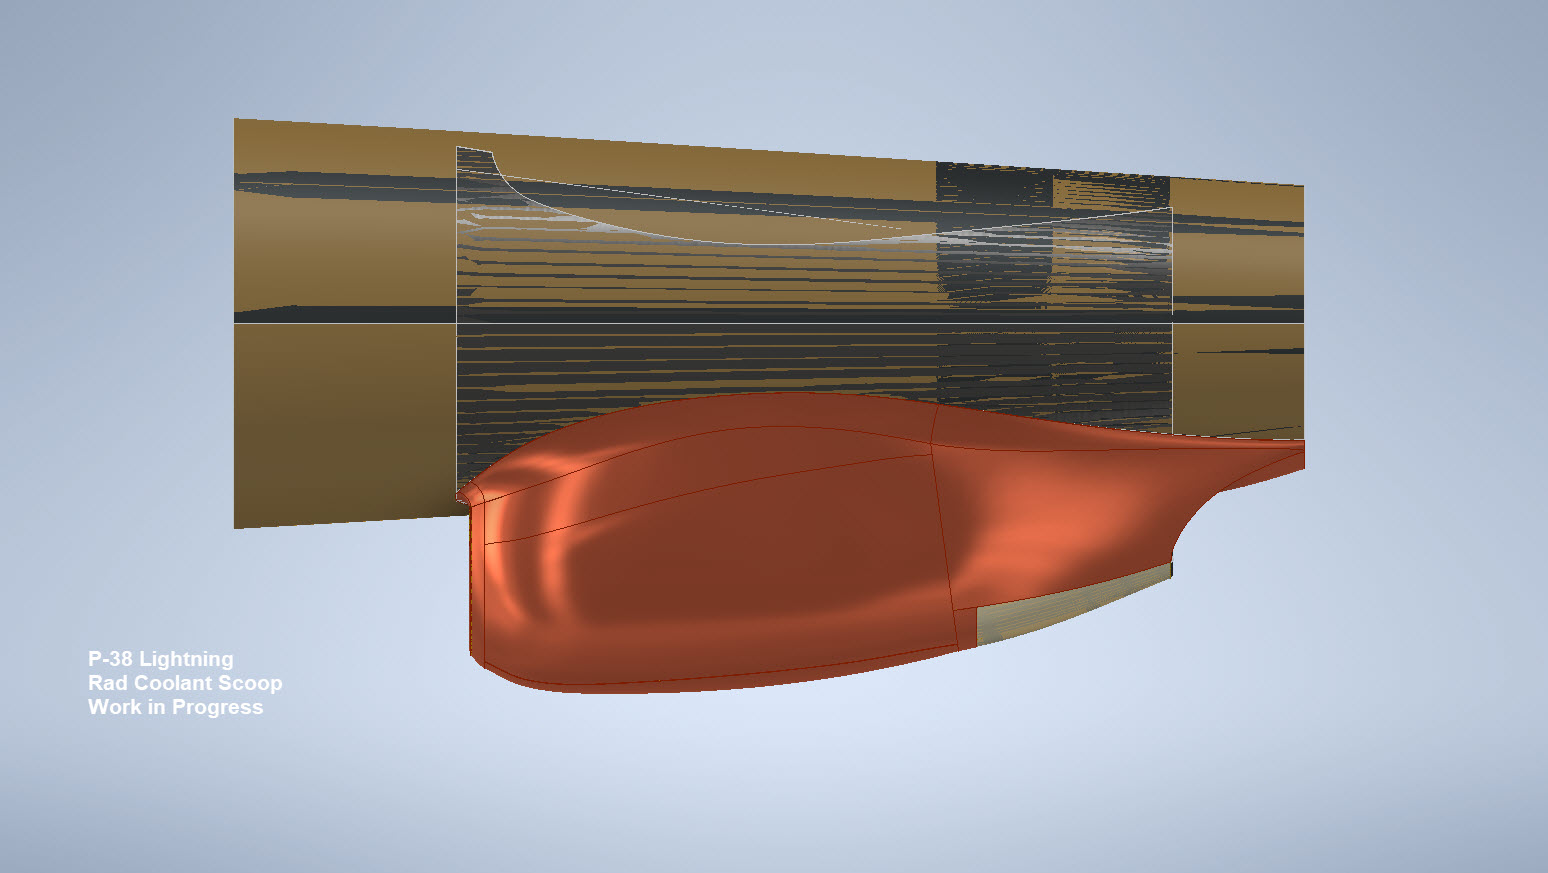
I would say this finished model is probably as close to the real thing as I can get given the complete lack of decent information. The Lockheed drawings for this scoop are largely predicated on known ordinate information which unfortunately is not available in the microfilm archives. What we do have though is a 5″ grid overlaid on the drawings…this in itself is a puzzle because what they have done is divide the drawings into 5″ square grids which may or not be relevant to end views and cross sections…so using the grid as a positional aid is inconsistent.

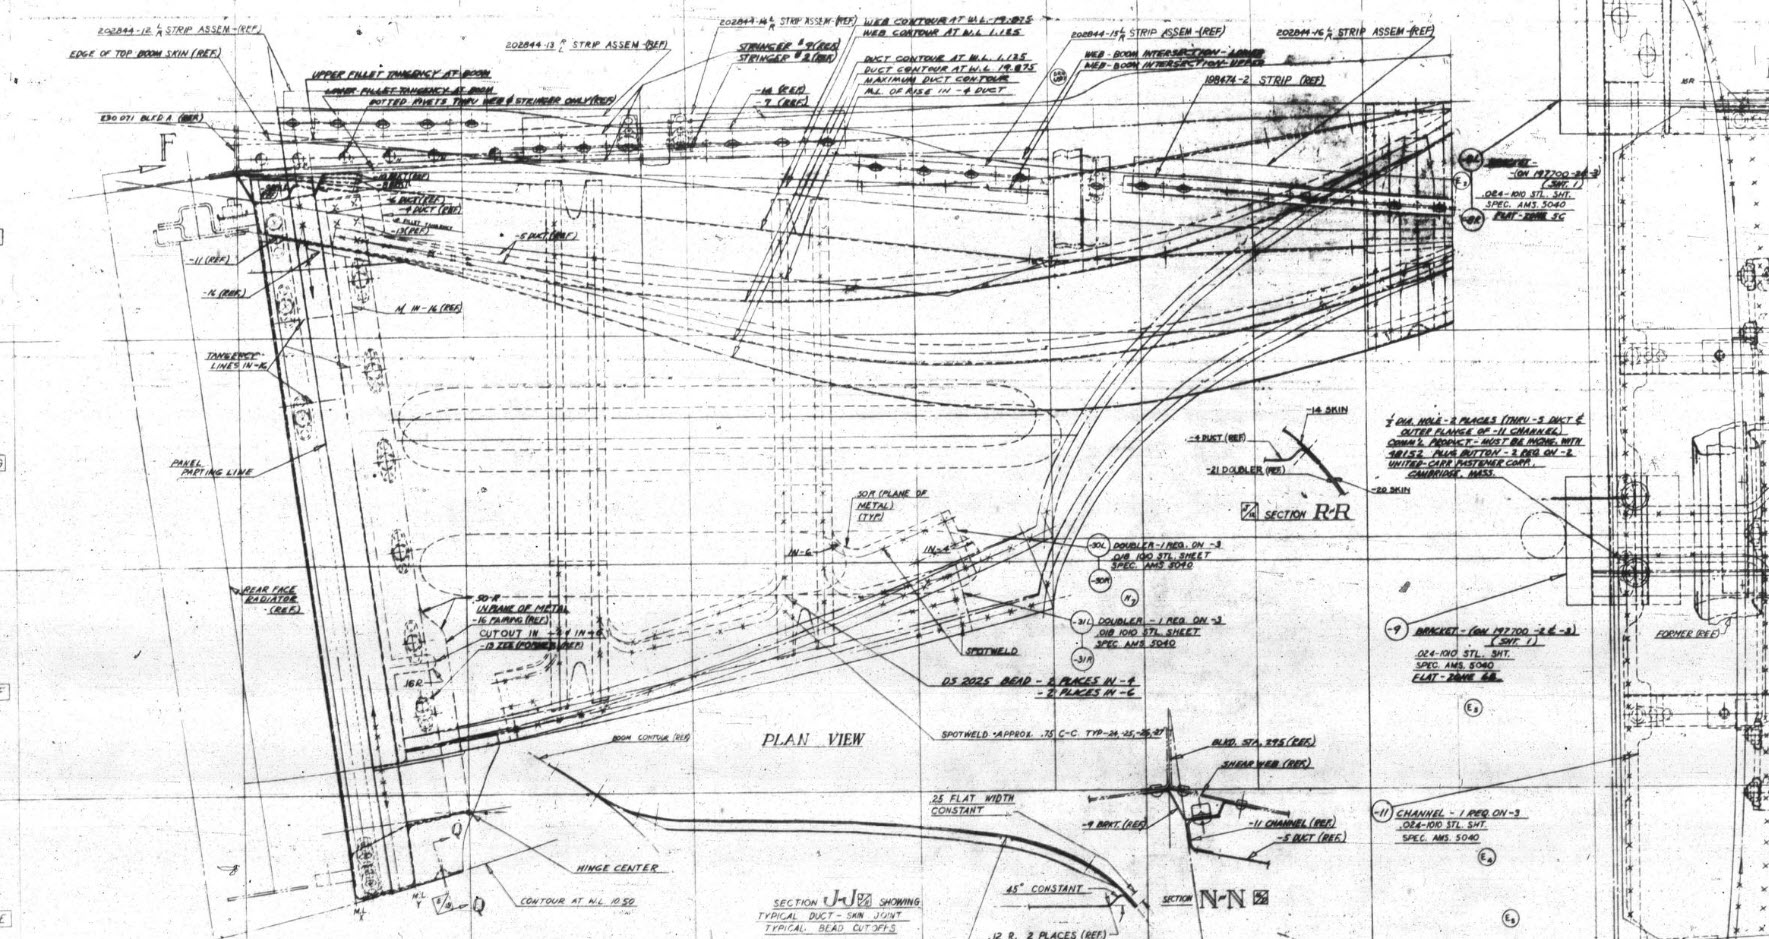
There are of course good references to the Stations which help a lot. One of the key decisions is interpreting what is an arc radius and what is a spline…I made some decisions on this early on and opted for a circular profile of the inlet and the second frame and beyond that a spline with ordinates at every 5″. It was a close match to the profiles on the drawings but if it is what the designer intended I have no idea.

Scaling digital copies of the drawings and using them as a background for building CAD models is not something I am keen on doing. I did write an article way back on scaling in X and Y directions…I shall get the link and post it here.

Fortunately, this model is being used for a CFD study so microdimensional accuracy isn’t required. The final model is what is best described as a close approximation…I don’t do close approximations…this is the exception…though I may have to undergo a similar exercise for the engine cowl!!

Inventor is probably not the best CAD product for serious surface modelling that is dependent on dimensional information. Sure they have the usual lofts, patches, sweeps and of course freeform. Freeform is a very organic feature that can work with other surface-derived types but it does not regenerate when that sketch geometry changes; a serious omission which I understand is on the Autodesk to-do list. Even the standard Loft feature is flawed.

For example, if you have 2 sketches that contain concentric profiles (like the ends of a tube) this cannot be lofted in Inventor…it just cannot be done. The other issue I have with this command is when you loft using guidelines or rails. No matter how precise your modelling there will be times this will not work…so you redo the lines over and over again…double checking everything and eventually it may work. Yet if you use the sweep command using the same profiles and rails it will work…so there are some serious issues with lofting that Autodesk really need to fix.

I think Autodesk need to take a leaf out of the Dassault workbook…I believe it was in Solidworks 2010 that Dassault decided to revise all the commands and features within the product…resolving glitches, adding functionality to existing functions and generally cleaning up the product. The main fear of the media at that time was whether there was enough to tempt users to upgrade…that was a stupid concern if a product is better and everything works as it should of course that is an absolute no-brainer, folks will upgrade and they did.

Even though Inventor has a number of glitches, I quite like the product and it is generally rather good but I do think it could be a lot better. When something does not work as it should then you can spend hours just developing workarounds to achieve the end result…time for a product cleanup.

I actually prefer Solidworks but Dassault does themselves no favours when it comes to product accessibility. You can’t just download a 30-day evaluation copy whereas Autodesk has a better approach with accessibility to their products. In fact, to get a 30-day evaluation of Solidworks you have to sit through a meeting with their sales rep and only then will they load it onto your computer for you…this is a real pain that you can’t just go online and download a copy. They do have an online access portal but for folks like me, that is not convenient. I don’t have time for sales reps, all I would want to do is buy online and download without the sales crap…you can buy Autodesk products online but not Dassault.

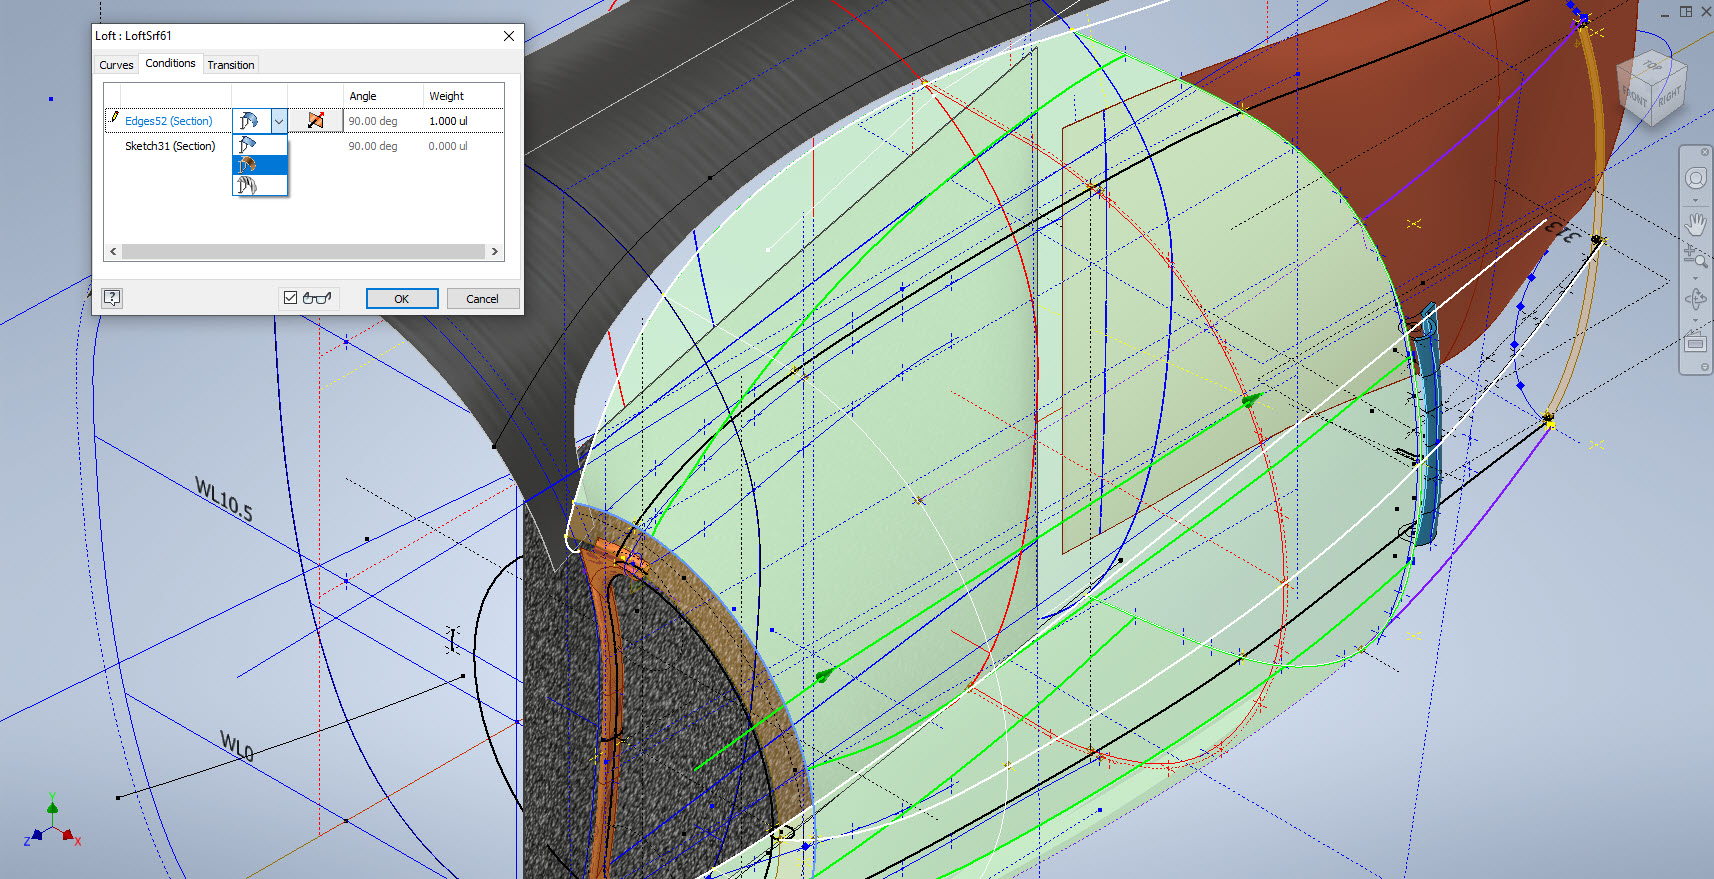
Getting back on the subject, what I wanted to mention is surface modelling. Generally, there are a few conditions for generating surfaces with Direction, Tangency or G2. If you are lofting or creating a sweep from a sketch you won’t have the latter 2 options but if you use a surface edge as a base for a loft you will get Tangent or G2 options. I like the option of G2 but comes with restrictions…it can cause problems with applying fillets (particular variable fillets) and surface offsets..so if you plan to do these late on in the model development stick to tangency. Variable fillets will not give you continuity with G2 surfaces.

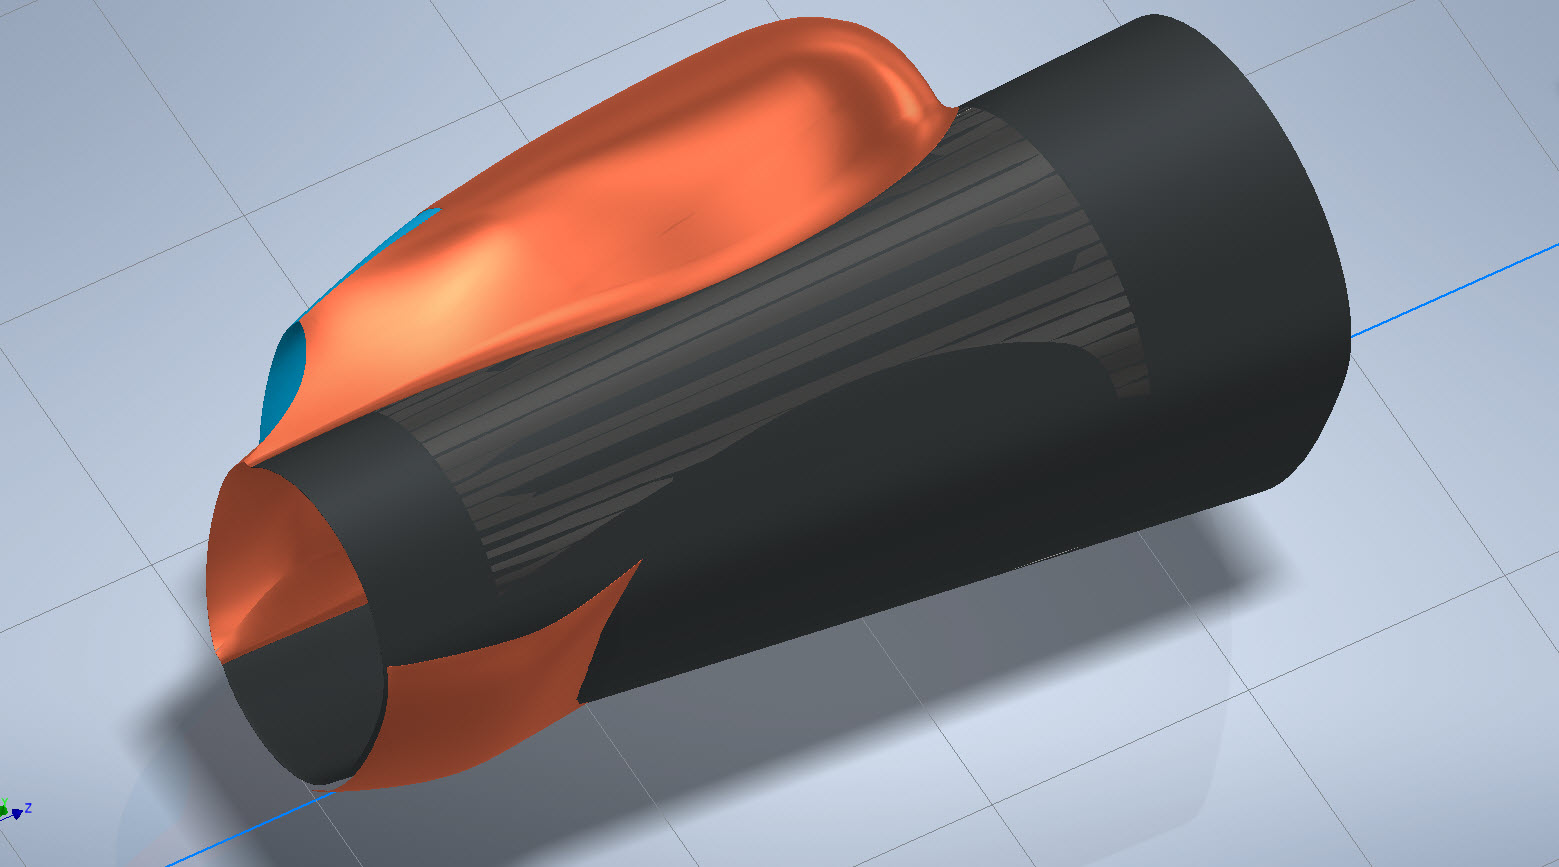
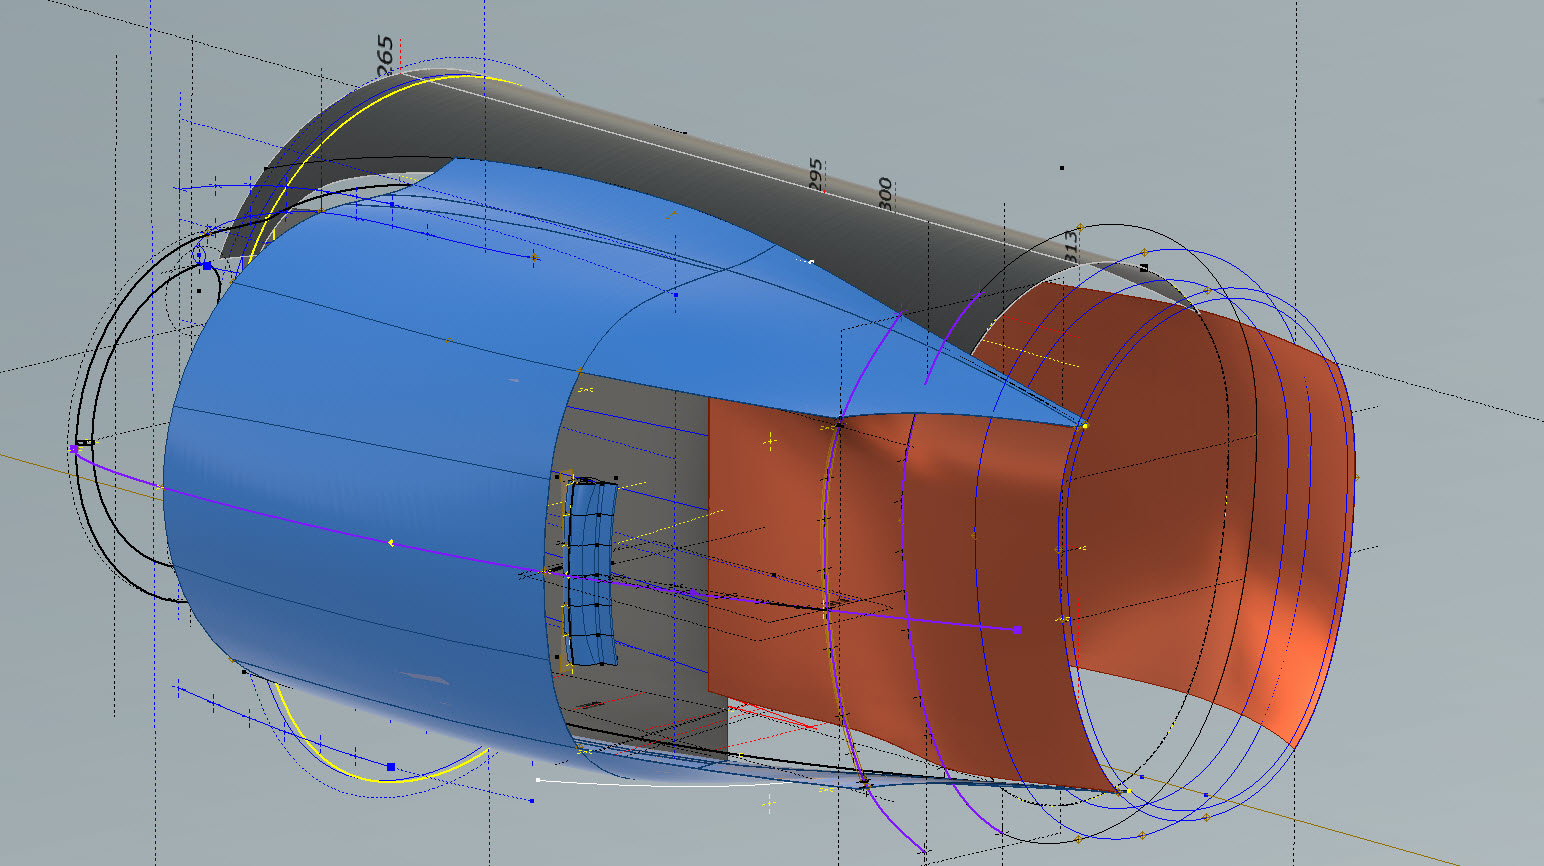
When using guidelines or rails to control the curvature of a surface loft please consider using them judiciously. As I mentioned in the previous article overuse of constraining elements can create problems with the eventual surface generated. In the first image above I have several guidelines drawn but only a few have been selected…this gives you options so that can pick and choose between the various guidelines to see how the eventual surface evolves so it is worthwhile spending the extra time having these available…it does help.

When you do run into problems with surface modelling using Lofts or Sweeps occasionally it helps if you delete that surface and replace it with a Fill Patch…the reason for this is that you have more control over each edge of a surface patch that you would not otherwise have with those features.

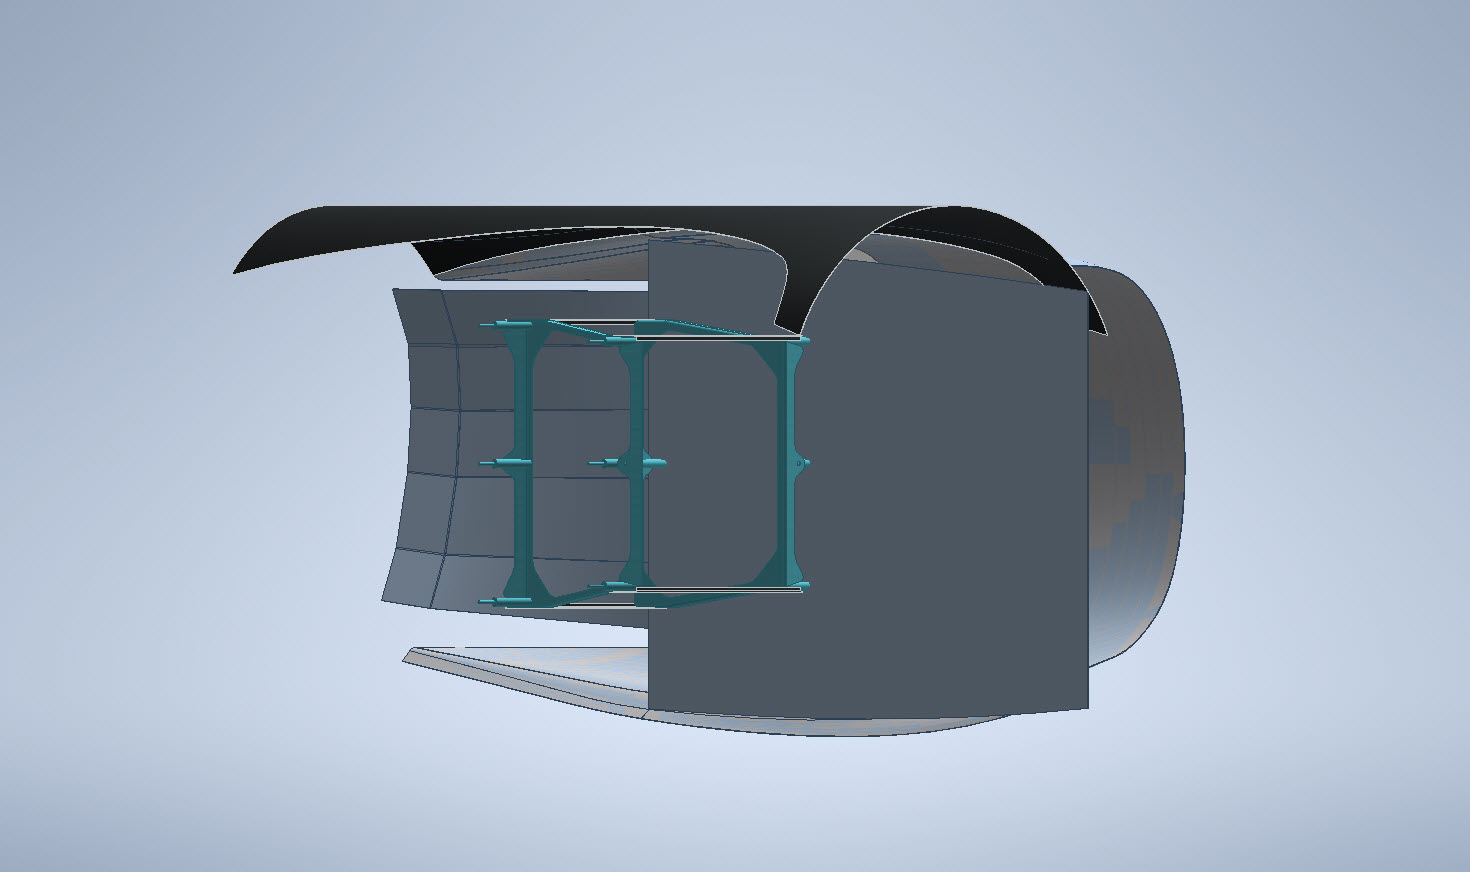
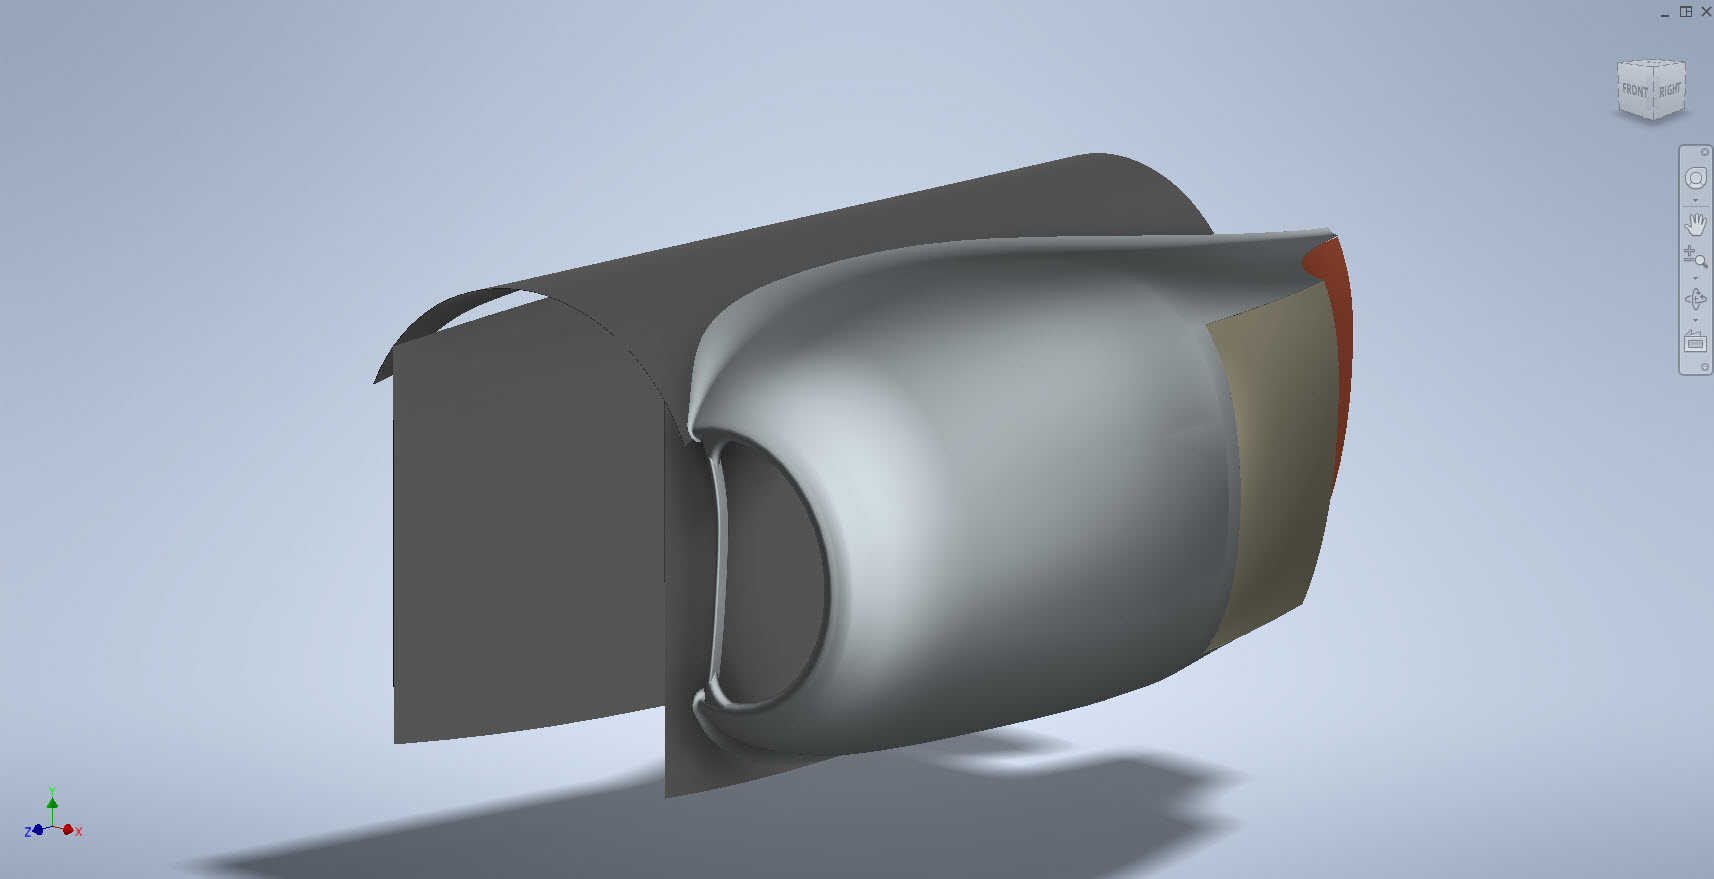
The Scoop actually turned out quite well…it was a frustrating journey to get to this point but it is worth it.

Update 20th Oct 2022:

I decided that it would be prudent to also develop the earlier variant Coolant Rad Scoop for the P-38 D, G, and H models.

.

.

.

Technote: P-39 Airacobra Exhaust Stack

Technote: P-39 Airacobra Exhaust Stack:

This rather small unassuming item is at first glance a straightforward little model that actually turned out to be a huge headache. I spent several days working on this model which will all be explained in this article. Hopefully, the solutions I found can help you.

The first hurdle was the Bell Drawing 12-614-001… several key dimensions were illegible and a complete end section was non-existent. The first task was to develop what I do know to help determine what I needed to know…that in itself took an inordinate amount of time but eventually managed to get that sorted. In addition to the sections shown on the drawing I needed to include a control sketch to control the dimensions of the eventual loft activity…this was essentially an ellipse with fixed height and variable half-width.

The side/outside lines of the Exhaust Stack are fixed profiles so it will be the inner profile that will change to make sure that the intersections of the 2 pipe exhausts were correctly located in the centre of the element.

You will notice the side profile sketch is separate from the main model sketches, this just makes it easier to see what I am doing as for the most part, it was mainly for reference.

At this stage, everything is quite straightforward as all I had to was loft the 2 pipes by selecting each of the profiles as shown and then trim the surfaces to give me a base model. A small tip: for this to work correctly and ensure the alignment with the external lines and allow for expansion internally it was necessary to loft using the Centreline option…the centerline holds the loft shape between sections normal to the centerline.

This is where everything got crazy. The main body part of this stack has no joint seam and is quite bulbous…so what I had to do was adapt this base model to form the bulbous surface complete with an internal curve.

As you can see in the image on the right the real item shows the bulbous main body part and the generous inside curve. By the way, some may have observed the real item looks shorter than the model…this is a puzzle…some of these exhaust items are indeed short and this is further noted on the Bell drawing as a dotted line! I suspect this may be linked to the engine used but as yet I do not know for sure.

I initially created the short version thinking that this was normal until I found out that most are actually longer versions. That was the start of many frustrations to come as that first batch of models was quickly scrapped and started again. That bulbous bit though is the main problem.

In order to achieve this I had to derive a solution that filled the void between the 2 tube lofts and at the same time provide an internal curve consistent with the real product. What I opted to do was simply trim and then remove the inner surfaces and then blend the remaining void with a surface patch.

My initial effort was to remove the centre section according to the natural divisions along the centre of each tube and the sketch plane. I tried variation after variation on this, adjusting tangency strength and G2 for each side, I even adjusted the dimensions on the control systems to make minor corrections. I eventually ended up with something reasonable and we got it 3d printed. The second image above is the latest model incarnation which I will explain below.

Two immediate issues are quite visible on these printed models…the initial curve between the 2 tubes is far too tight and almost looks as though it has folded. The second is the surface continuity…okay admittedly I was unsure about the short and long versions of this stack so the end extensions were a separate model part…though I should note that the surface should have been tangential and it’s clearly not.

Coming back to the cad model above…the second image shows what needed to be done. In this one you can see the cutout in the main body is an ellipse which gave much better results and a larger smoother curve between the tubes.

What was happening with effort 1 was that choosing the centre of the tubes at 2 and 3 (which by way was a logical choice) was actually restricting the area in which the inner curve could form, resulting in small deviations in surface accounting for the folded look. Essentially by selecting the centre lines I was actually creating self-imposed restrictions. It took me a while to figure that one out and many hours of work.

Further the mere fact that this patch includes sharp angular corners also did not help as the patch stretches to accommodate those corners again leading to imperfections. Finally, I decided to forego that first attempt and ended up using an ellipse profile that extended beyond the centrelines of the tubes. As there were no sharp edges continuity of the surface patch outline was good and ended with a smoother patch surface that was G2 compliant. There is a small additional patch at the end of the stack…there was a natural seam there which I needed to get rid of.

The final model is shown above and is a very much improved surface with good continuity and a generous internal curvature between the tubes. One final point is the mounting plate… which is not dimensioned on this Bell drawings because it is a contractor-supplied item. I searched through many drawings and found something similar…so I cannibalised the dimensions from that drawing to create the mounting plate. It turns out that this was a good effort as it actually aligns with the engine block.

Surface modelling is rarely this complex but occasionally you will come across something equally challenging. If something is not turning out the way you had hoped or expected just check to see if your choices are imposing restrictions on how the surface is created. When you are trimming or splitting surfaces try to minimise sharp edges and instead opt for curved circular solutions.

Update: 7th October 2022:

Just received word that the newly revised Exhaust Stack model has now been 3d printed…just another 11 sets to go. Apparently, the time for printing and ultrasonic cleaning will be about 4.6 days. They look good…check out the awesome curvature on these prints.