Hoppers: Surface Model for Mass Containment

Hoppers: Surface Modelling for Mass Containment:

Although not directly associated with aircraft design there are inherent modelling techniques equally applicable to many aspects of aviation. The techniques relate to surface modelling for the containment of a known mass or volume. In each case, the criterion is the specified volume or mass that ultimately defines the size and shape of the container.
hopper-1

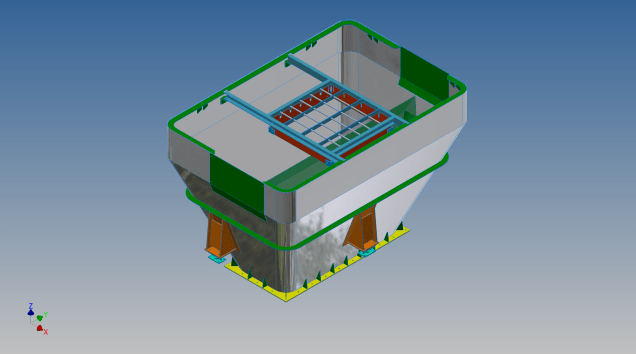
This particular hopper is for a Transfer car used to feed Steel Plant Coke Ovens with coal. The development of this hopper combines surface and solid objects in a single multi-part model that is configurable via a dialogue populated wth the key parameters. Surface modelling can be used for various purposes; some of which I have covered in previous articles for the creation of sheet metal flanges, trimming solids and providing a boundary for extrusion or as a containment for a solid component; as I have used here.

hopper-master-01

This type of hopper is fed from an overhead bunker and releases the fill material through an aperture in the base. The mass volume is modelled according to industry specifications that define the slope of the poured coal defined by the size of the top bunker opening.

The surface represents the containment boundary which has zero volume and zero mass therefore by definition will ensure that the only properties recorded for mass and volume in the 3d model relate only to the fill material. The image above shows some of the key parameters used to model this hopper as a part file with an ilogic form to make it easier to adjust the parameters to suit the project design.

2013-09-17_121727

The gray values for the Coal Volume and the Centre of Gravity are the results calculated from the physical dimensions of the coal mass and the containing surface model. Once the correct dimensional and mass properties are determined the surface objects are extrapolated using the “Make Component” command in Inventor which creates a separate derived part file and also (optional) includes the part file in an assembly placed at the original coordinates. In the surface part file we simply thicken the surface to generate the solid plate material that will form the structural body of the finished hopper.

hopmaster01assemblya

This is a very basic introduction to using surfaces where the mass or volume of a fill material is the critical component. On some forums, similar questions have been asked for complete hoppers where programmed solutions are offered to subtract all the structural objects to derive the fill mass and volume. By using surfaces with zero mass and volume to contain the fill there is no need for any programming solutions. There are a few ilogic basic routines included in this example for formula calculations and shifting the location of the bunker output. Another example just for reference is the casing for a screwfeeder:

400 - Streams 1 & 3.png

Surfaces are extraordinarily versatile with many applications, only some of which have been mentioned in this blog. For this example, we could extend the technique to modelling fuel tanks, hydraulics and oil tanks where the volume and mass are critical.

Sopwith Pup:Wing Brackets

SopwithPup: Wing Brackets

This was not meant to have been a study in its own right, but out of curiosity I couldn’t help but wonder if there was enough information to actually build an accurate 3D model.

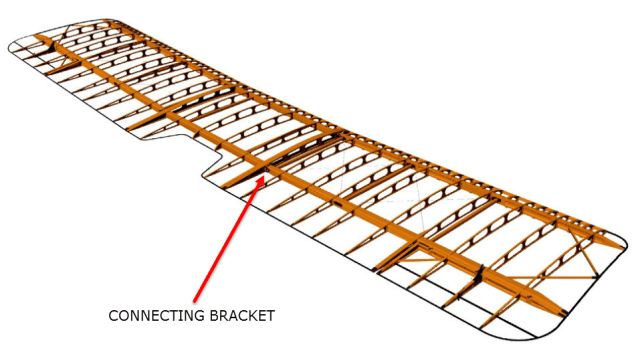
I was also curious why I had received a number of help request emails from my friend about this particular aircraft…so I decided to have a closer look. His latest query was regarding brackets similar to the one I mentioned in my previous post but specifically the centre section connecting brackets to the wings.

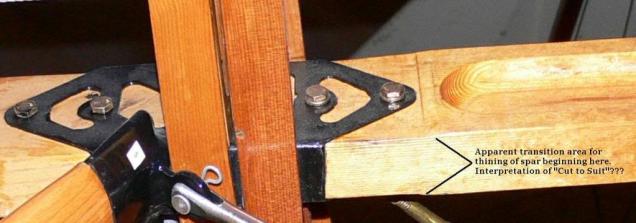
The left bracket belongs to the centre section and the right bracket is the connecting bracket for the wing that slots into the centre section bracket.

sp-009

The bracket dimensions are such that the centre bracket sits proud off the centre spar whilst the wing bracket is embedded in the wing spar, so technically they should just fit into one another without too much problem!! That’s the theory but the reality is it doesn’t quite align with expectations.

sp-03

This image shows the actual clear dimensions within the top and bottom rib flanges which replicate the perimeter dimensions of the wooden centre spar. In order for the centre section bracket to connect to the spar we would have to notch the top and bottom rib flanges to get it to fit. The horizontal dimension can vary (highlighted) but we will be restricted by the vertical dimension. I can’t imagine why anyone would want to notch the top and bottom flanges as this diminishes its strength. Plus there’s another issue with this…

sopwith-pup06

This preliminary model shows the problem where the centre spar is actually set back one inch to facilitate the incoming connecting bracket from the main wing. Ideally, we need to fully assemble the centre section and have it fitted to the aircraft and aligned prior to fitting the wings, but how can this be done if we can’t screw the rib flanges to the spar? I think in this instance I would shape the wooden spars in such a manner as to facilitate fitting of the flanges and mating with the wing spars.

I have done some research on this and it appears to be a known issue with some clever blokes just redesigning the connectors to make it work better or tapering the wing spar to good effect as shown below.

sdasmpup

It looks as though the wing spar is tapered with a smaller bracket sized to fit within the centre bracket. That would work and likely an improvement implemented in the workshop. A very rough preliminary study could look something like this…

…it does need a lot more work but I don’t have a lot of time to develop it further right now!

The design in many respects seems a little rough and ready, but we have to remember in those days they were under a huge amount of pressure to get these aircraft built and get them into the field. The life expectancy of these aircraft was only six weeks so replacements had to be shipped out in rather a quick time.

No disrespect either to Tom Sopwith and his engineers, these things actually flew rather well regardless of the vagaries of the design and what may seem to be annoyances to us may well be things they would naturally deal with in the workshop without any hassle.

It is very tempting to continue developing the Sopwith Pup but to do so efficiently would require setting out the basic geometry for the entire aircraft, identifying the anomalies and determining suitable resolutions as close as possible to the original design intent. I’m not sure I have the time nor the inclination to do so.

This has been a welcome distraction from the P-39 Airacobra project and will likely feature in a few more posts as I will surely continue to receive help requests from my good friend.

Sopwith Pup: Technote

Sopwith Pup: Spar Clip Technote

The Sopwith Pup is a single seater biplane built by the Sopwith Aviation Company, another aircraft in my archive, though not one that I have done much work on. This is just a quick technote; so not a new project; my priority still lies with the P-39 Airacobra.

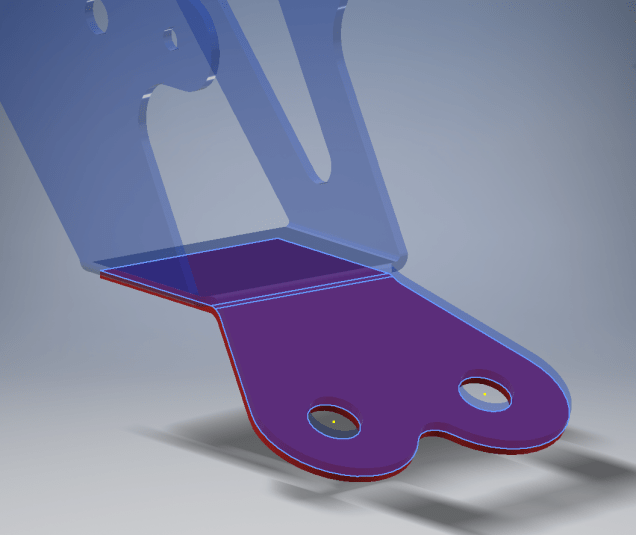
I received an email from a close friend and he asked if I could help him out with this model for the main spar clip, item number 1393-1 from the Sopwith drawings. The area in question was the cable lug at the base of this clip, which comprises 2 parts.

The problem related to matching the profile of the top part to the profile of the lower part, without extensive or complex modelling. For the lower part, I decided to use the sheet metal features to create this as a multi-body part which I would then use as a template to profile the upper section that is essentially an extension of the main model.

What he was trying to do was project a sketch from the each face of the lower part, extrude each sketch and then fit a bend to connect the two extrusions. He reckoned this was more complicated than it should be and asked me if there was better way of doing this.

He was actually not that far from achieving a simpler solution, he just needed to adapt the process a little bit.

sc-03

In a previous article for the P-39 cabin glass I discussed the merits of selecting the solid surfaces as a means to modelling the jogged edges. I have used a similar technique here for developing the upper part of the lug.

Simply by selecting the top surfaces of the lower part as shown above; we then apply a thickness to this selection and opt to merge with the upper part as shown. There we have it; an exact match and fit between lower and upper lug parts in one step!.

It looks simple and often the best solution is, but occasionally it is easy to overlook the fact that we can manipulate the surfaces of a single solid model to create new separate parts without too much effort.

sp-05

Squaring the Edge:

The Sopwith drawings for this part and many other similar parts are a little misleading given that they show the edges of these components as beveled. This is normally not good practice, particularly when metal meets timber. Ideally we need to square the edges to negate this problem and to facilitate the cutting of the developed sheet metal pattern.

sc-06

These brackets are an awkward shape which requires some careful planning to ensure that the model is correct and can be manufactured. So to achieve this I occasionally use surfaces to set-out the basic cut profile shape and then thicken.

Thickening a surface model is actually a good way of working due to the thickness being applied normal (perpendicular) to the surfaces, thus by definition achieving a good square edge to the developed pattern.

As you can see in the image on the right the edges are square and easy to cut.

The other way of doing this is using the cut option feature from the sheet metal command.

sc-10

By selecting the “Cut Normal” option in the dialogue this will ensure that each of the edges from this extrusion will be square to the surface when flattened.

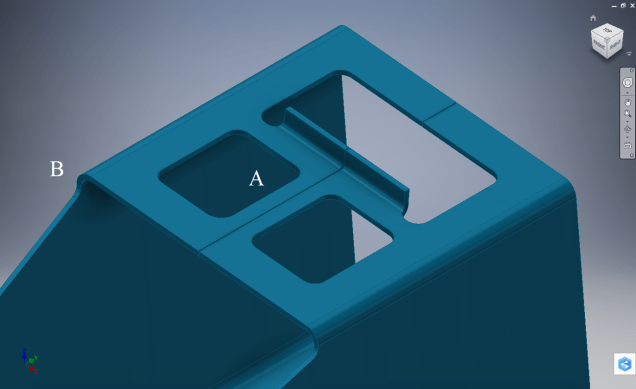
Whilst we are on this subject; the weld seam at the top of this bracket is something I would consider improving by having a thin continuous metal strip either side of the seam instead of 3 smaller widths (top image) which may distort the metal, something like this (A):

sc-11

Notice I have tidied up the bend at (B)…this gives a much cleaner profile when the draft angle is quite small. I should note that I don’t normally take liberties wth the manufacturer’s details, but occasionally exploring options to see how things could be improved can be quite an interesting exercise.

I should note that it is normally good practice to state on the 2D manufacturing drawing a “Break Edge” minimum size anyway for all edges even when square cut.

Bell P-39: Cockpit Glass

Bell P-39: Modelling Curved Cockpit Glass (Inv 2017)

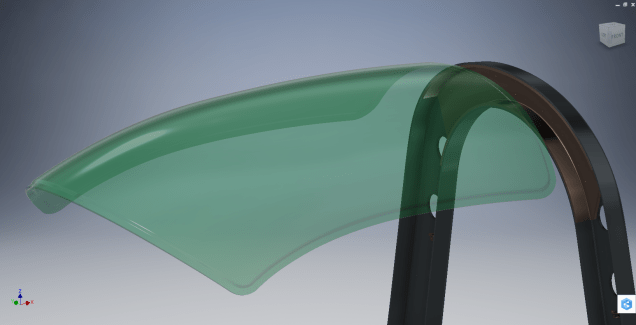
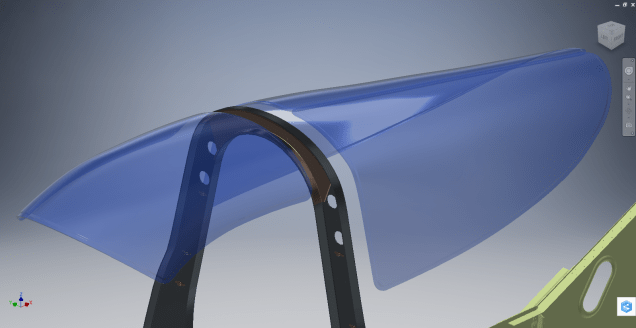
Modelling the Cockpit glass can be a challenge to achieve the correct curvature and create the inevitable jogged and profiled edges.

P-39 canopy

The Bell drawing lists all the ordinates to enable us to create the profile sketches from which to derive the required basic shape with two areas worth extra consideration in respect to the rounded corners and the jog along the perimeter edge.

We developed the initial extruded surface from the contour ordinates and then simply extruded a sketch to trim this surface to the basic shape.

P-39 c1

The first thing we need to do is to fillet the corners. In Autodesk Inventor we cannot fillet a single surface, though we could use various techniques to do this we decided instead to Thicken the surface an arbitrary amount ( it does not much matter how thick it is) and then apply a fillet of each corner of the solid which ensures correct tangency.

P-39 C2

The jog along the edges is a bit tricky, given the nature of the surface. One way of doing this would be to sketch the jog profile and sweep the profile using the edge as the path. We tried this in several configurations but the result was not consistent.

To solve this we need to consider what a solid comprises off in order to rethink our strategy. A solid is essentially a series of closed surfaces that are used to contain the solid properties. With this in mind, we started by offsetting the top surface to create a copy at the desired jog dimension inward. Along the edge of this new surface, we sketched a circle with a radius the same as the jog flat dimension and swept this along the perimeter of the new surface.

P-39 C20

By using a circle profile for the sweep we ensure that the resulting flange; which is trimmed from the copied surface; will be a consistent width throughout its length. Now we have a surface representing the exact dimensions of the jogged top face at 3/8 inch. We do something similar for the top surface which is selected from the solid with the circle set to a bigger dimension to facilitate the jog transition curves. This time simply trimming to remove the edge width.

p-39 c21

This gives us 2 surfaces, the lower surface for the top face of the jogged flange and the second, the actual main surface for the top of the canopy glass. To fill the resulting gap between the surfaces we used a patch surface.

P-39 CX

We have trimmed the surfaces of the solid body thus breaking the solid cohesion leaving a number of orphaned surfaces which can now be deleted. To finish we would stitch the surfaces and then thicken to the required amount.

p-39 c12

To achieve a smooth transition when applying a patched surface between 2 surfaces a good result can often be achieved by using the tangency option relative to each joining surface. In this particular instance, the patch size was too small to do this so instead we applied fillets to achieve the same results.

A Note on Curvature:

P-39 Canopyx

It is absolutely critical to manage the curvature of the sketch profiles prior to lofting to ensure the best possible surface. This usually requires marginal adjustment to the ordinate dimensions; generally fractions of a millimetre; to achieve a good result.There is a small shoulder on this glass panel thus accounting for the slight edge deviation. To improve further the definition of the finished surface we can convert to a freeform surface which will derive a new surface with G2 curvature.

P-39 Cockpit Glass

Another Quick Tip:

Sheet metal flanges are restricted in Inventor to straight edge segments whereas with Solidworks we can actually create a curved flange where there is continuous tangency. One workaround in Inventor is to sweep a profile along the edge of the sheet metal part to create a flange or alternatively use the Ruled Surface feature.

P-39-1

This feature provides a few functions for extending surfaces either perpendicular or tangential to an existing surface. In this example, we simply select the default and create a perpendicular edge without requiring additional sketches.

Thicken the resulting surface, convert to sheet metal part and apply a traditional flange!

Bell P-39: Fold Over Flange

Technote: Bell P-39 Fold Over Flange.(Inventor 2017)

This a quick technote to highlight an issue that we sometimes come across with creating flanges in Inventor when one part is sloping away from the other.

The part we are working on is shown on this scrap view from the Bell drawings. This flange is folded over onto a sloping top plate from the side plate that is at an angle of 105 degrees.

P-39 Oil Cooler Main1

The issue relates to the reference edge selections that will determine whether or not we obtain a smooth transition from the side plate to the new flange.

P-39 COOLER MAIN5

When I first did this I selected the outside edge of the side plate to align the flange sketch. This was not satisfactory due to the notches; that are perpendicular to the side plate; influencing the creation of the eventual flange bend which gave us a rather awkward and untidy bend transition…definitely not good.

So I recreated the sketch; this time aligning with the inside edge of the side plate; which resulted in a smooth transition bend to both notched areas as shown below.

P-39 COOLER 4

Occasionally when creating flanges the selection of which edge is referenced can make all the difference in achieving a satisfactory result. Use the sheet metal Face command to create a flange based on a 2D sketch as we have done here.

I should note that those notches are bigger than they need to be at this stage. I normally develop these complex models using a generous radius until I have completed the construction. Once I have achieved a satisfactory model and everything aligns correctly then I can go back and adjust these notches to a minimum size.

Progress Update:

I have included the rear fuselage section contour lines for reference. Will probably have to leave this project for a few weeks as I really need to spend some time sorting out my garden that is slowly resembling a jungle!

P-39 Aug21

37mm Gun Mount & Rudder Cable Guide Pulley.

Bell P-39: Creating Wing Fillets

.Technote: Bell P-39 Creating Wing Fillets.(Inventor 2017)

Wing fillets are probably one of the most complex aircraft items to model as they need to follow the curvature of both the wings and the fuselage shell. Invariably we have many offsets to contend with and variation in angular alignment of the flanges.

The following images are typical of the manufacturers drawings with an ordinate table listing the X,Y ordinates and angle of the flange at each point.

As usual we would start with marking out what we know; in this case the ordinates points from which we create the reference geometry.

P-39 Wing Fillet1

The reference geometry in this example is the 2 splines for the flanges connecting to the fuselage (left) and the wing (right) with a horizontal base line for the lower flange.

We then check the curvature of the splines to ensure we do not have negative curvature; adjusting the handles to negate this where necessary.

These Fillets are full of tangent and perpendicular dimensional oddities that can sometimes be a real pain to achieve satisfactory results .

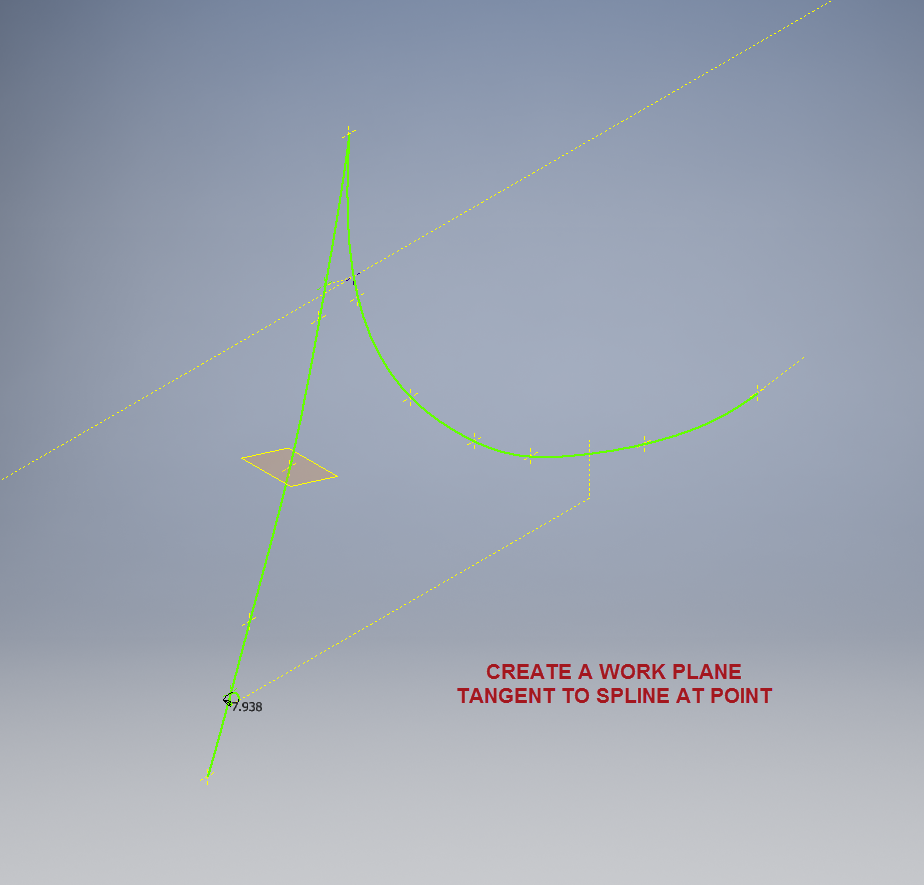
Previously we would create a work plane (tangent) at each node and individually sketch the required flange construction lines set to the correct angular value. This was a lot of work and a heck of a lot of sketching. Thankfully Autodesk have introduced some nice functionality to the 3D sketch environment in Inventor 2017 making this task so much easier with provision of logical constraining options and associations.2016-08-14_15-19-34

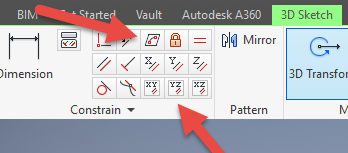
In Inventor we have various planar constraining options as shown. The top one is to constrain a sketch element to a surface and the lower ones are parallel constrain options to the main work planes.

We would still create the work planes tangent to each point as before; I have shown one for clarity, then we simply move straight into the 3D sketch environment to model all the flange construction lines.

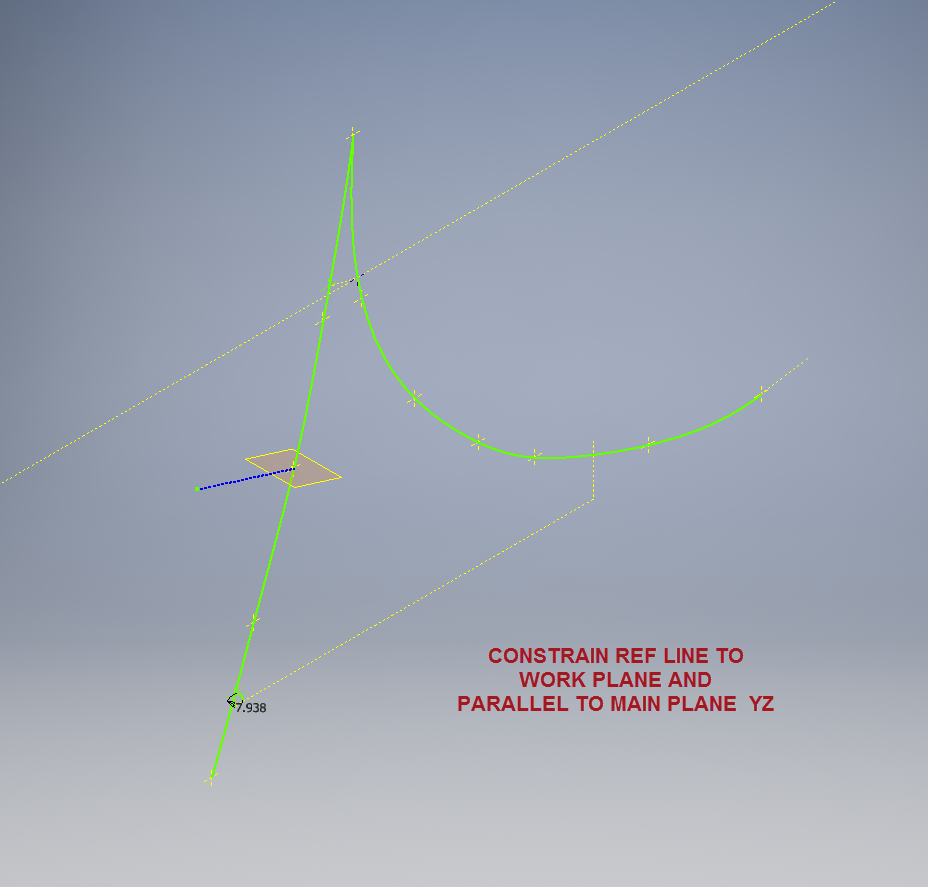
We first need a reference base line constrained to the tangent spline work plane and also be parallel to the main work plane YZ.

P-39 wing fillet 3

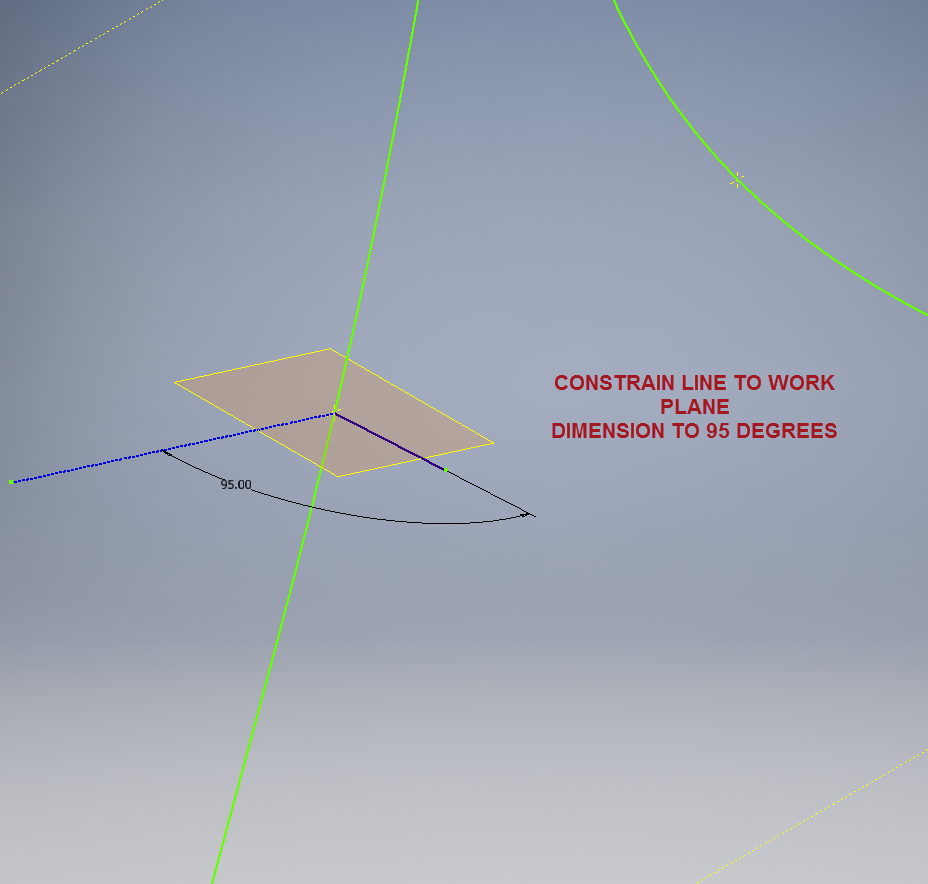
We then sketch the flange line, constrain to the tangent spline work plane and dimension to the reference line as shown at 95 degrees.

P-39 WING FILLET 5

It really is a simple case of drawing a few lines and just using the planar constraint options to ensure correct tangency for developing the flange guide lines. Furthermore you don’t even need to project geometry from the 2d sketch as you place the line it will automatically connect to a point on the 2d sketch.

We continue doing this for all the ordinate points as shown then surface loft the flanges and apply a surface patch to create the main body. I should note that the surfaces shown have already been trimmed to the extents of the part.

It is very tempting at this stage to stitch and then thicken to achieve the finished part, however in my experience occasionally the transition of sharp corners introduces anomalies along the edges which can be negated if we first apply a fillet prior to thickening.

P-39 Wing Fillet2

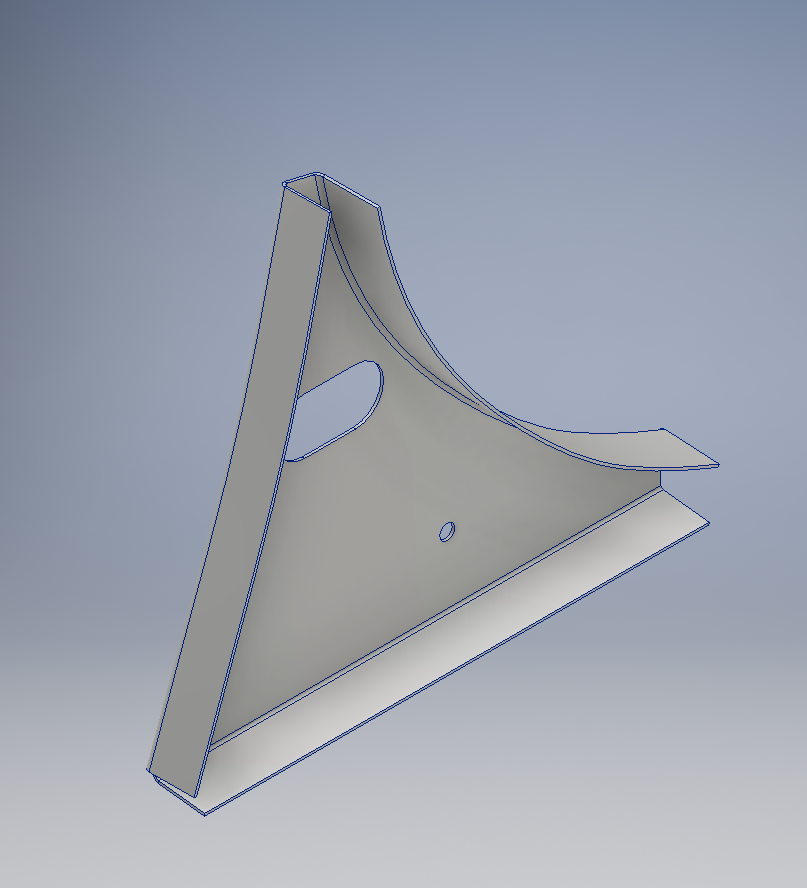
To finish the part after thickening, I converted to a sheet metal part and added a flange to the base at 7.5 degrees, a few holes and that’s it done. There are some flange holes still to be modelled which will be done later when the other connecting parts are modelled and checked for alignment in the assembly.

Progress Update:

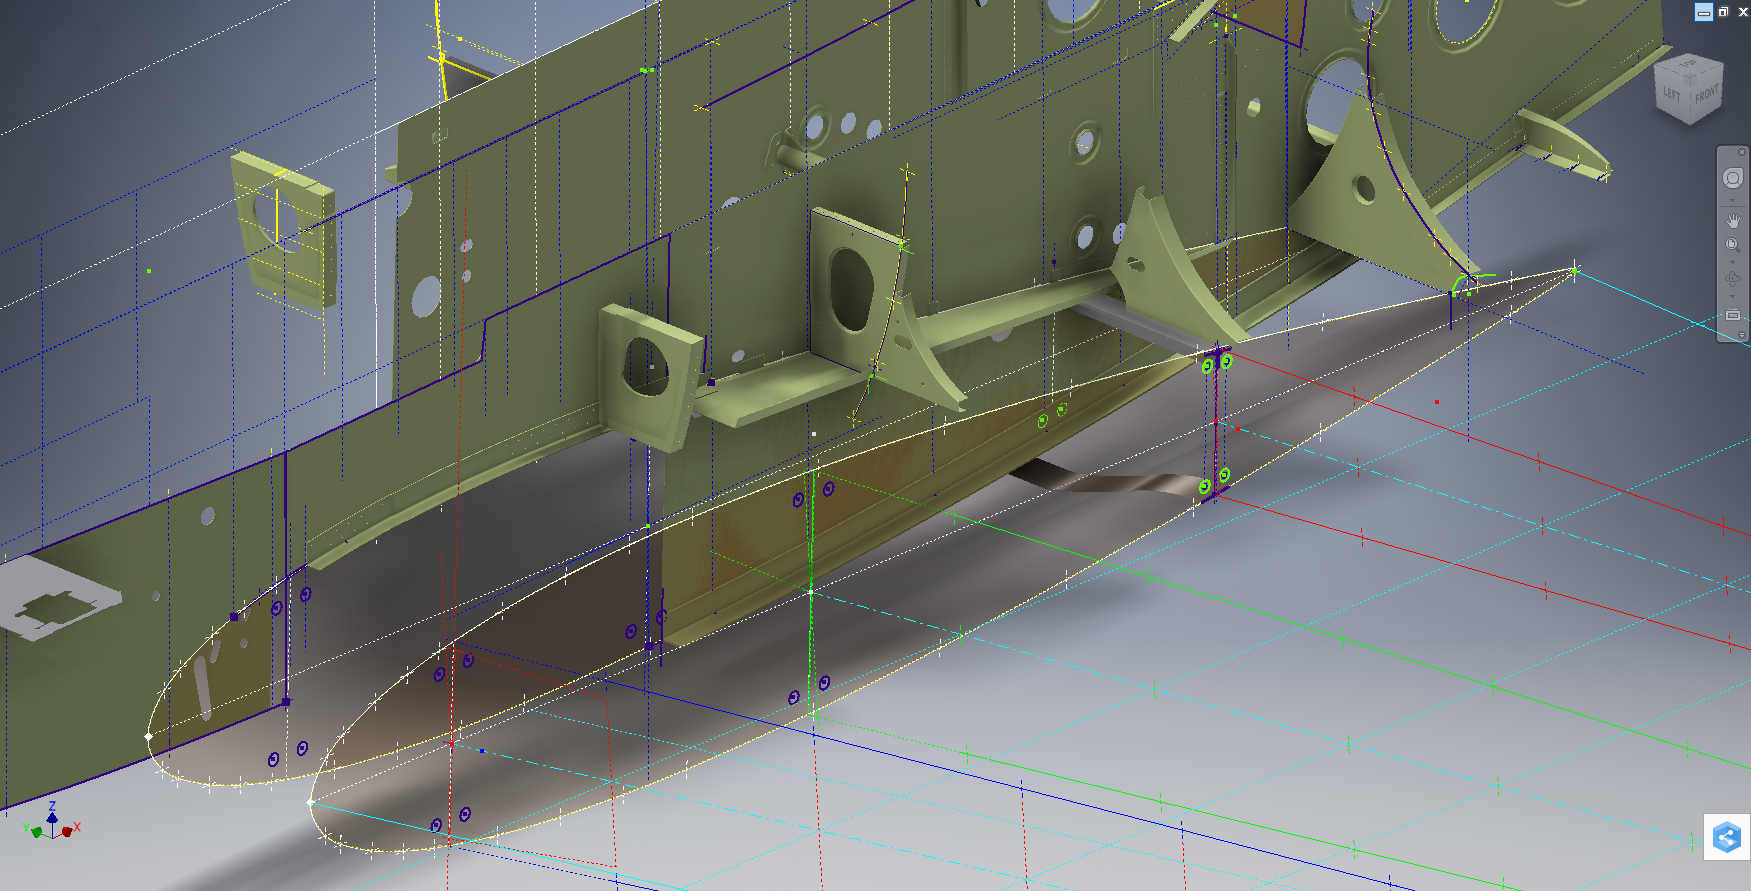
The following image shows a typical interface check between the P-39 wing and fuselage:

P-39 Wing Location

…and here the Radiator Intake Duct, preliminary alignment:

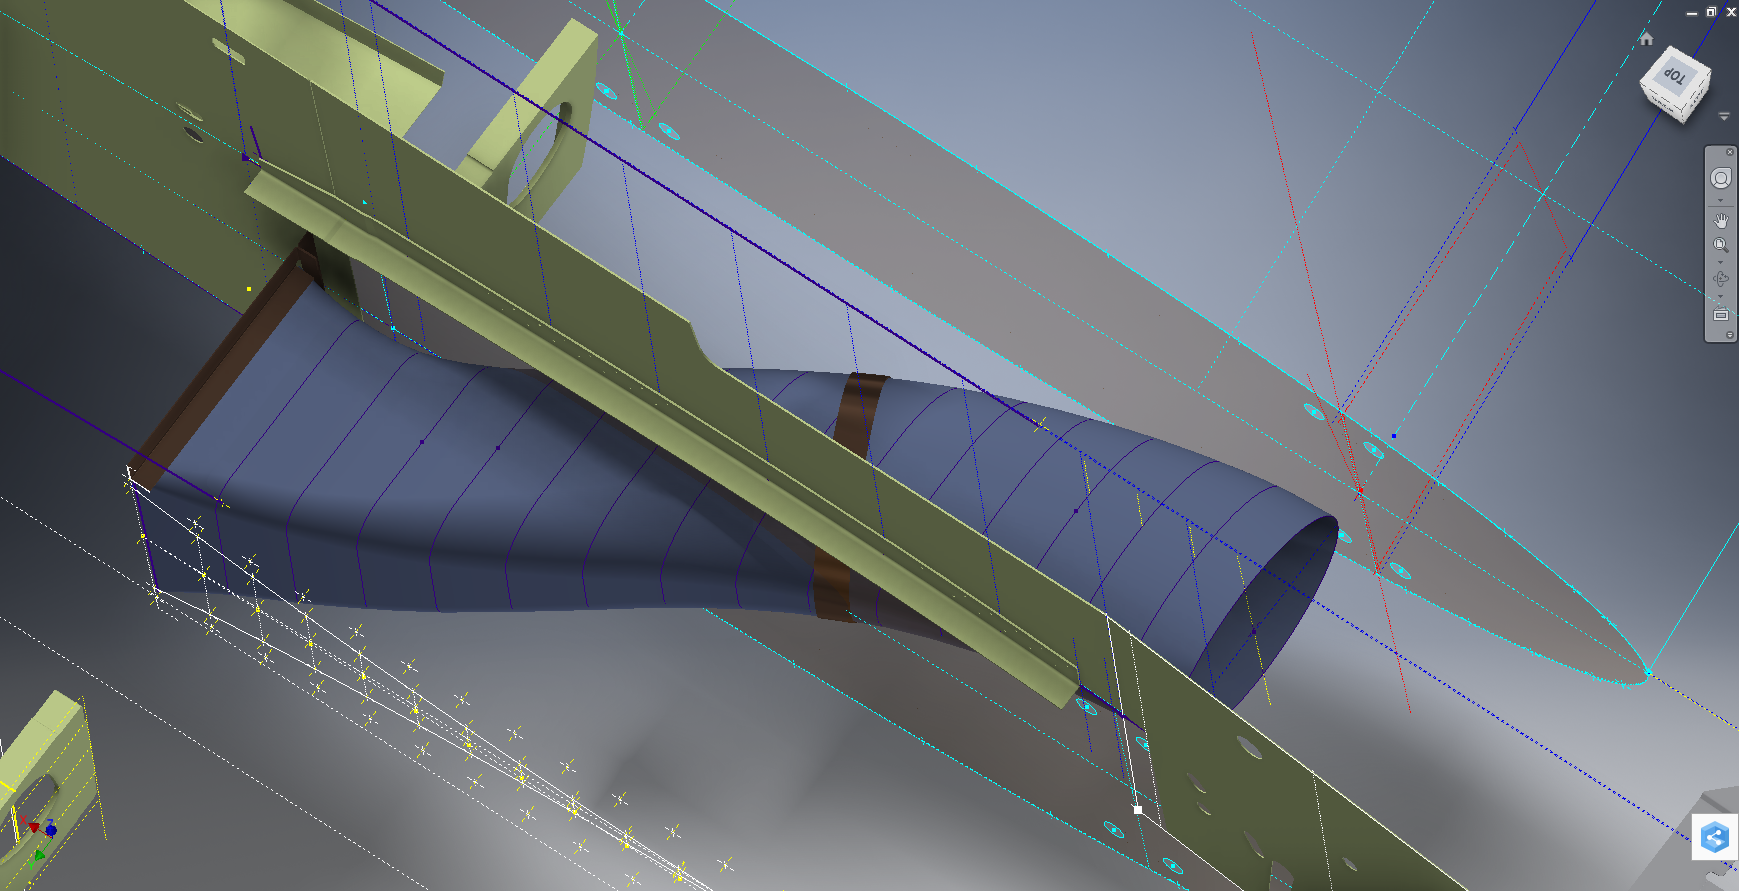
P-39 Rad Intake Duct

This radiator intake duct was an interesting development as the Bell chaps had provided both the tangential and the exterior dimensions at 2-inch intervals; on plan and elevation; which collectively are projected to form the profiles at each station. The white sketch at the bottom of the image shows these dimensions on the side elevation, with the curved lines depicting the tangent lines. I checked the curvature of this line and I only needed to adjust 2 dimensions by a minuscule amount to correct for negative curvature.

Update July 2022: New Revised P-39 Ordinate/CAD Dataset:

For all inquires please get in touch: hughtechnotes@gmail.com

NAA P-51D Mustang: Project Cad Technote Multi Body Parts

NAA P-51D Mustang: Project Cad Technote Multi Body Parts

The process of developing these drawings into accurate 3d models relies on maintaining the hierarchy according to the original NAA drawings, even if sometimes it gets a tad confusing when dealing with what constitutes a “sub-assembly” as I mentioned before.

The sub-assemblies I described as “Part Assemblies” as the assembly unusually comprises a fully detailed part inclusive of additional items like bearing, spacers etc.

I have reviewed my approach to how I deal with this and thought it may be prudent to write a quick note on this technique.

I am utilising the multi-part feature within Inventor for this, which allows you to model separate solid parts within a single part file and then create an assembly that comprises some or all of these solids.

2015-07-07_12-57-05

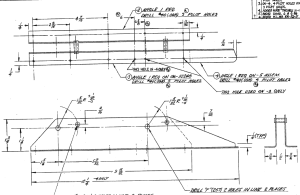
This is a scrap view from the NAA drawing showing an assembly that has 2 configurations based on varying paired angles with spacers and rivets as shown.

Each of these items has a suffix added to the part number i.e -1, -2, -3 etc.

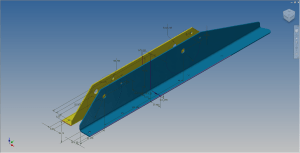
These images give you some idea of how I have modeled this, with the first image showing the configuration of items 2 & 3 and the second showing the configuration of item 2 & 4; all in one cad part file.

2015-07-07_12-41-28 2015-07-07_12-41-49

The beauty of working with multi body parts is that you only need one set of sketches that can be shared between all 3 parts.

2015-07-07_12-42-16

The sketches are dimensioned exactly as the original drawing…I mention this because I would not normally dimension from the edge of an angle section (cut edge); its not really good practice!

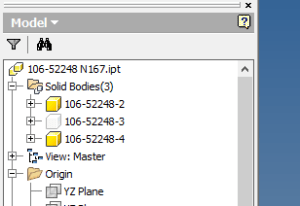
The image on the left shows the feature tree within Inventor; listing the 3 solids with appropriate suffixes.

The part file name (at the top) comprises the NAA drawing number with a suffix noting the archive reference.

All I have to do now is create an assembly for each of the configurations and add the relevant spacers and rivets. This is done very quickly using the “Create component” feature. The assembly number will comprise the NAA drawing number suffixed with either a -1 or a -5 respectively.

2015-07-07_13-50-22Only assemblies created from a multi-body part will be suffixed with a numerical character, otherwise they will simply be suffixed with SA.

Using this technique we maintain the integrity of the NAA numbering system with an hierarchy that suits the CAD strategy.

In a previous post I discussed “as-fitted” parts; like bushes; that might be press fitted and and reamed thus dimensionally different from the manufactured part, so these will still be modelled within the part file to “as-fitted” state and not brought in as a component of the sub assembly.

NAA P-51D Mustang: Tail Wheel Down Position Support

NAA P-51D Mustang: Tail Wheel Down Position Support; Derived Parts (Inv)

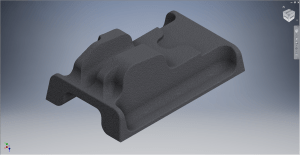
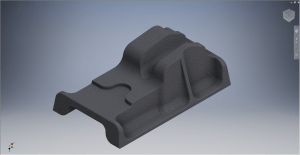
I mentioned in an earlier post that we don’t have many of the forgings/castings for this aircraft but the few that we do have are not stated as such in their description and thus occasionally overlooked.

In this case the forging/casting was noted in the NAA machining drawing; which I do have.  This gives me an opportunity to explain one of the strengths of the Autodesk Inventor product, namely derived parts!

Derived parts are a powerful but easy-to-use tool that comes in two basic flavors: you can derive a part from another one, or you can derive a part from an assembly. Using derived parts, you can easily create machining models and drawings from an as-cast model, and you can create a mold from the same model.

2015-06-25_23-39-08 2015-06-25_23-38-08

These images show the casting model I created from the original NAA drawing #73-34162 for the Tail Wheel Down Position Support.

This model took me quite a while to do due to the creation of all the fillets which got a bit crazy sometimes and I ended having to redo them several times to get them the way I wanted.

2015-06-25_23-39-27 2015-06-25_23-37-48

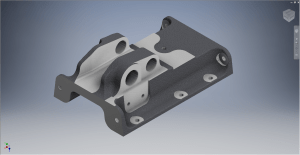
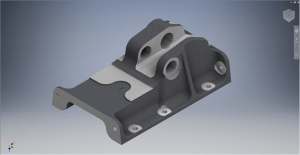
The machining model is a separate Cad part file created from NAA drawing #73-34161 which has the casting body and sketches derived from the first Cad model above. I can now go about working on the derived model; creating the machined elements and holes; without affecting the original model file above as shown.

The great thing about working this way is that should the original casting model change then this will be propagated to any other cad part files to which this item is derived but conversely any changes in these Cad part files are not reflected in the casting model.

I still have a few minor details to finish this model but thought it may be prudent to touch on the derived part capabilities of the Inventor product.

Another use for derived components is when you only have Inventor LT (Lite version) which is a parts only product and unlike its big brother does not handle assemblies. Using the derived feature it is possible to create a proxy assembly for checking the alignment of parts as shown below.

This is the armor plating for the Mustang P-51 Firewall; with the top section modeled separately from the bottom section. In this example, I have derived the top part into the lower part file as a surface model to assess the alignment and curvature continuity.

Solidworks: Wrap: Translation of 2D developed flat to curved surface.

Developing 3d models of historical aircraft is both challenging and sometimes frustrating, often requiring inventive, creative thought to develop complex shapes commonly associated with aircraft designs.

Solidworks: Wrap: Translation of 2D developed flat to curved surface.

One key aspect that has given me some grief in the past is when the fabrication drawings show a developed panel alongside the details of its final curvature. In a workshop one would just cut this plate and then form it on a predefined template to create the finished product.

This image illustrates a typical example of the sort of thing I am talking about. The large detail shows the flat pattern or developed profile with the top details showing the curvature required for the finished product.

I had tried various ways of doing this use the Flex and deform options to control the curvature within the dimensional limitations as noted – without success. I finally decided to try the Wrap command – essentially the same methodology used in the real world.

This Technote will describe the process I have adapted to develop these shaped forms.

For the purposes of keeping things simple I am not going to attempt the above but something a little easier.

19-02-2010 22-06-34

19-02-2010 22-08-16

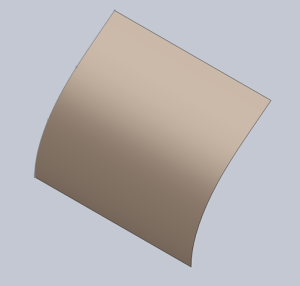
I created a spline and then extruded to give me a surface representing the finished curve.

19-02-2010 22-10-5319-02-2010 22-13-35

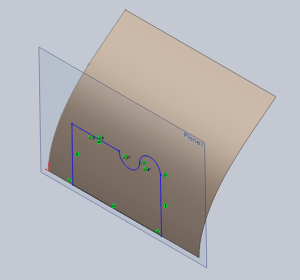
The next step is to create a plane tangent to the curved surface selecting the point at the bottom left corner. This is important; the plane has to be Tangent to the surface and a point selected that is coincidental with the alignment of the sketch. The sketch as shown is aligned with the bottom of the curve which is coincident with the datum for the plane. The reason why this is critical is that when the sketch is projected the lines deform to fit the surface which depends on the distance from the surface and the relationship between them – by selecting a coincident point where the sketch meets the surface then deformation is zero.

19-02-2010 22-20-50

Inset>Features>Wrap – select the ‘scribe’ option and the 2d profile is ‘wrapped’ to the surface.

Note: cautionary comment: to check this methodology I did a measure on the left vertical line on the 2d sketch and checked it with the wrapped line on the surface – technically they should be equal – the 2d line measured 37.30194mm and the corresponding line on the surface is 37.29606mm – a variation of .00588mm – well within acceptable parameters.

This is where it gets interesting:

19-02-2010 22-30-43

19-02-2010 22-30-18

19-02-2010 22-28-20

When you select ‘wrap’ in the feature tree the area of the wrap is highlighted and similarly when you select the ‘surface extrude’, but when you check the surface bodies we actually only have one surface!. So how can we progress this to separate the wrap area to enable us to finish the part?

19-02-2010 22-40-40Because the areas are separately selectable we can use the offset command with a value of zero and then select only the area we want….this creates a copy of the surface at the same location…all we need to do now is apply thickness and our part is complete.

So there we have it! A formed plate that conforms to the defined surface curvature and dimensionally with the 2d plan sketch.

Footnote: Placement of the tangent plane as I mentioned is important, but I suspect that thru experimentation various tangency relationships can be identified that satisfy all the necessary criteria.