Technote: 3D Printing-My Perspective #2

Technote: 3D Printing-My Perspective #2:

In my previous article, I talked about finishes, minimal wall thickness, custom supports, and printing dowels. I explored the minimum wall thickness with respect to 3D printing options for a scaled RC aircraft, where the CAD and coordinate datasets serve as valuable resources. My preliminary investigations suggested that a minimum of 2 wall loops with a suitable infill may be the way forward.

I ventured to do some 3D prints to see what actually worked, and though my initial ideas had merit, I have found that for the wings and stabilisers, at least a single wall with a gyroid fill provides structural integrity whilst minimising weight.

In the first image above, the Gyroid fill consumes 10% volume, sufficient to fully support a thin single wall. I actually printed a second test using the more traditional rib-and-sheet construction, but for this type, the walls are too thin, as the ribs created indents on the surface and were not as strong. For the latter, I also tried 2 wall layers, but even then, the surface finish was not as good. It could be argued that it does resemble an actual real aircraft look, but this is an RC project, and the key objective is strength with minimal weight. Using a gyroid fill, we can achieve distributed support across the entire wing with no surface deformations.

My second test was to print half the fuselage with a section of wing to see how this worked out with a single wall. Although it looks just fine, there was evidence of distortion in the straightness of the fuselage, though it was surprisingly strong. The layer lines from the 3D printing followed the longitudinal axis along the fuselage, which created some obvious surface deformations. Ideally, the fuselage should therefore be printed with the layers perpendicular to the fuselage axis to achieve more exact surface contours.

The fuselage will, of course, need to be hollowed out for the engine and RC gear, which then leads to how best to manage the creation of the walls. My initial thoughts are to build this fuselage in sections with a wall thickness of 2 to 3mm printed with double wall layers and gyroid fill. That needs to be tested once I complete the internal design for fitting RC equipment and controls. The plan is to study 2 aircraft, the SU-31 and the Grumman Goose.

The SU-31 model displayed here is a surface model derived from the main assembly. Since this is a part file containing all the surfaces, I can create solid parts suitable for the 3D printing process from any combination of these surfaces without affecting the main assembly. It is crucial to handle this as a separate entity, as the primary purpose of the main assembly is to accurately represent the real aircraft.

The Grumman Goose study is still a work in progress. The fuselage lines are displaying some small misalignments, which are due to the original dimensions being in inches, accurate to 1/32″, which, for manufacturing, is fine, but any imperfections do show in the CAD model. The SU-31, by comparison, was entirely generated mathematically, which resulted in a better CAD model. I did spend considerable time on the wing fillets with micro millimetre adjustments to improve the surface curvature and continuity.

Having explored the 3D printing options, I am now ready to move to Phase 2 to determine the ideal scale for the model and thus the selection and installation of the RC equipment. The following 3-view shows the overall dimensions for reference.

Update 10 Nov 2025:

I have converted the surfaces into solid parts and subdivided them as shown below. The divisions for the fuselage are still pending until I finalise the choice of RC gear. I am still undecided on the Landing Gear; hopefully make a decision on that shortly.

Support Phase 2 Development:

To date, I have only ever built gliders with basic controls for flight…I actually designed my own glider at one stage. I have never built a powered RC aircraft, so this project is going to be a challenge.

STL, DWG, and IGES files for the completed CAD model at a 1/16 scale will be available soon. Please see the new post above for details.

I would love your support as I dive into these exciting projects! If you’re able, a small donation would mean so much—every little bit helps and makes a big difference. Thank you for considering!

Dinations Paypal preferred; PAYPAL LINK,

As usual, comments and inquiries to hughtechnotes@gmail.com

Technote: P-39 Door Handle CAD Solution

Technote: P-39 Door Handle CAD Solution:

This little part at first glance seems fairly straightforward, but there are a few caveats.
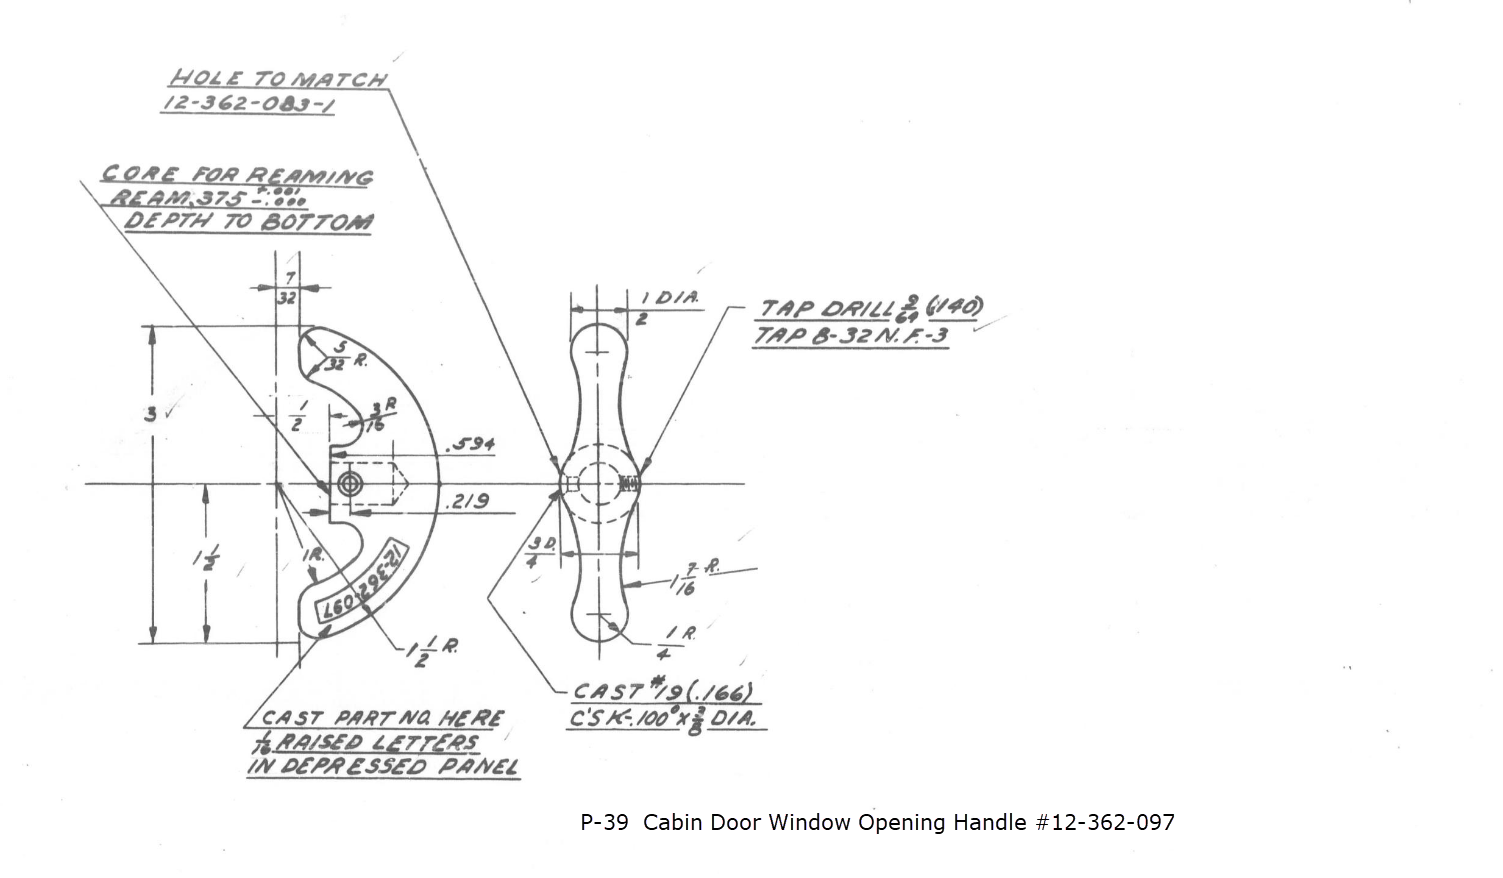
It has been a while since I specifically wrote a CAD solution Technote, and this seemed to be an ideal subject for surface modeling and 3D sketching. The dimensions define the outline for the front view, which is fine, and the plan view, which details a thinning of the handle cross section.

The thinning of the handle occurs in a specific plane as indicated in the plan view, while the front view maintains a consistent full depth diameter. Before diving into the modeling process, it’s important to pause and consider how to approach this design. Typically, my first step involves sketching out what is already known, which helps clarify the information we still need to gather. This initial sketching phase is crucial for laying the groundwork for an effective modeling strategy.
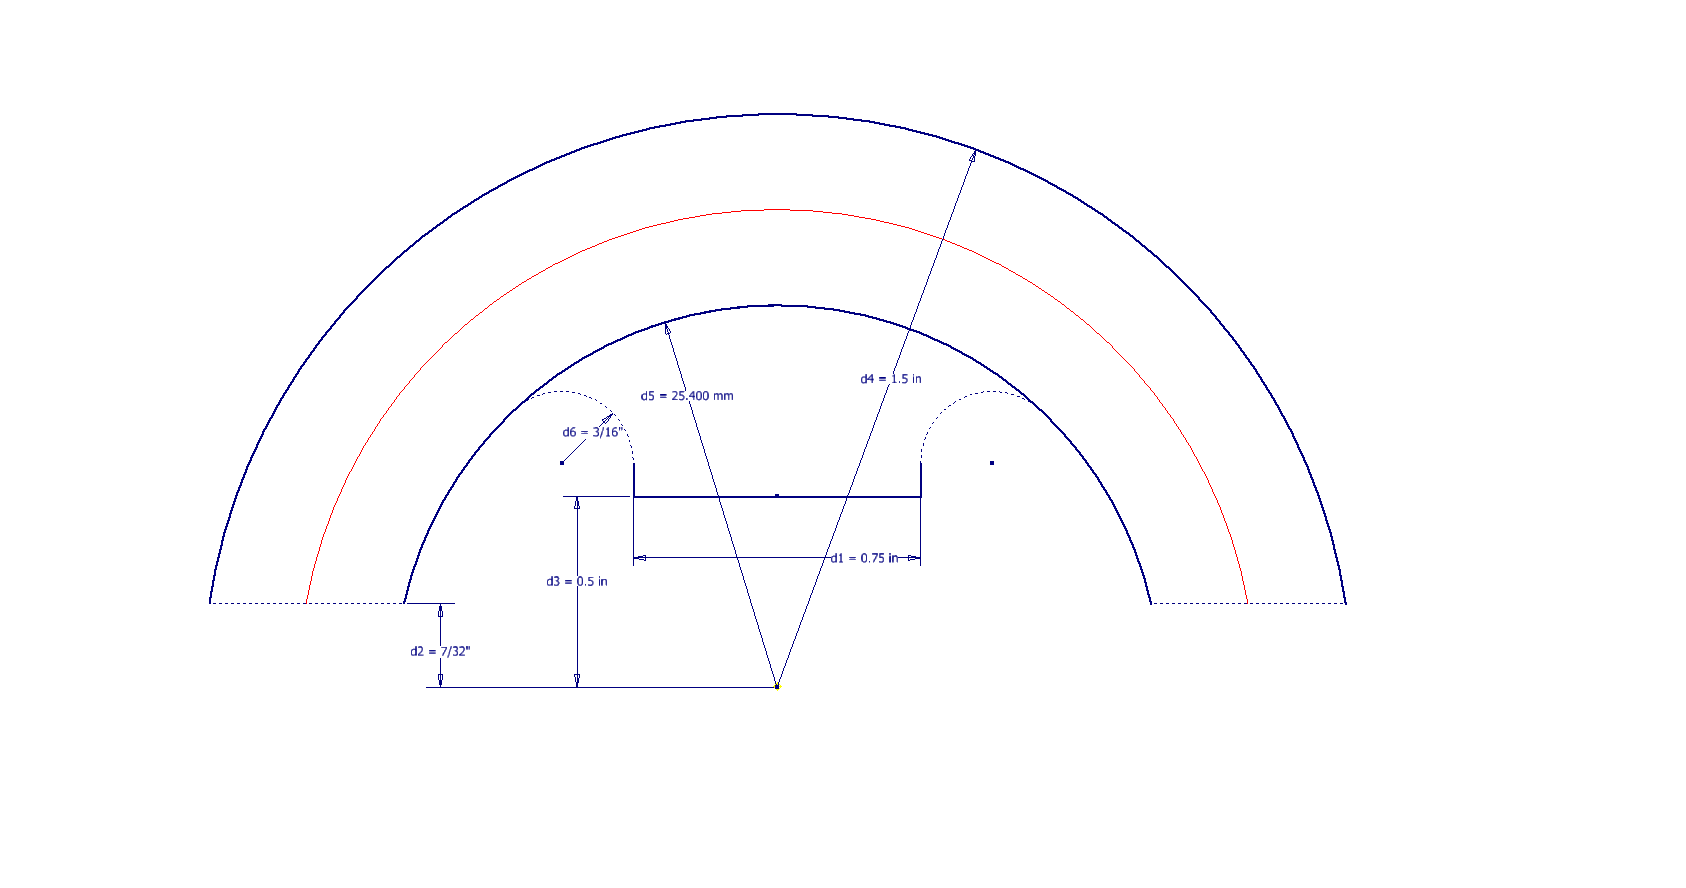
In each case, you’ll notice that these profiles are not closed. The base lines shown in the front view are defined as construction lines, and the end curves in the plan view are also intentional. This design choice allows the main profile lines to be used later for creating a Loft and for selecting a 3D Sketch Intersection. The center line of the arc in the front view will serve as the second selection for this 3D sketch. Additionally, note that the curves in the plan view are elliptical.

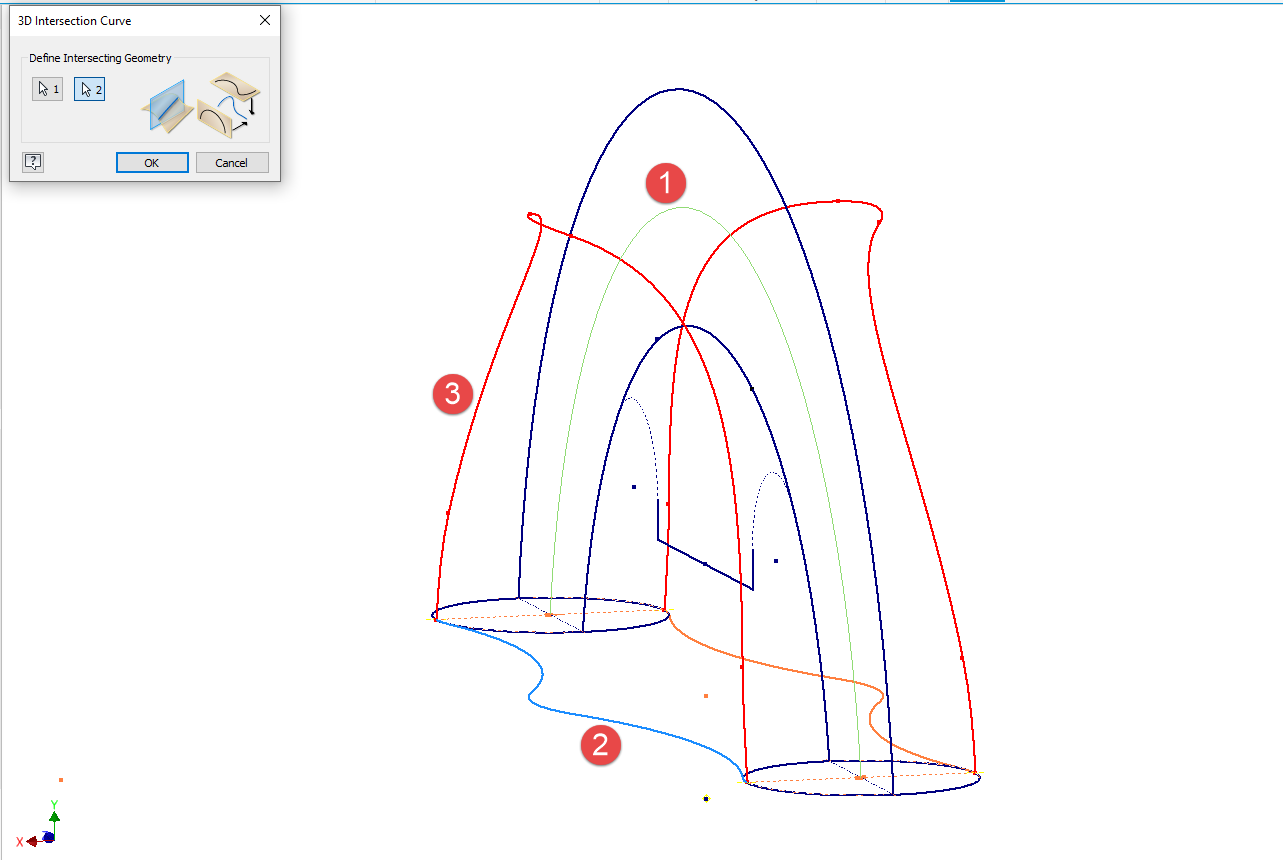
The purpose of the 3D Intersection sketch is to define guidelines for the eventual loft. Using the 3D sketch feature, we first select the center line from the front view and one curved edge from the plan view sketch. The resulting intersection will serve as the 3D path for the loft. This process needs to be repeated for both sides of the handle. The ellipses that will form the ends of the loft are created in a separate sketch from the previously mentioned plan view. This keeps them as distinct entities.
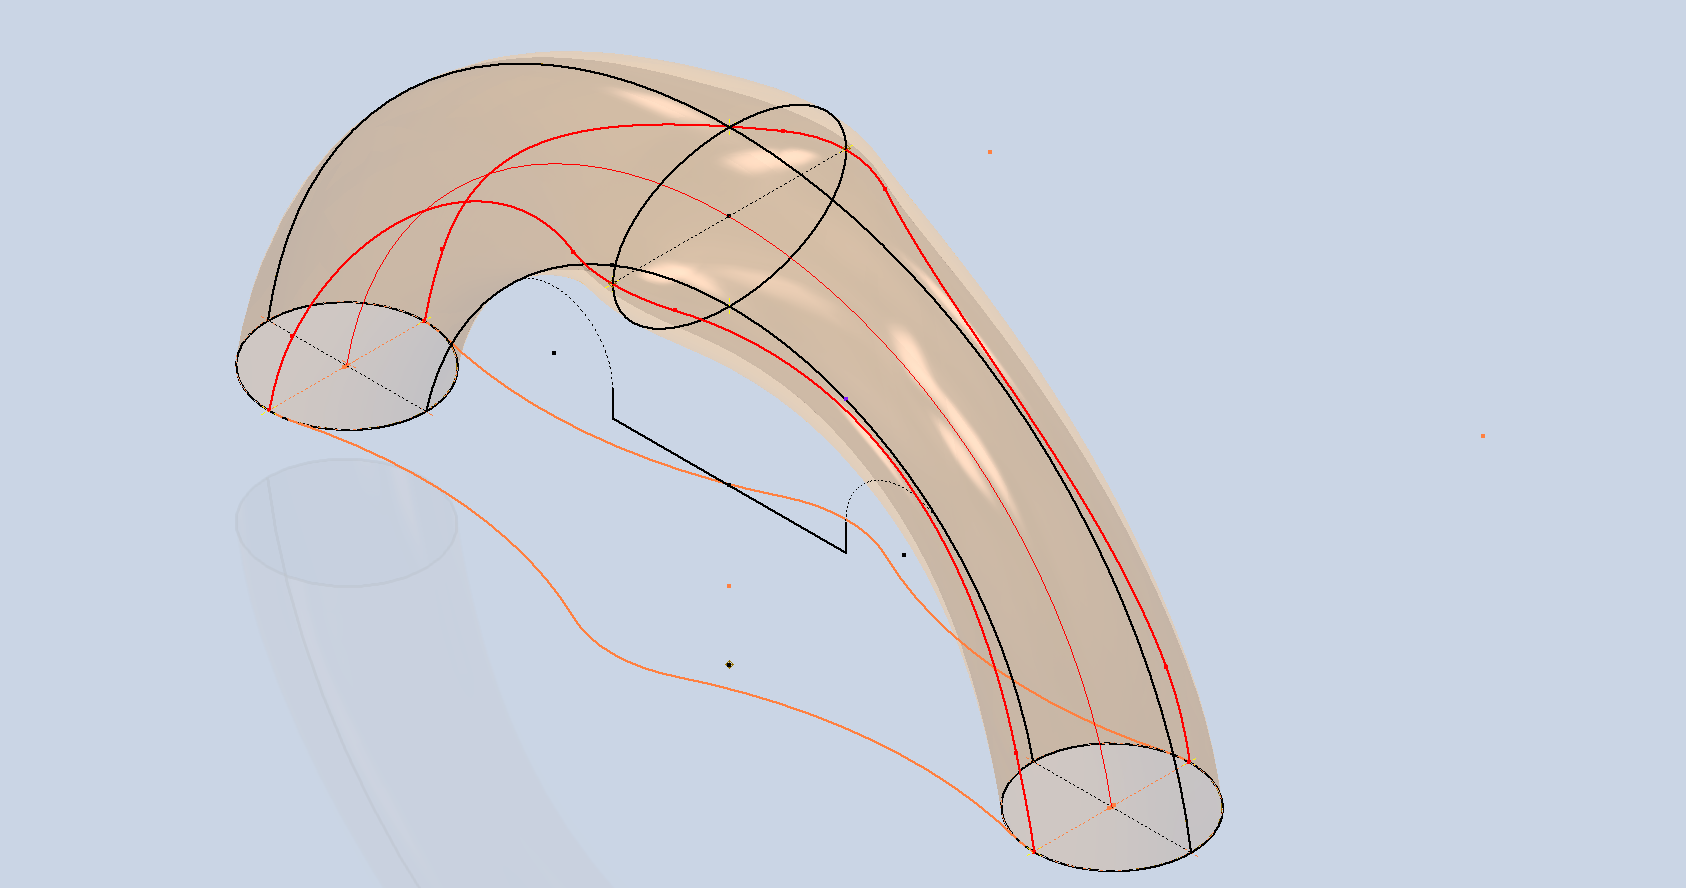
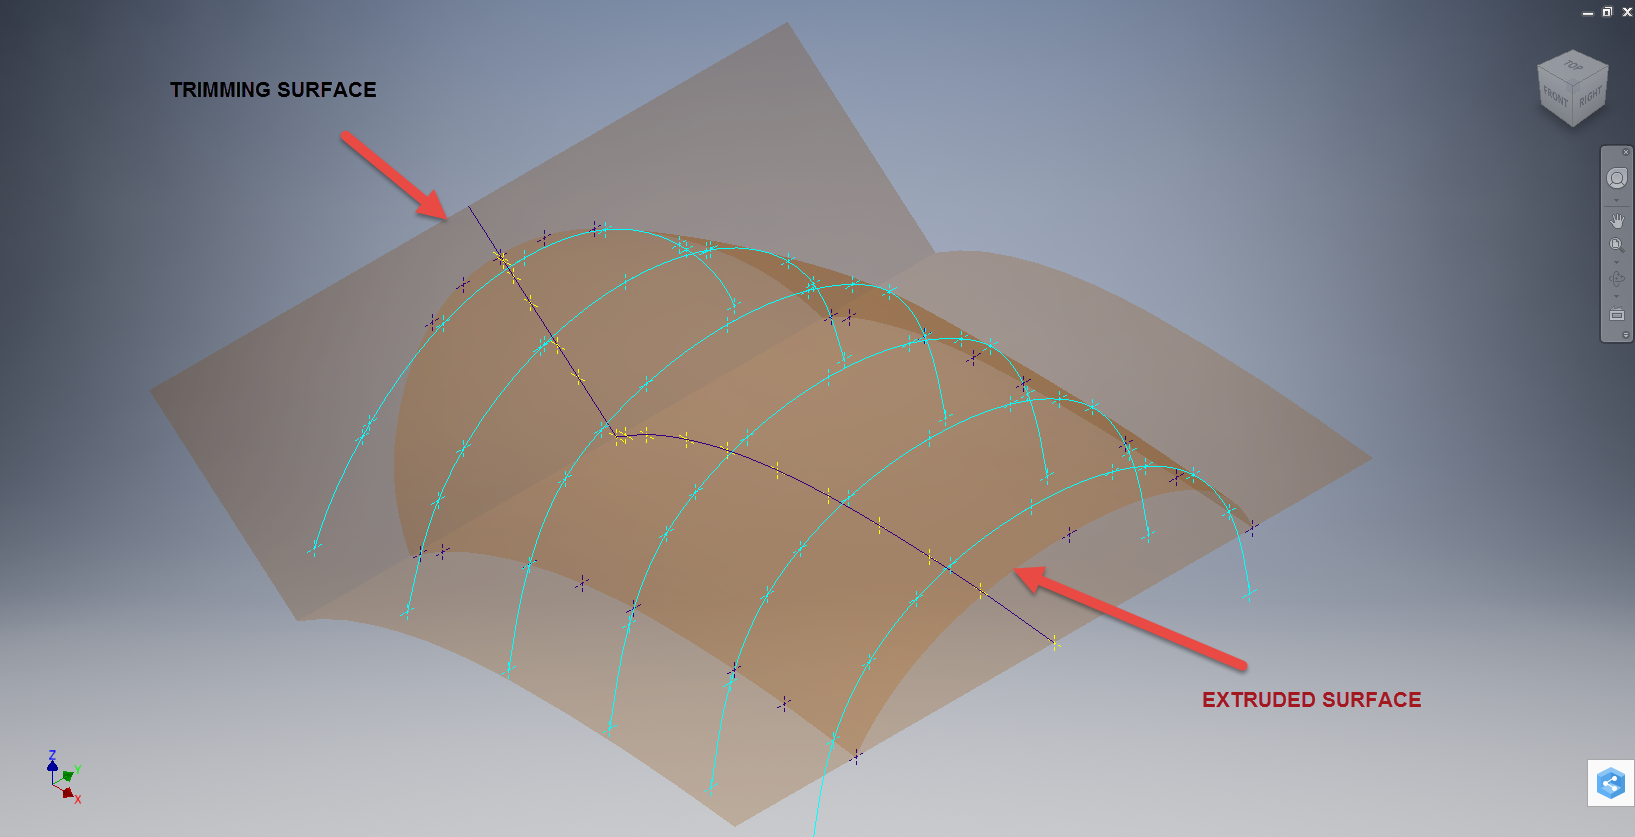
Hold on a moment; where did the ellipse in the middle of the arch come from? If we simply loft the two end profiles of the arch, as shown earlier, we can create an acceptable model, but it won’t be ideal. In the second image, where both surfaces are overlaid, you can see that this approach tends to create a diamond-like cross-section in the center. While this is not entirely incorrect, incorporating the ellipse in the center of the arch results in a much better finished surface, ensuring good continuity, as demonstrated.

Once we have the arch lofted surface, we extrude the centre section circle to match the surface contours.

We then use this extrusion to trim the underside of the arch surface, apply patch surfaces to fill in the ends of the arch and this centre section. Then stitch everything together and we have the main solid model.

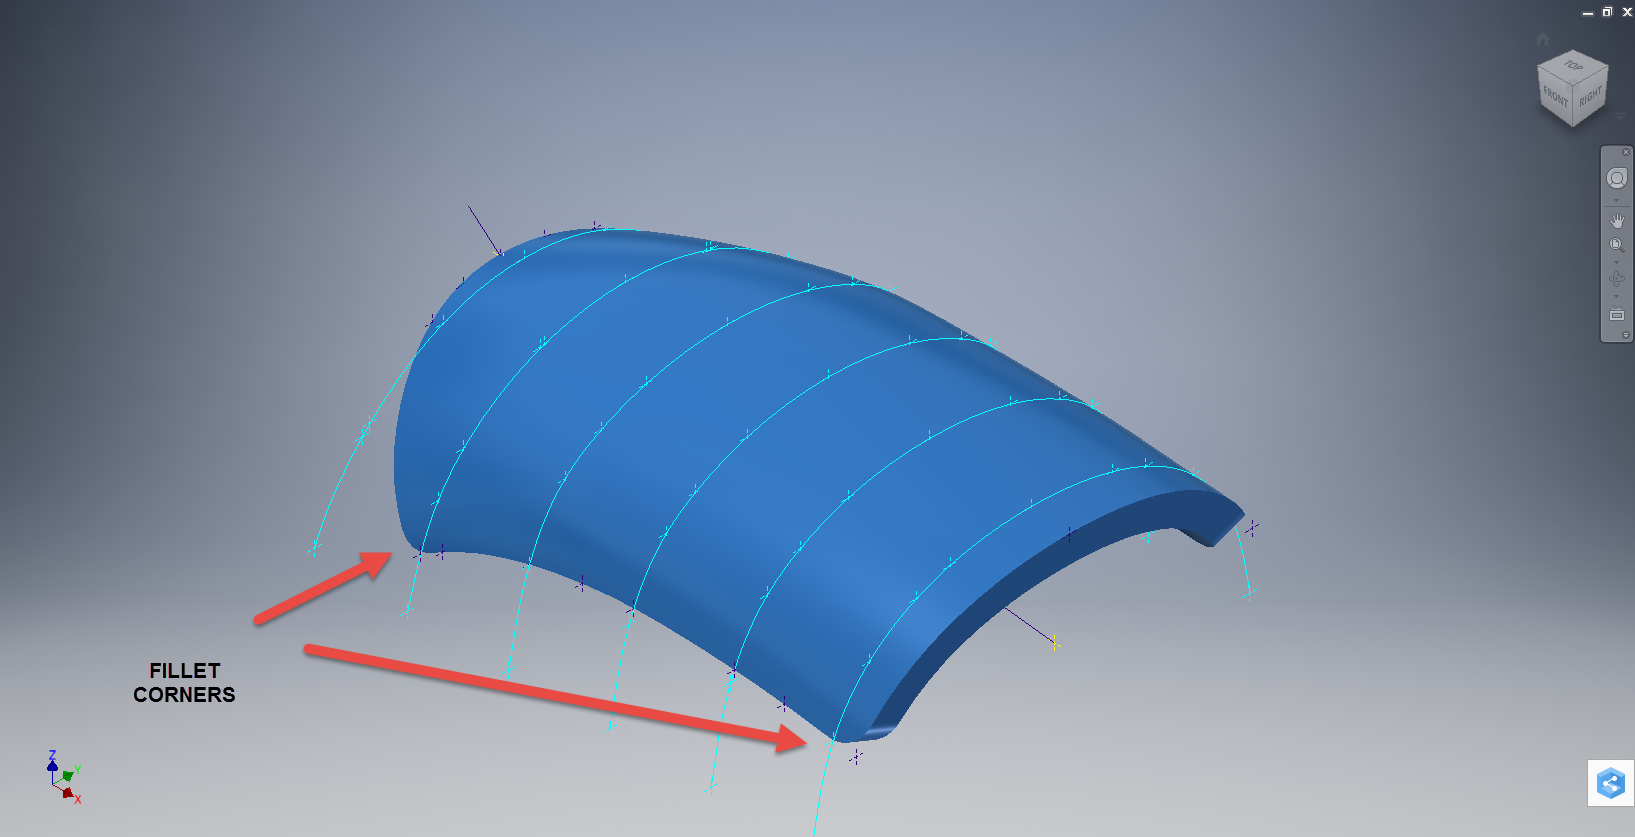
Apply a fillet as shown to the underside; note the fillet in this case is better selected as a tangent fillet and not a G2 curvature. It is often tempting to overuse the G2 fillet option as the perceived notion is that it creates a smoother finish, which by the way is correct, though in a case like this it tends to sharpen the fillet corners which is not good. Something to watch out for when applying fillets.

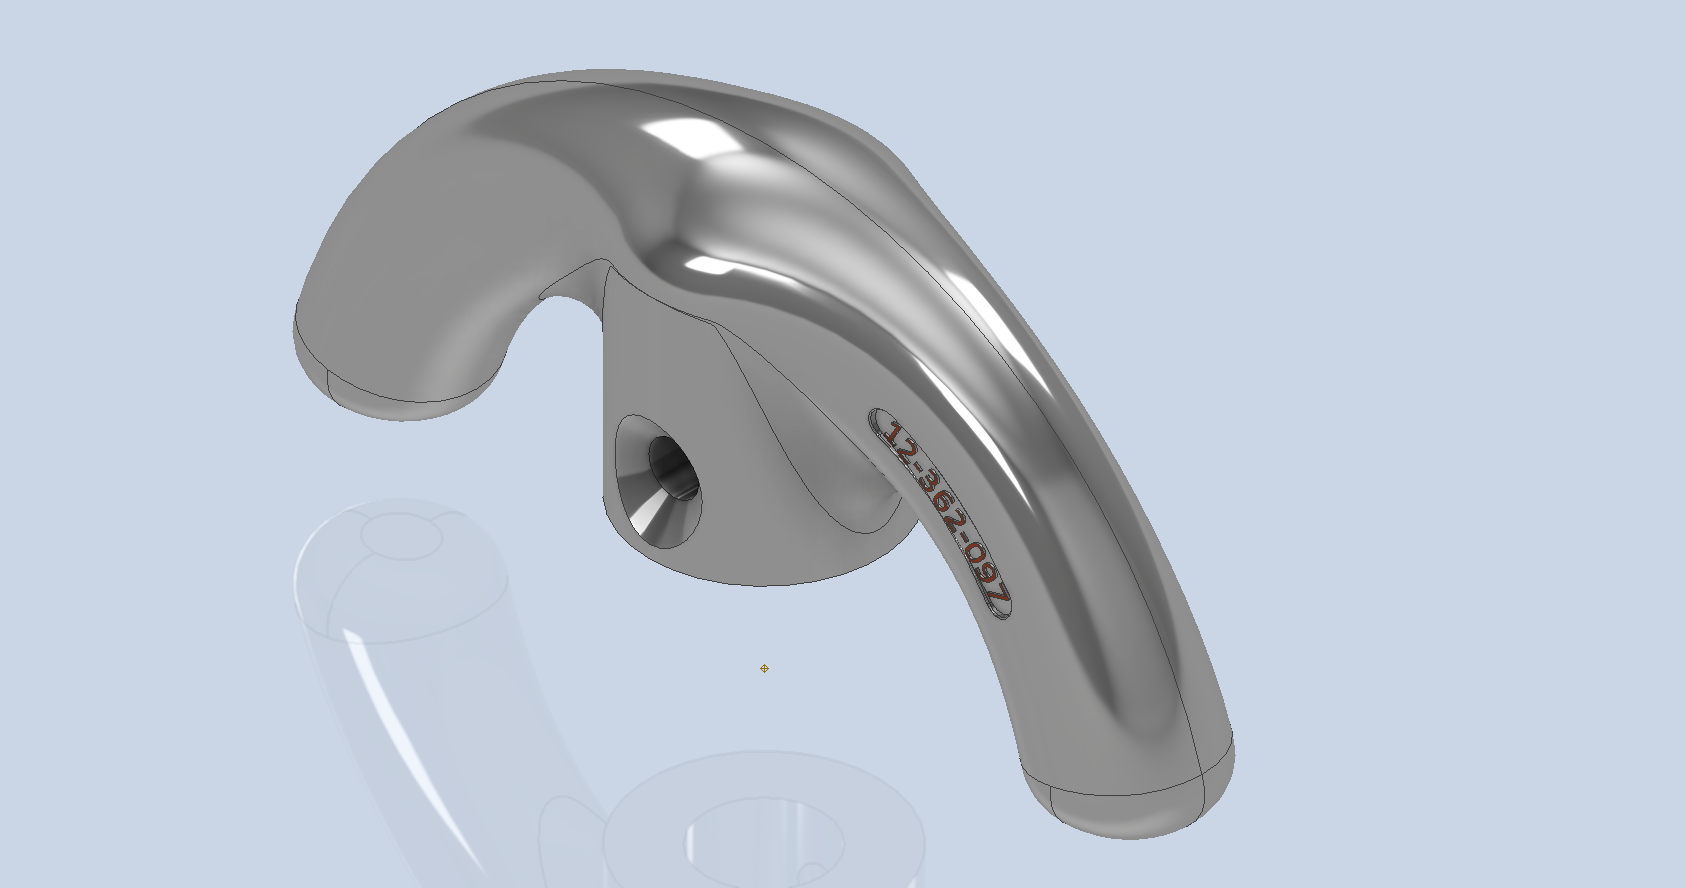
To finish up we add the holes as specified, fillet the ends of the arch (a good opportunity for a G2 fillet) and add the part identifier. The final part should look something like this:

In summary, when developing surface models, it’s beneficial to explore your options and start by creating sketches that support your plan of action. Consider using 3D intersections to define loft paths, and incorporate additional geometry as needed to maintain the circularity and continuity of the final surface.

This part is ready for manufacturing, which will probably be 3D printed for this static display restoration.

Typical Design Workflow:

Usually I would initially receive an inquiry via email from companies like Planes of Fame for a 3D CAD model of a specific part or assembly. Typically, the request includes a brief description of what is needed and not necessarily the actual part number. In this instance, it was for “the handle for operating the window glass.” I then searched through my archives to locate this item, reviewed the part’s blueprint, and checked which parts or assemblies it connects to ensure I have all the relevant information.

I will make every effort to start working on the CAD model as soon as possible, regardless of the time of day, to minimize any delays. For example, I received an inquiry about a part at 9:17 PM last night for the “P-39 Throttle Control Mount.” Following the established procedure, I was able to begin working on it relatively quickly on a Friday evening. The finished part (#12-631-027) was completed and submitted on Saturday at 11:17 AM. The final design included both the original 3D CAD model and a fully dimensioned 2D drawing, which is essential for verifying that all dimensions conform to the original blueprint.

This part will likely be 3D printed for the restoration of the static display, so the 2D drawing serves both as a dimensional check and a reference for manufacturing. If the inquiry had required a metal casting manufacturing process, the drawing would include more detailed information about part machining and the tolerances necessary for a full-metal manufactured item.

If you’re looking to bring your ideas to life with accurate 3D and 2D CAD models for replica parts, I would love to help! Don’t hesitate to get in touch hughtechnotes@gmail.com
Hoppers: Surface Model for Mass Containment

Hoppers: Surface Modelling for Mass Containment:

Although not directly associated with aircraft design there are inherent modelling techniques equally applicable to many aspects of aviation. The techniques relate to surface modelling for the containment of a known mass or volume. In each case, the criterion is the specified volume or mass that ultimately defines the size and shape of the container.

hopper-1

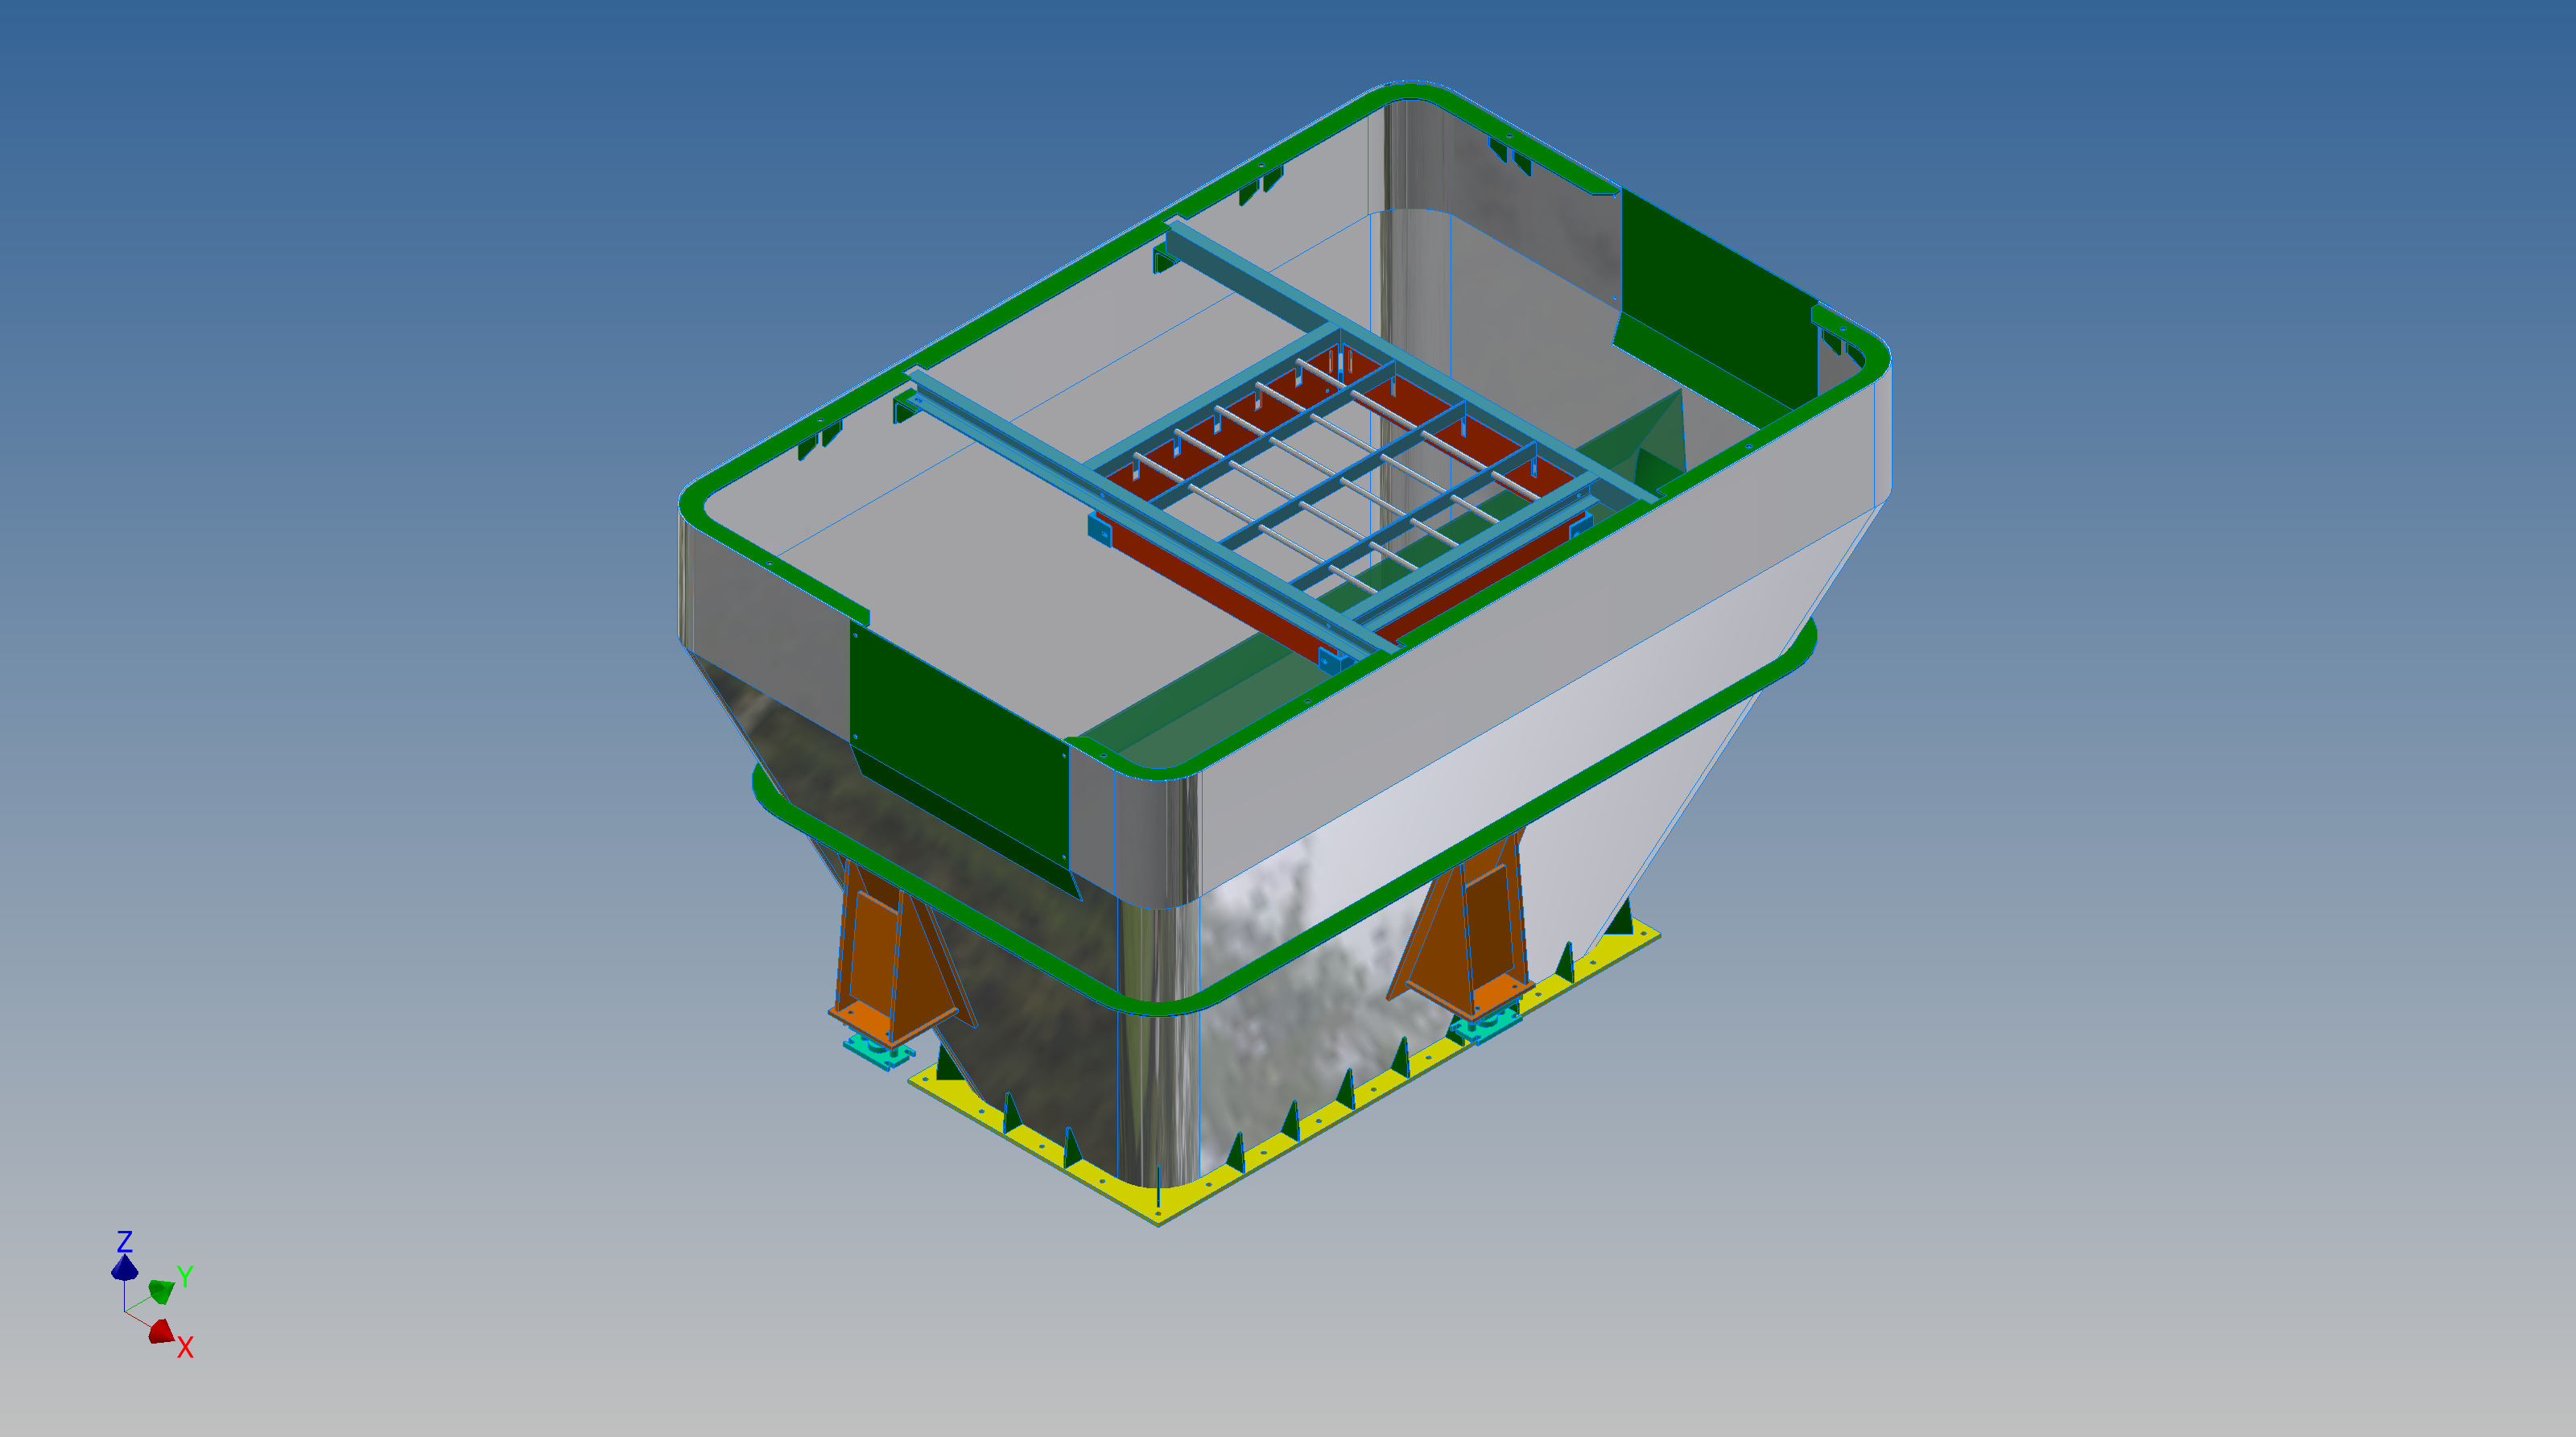
This particular hopper is for a Transfer car used to feed Steel Plant Coke Ovens with coal. The development of this hopper combines surface and solid objects in a single multi-part model that is configurable via a dialogue populated wth the key parameters. Surface modelling can be used for various purposes; some of which I have covered in previous articles for the creation of sheet metal flanges, trimming solids and providing a boundary for extrusion or as a containment for a solid component; as I have used here.

hopper-master-01

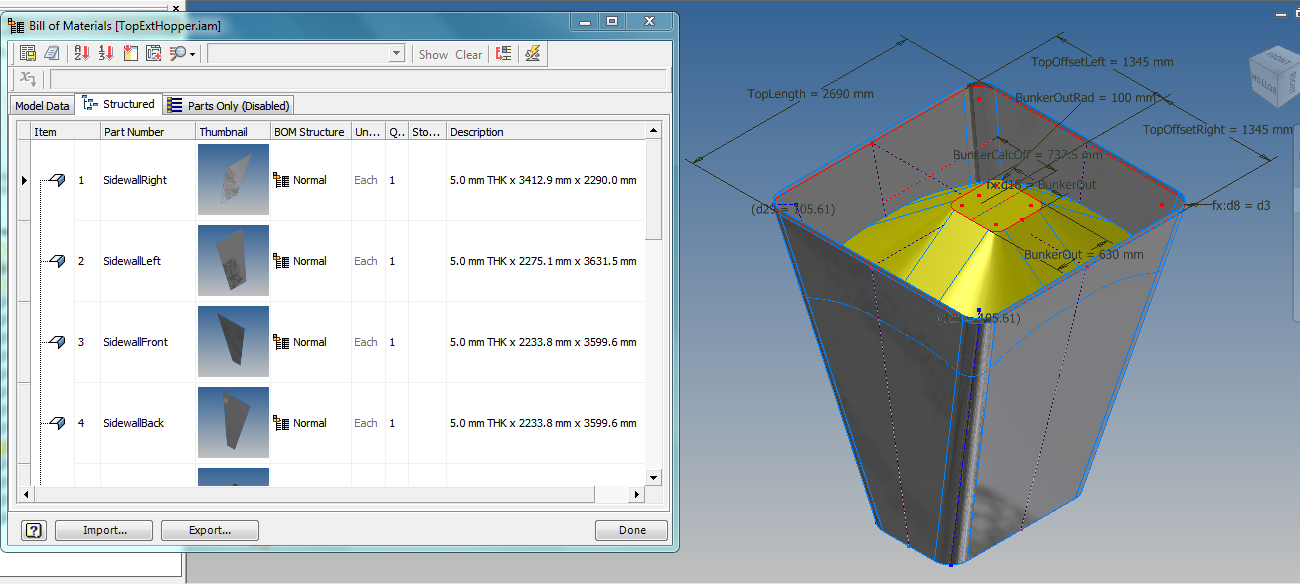
This type of hopper is fed from an overhead bunker and releases the fill material through an aperture in the base. The mass volume is modelled according to industry specifications that define the slope of the poured coal defined by the size of the top bunker opening.

The surface represents the containment boundary which has zero volume and zero mass therefore by definition will ensure that the only properties recorded for mass and volume in the 3d model relate only to the fill material. The image above shows some of the key parameters used to model this hopper as a part file with an ilogic form to make it easier to adjust the parameters to suit the project design.

2013-09-17_121727

The gray values for the Coal Volume and the Centre of Gravity are the results calculated from the physical dimensions of the coal mass and the containing surface model. Once the correct dimensional and mass properties are determined the surface objects are extrapolated using the “Make Component” command in Inventor which creates a separate derived part file and also (optional) includes the part file in an assembly placed at the original coordinates. In the surface part file we simply thicken the surface to generate the solid plate material that will form the structural body of the finished hopper.

hopmaster01assemblya

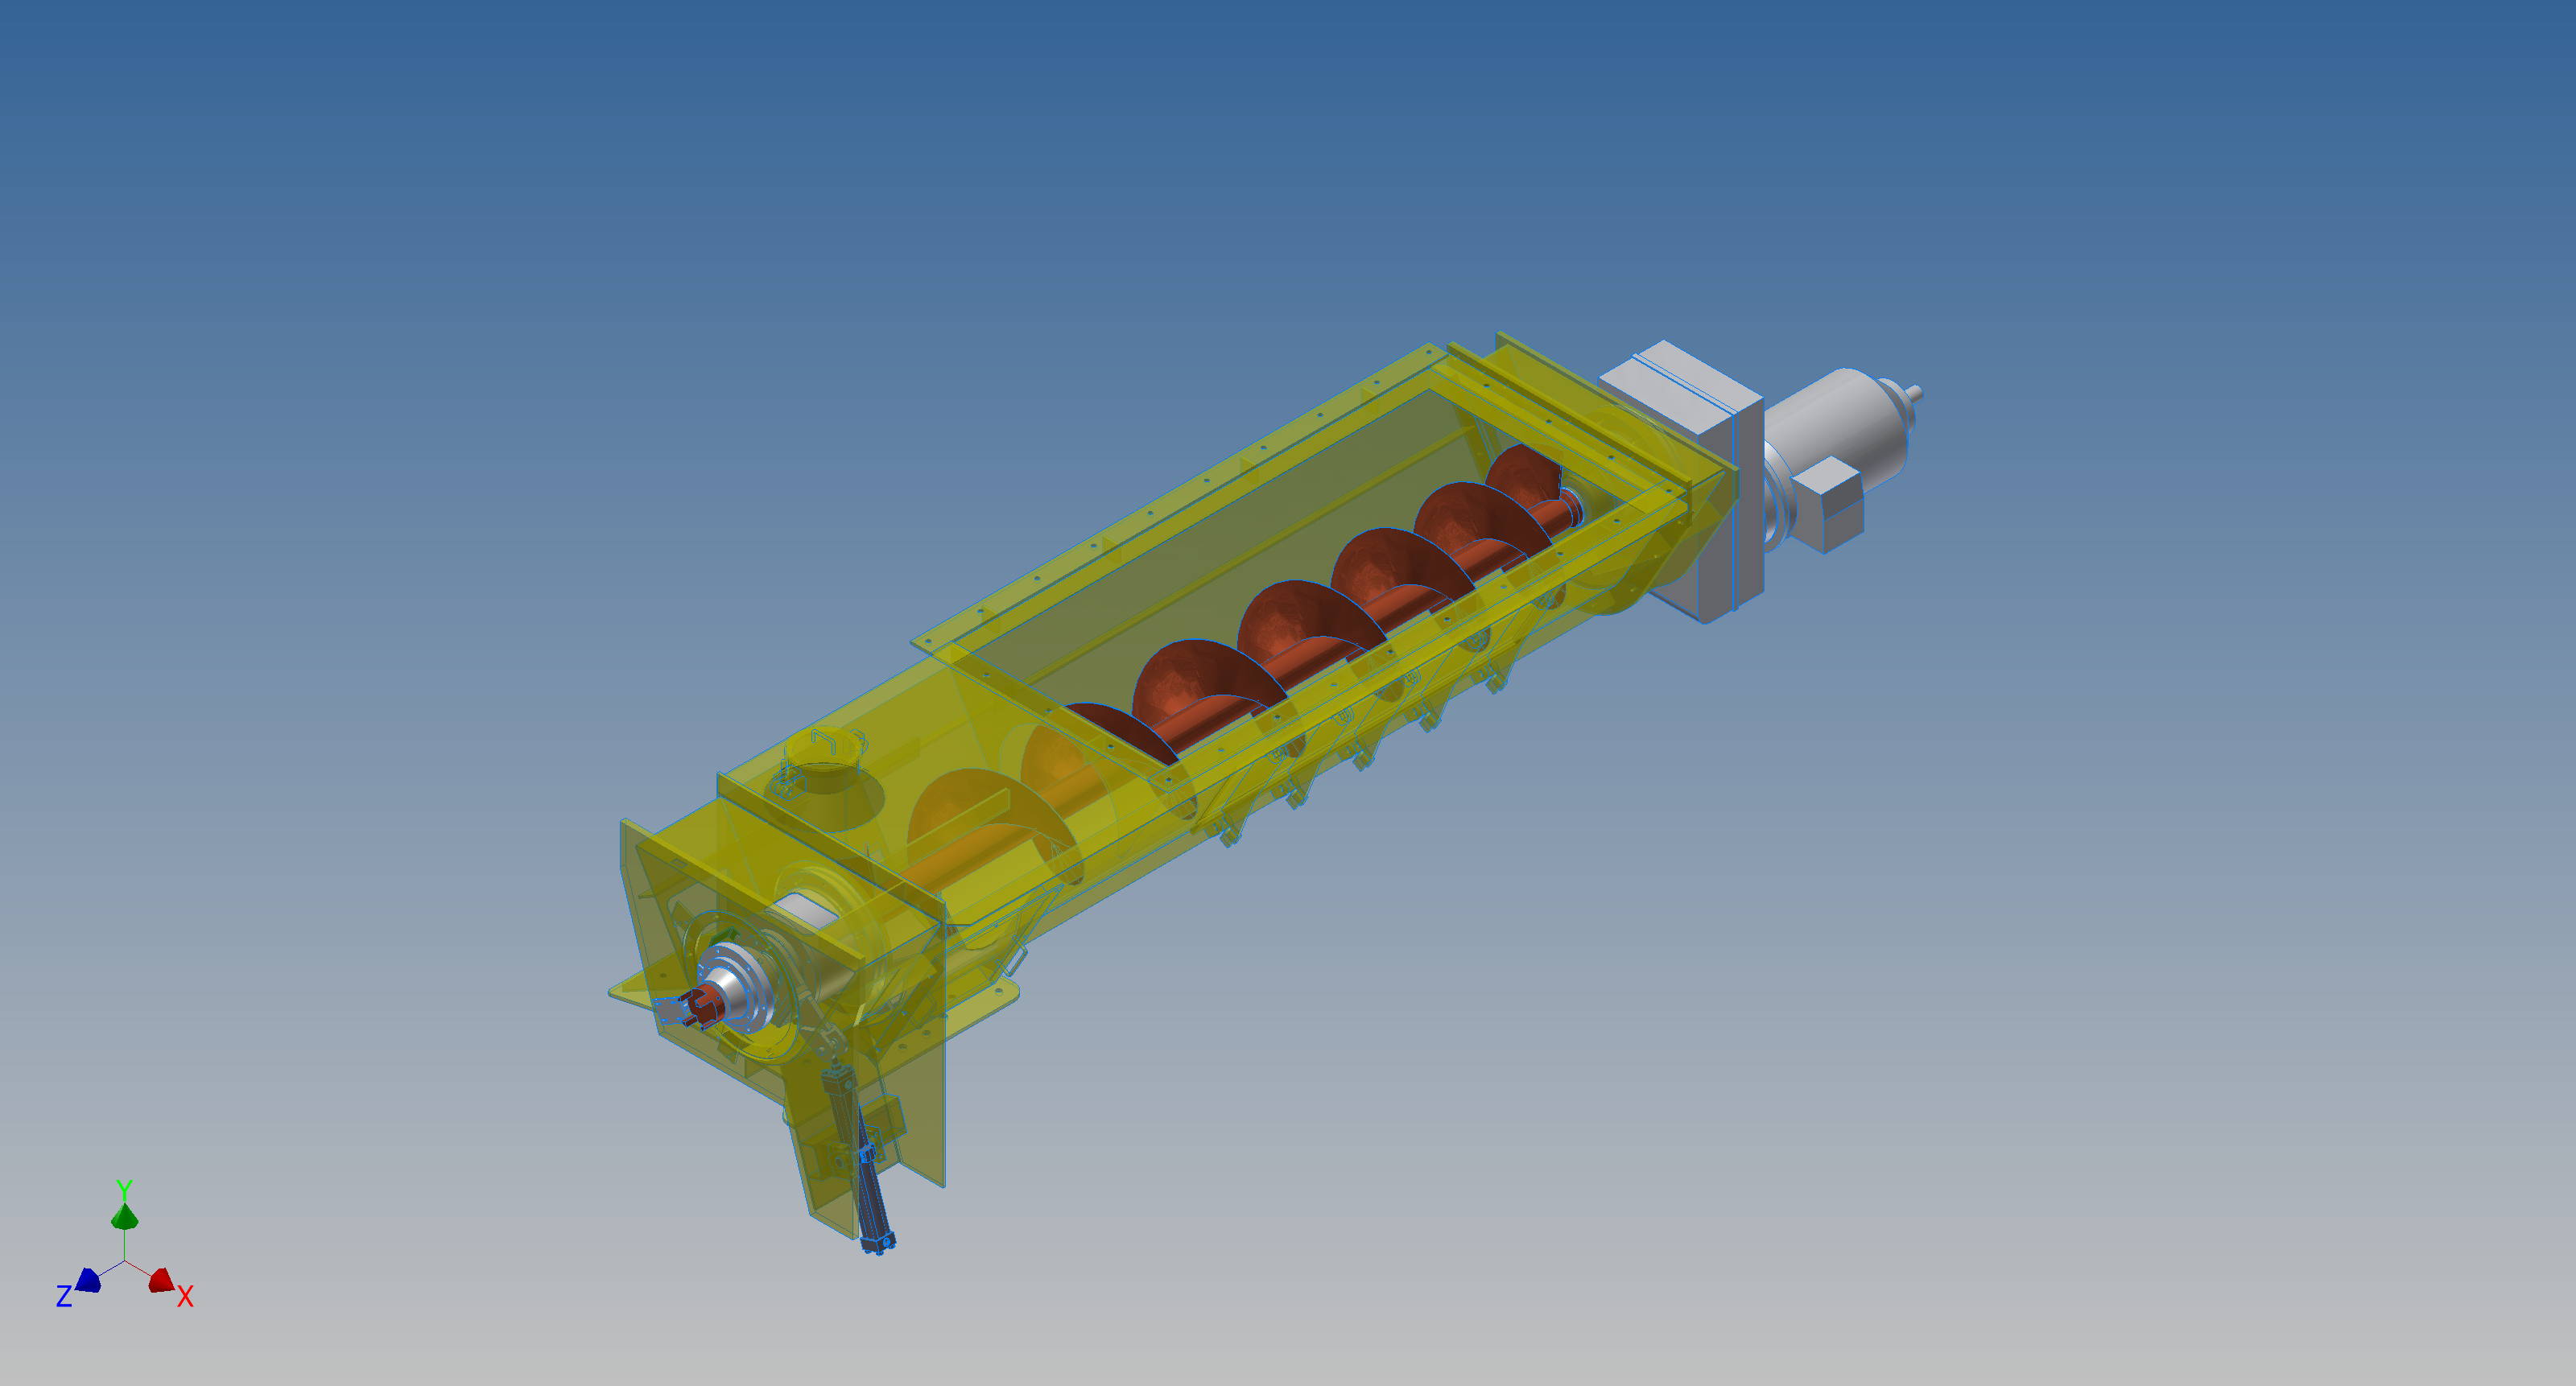
This is a very basic introduction to using surfaces where the mass or volume of a fill material is the critical component. On some forums, similar questions have been asked for complete hoppers where programmed solutions are offered to subtract all the structural objects to derive the fill mass and volume. By using surfaces with zero mass and volume to contain the fill there is no need for any programming solutions. There are a few ilogic basic routines included in this example for formula calculations and shifting the location of the bunker output. Another example just for reference is the casing for a screwfeeder:

400 - Streams 1 & 3.png

Surfaces are extraordinarily versatile with many applications, only some of which have been mentioned in this blog. For this example, we could extend the technique to modelling fuel tanks, hydraulics and oil tanks where the volume and mass are critical.

Bell P-39: Cockpit Glass

Bell P-39: Modelling Curved Cockpit Glass (Inv 2017)

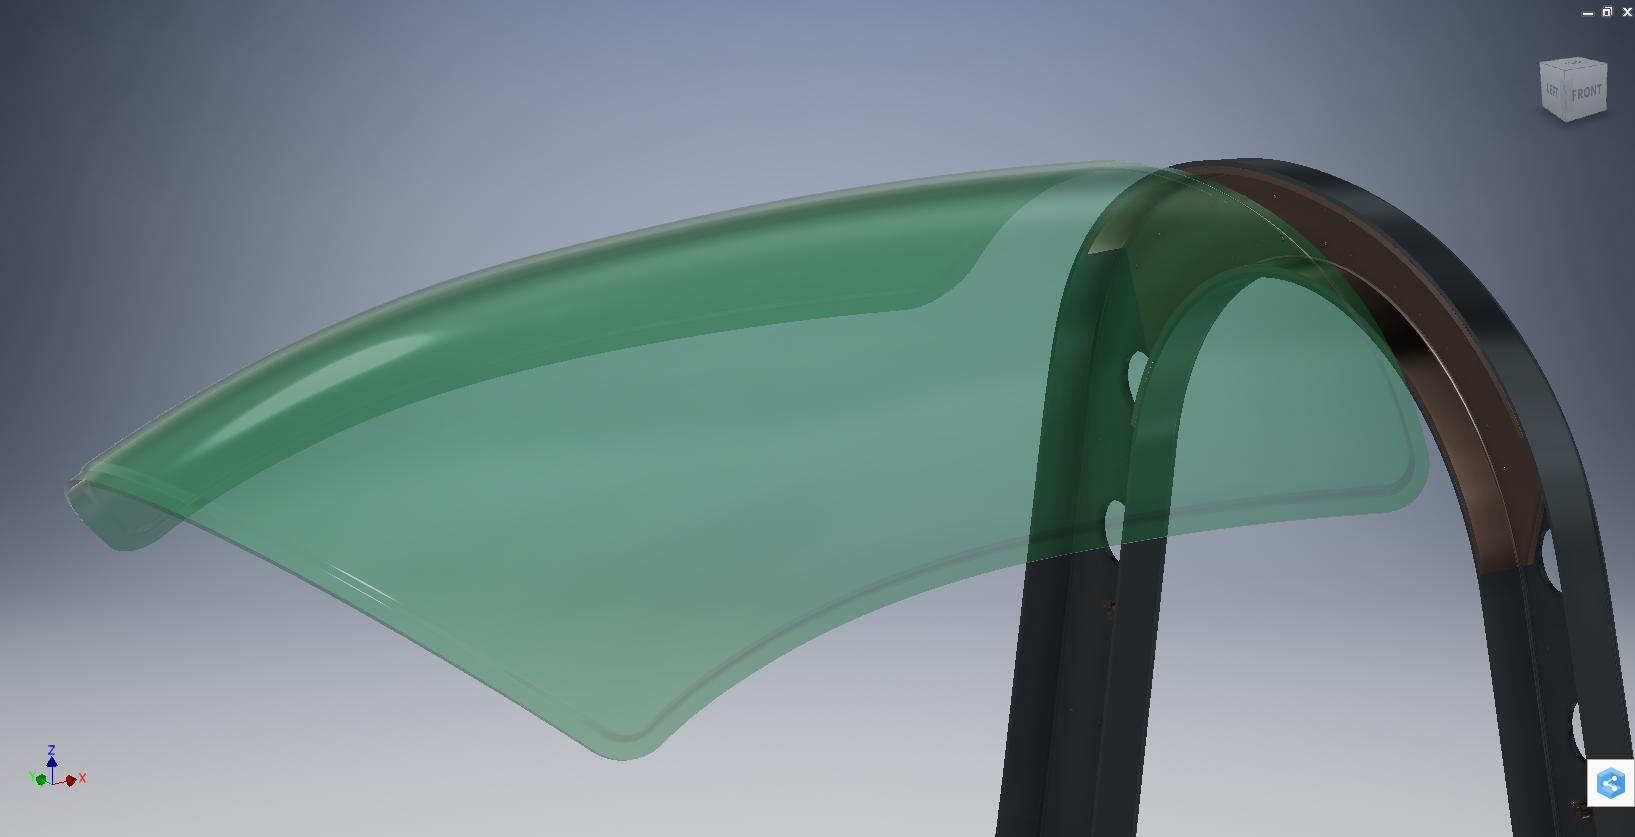
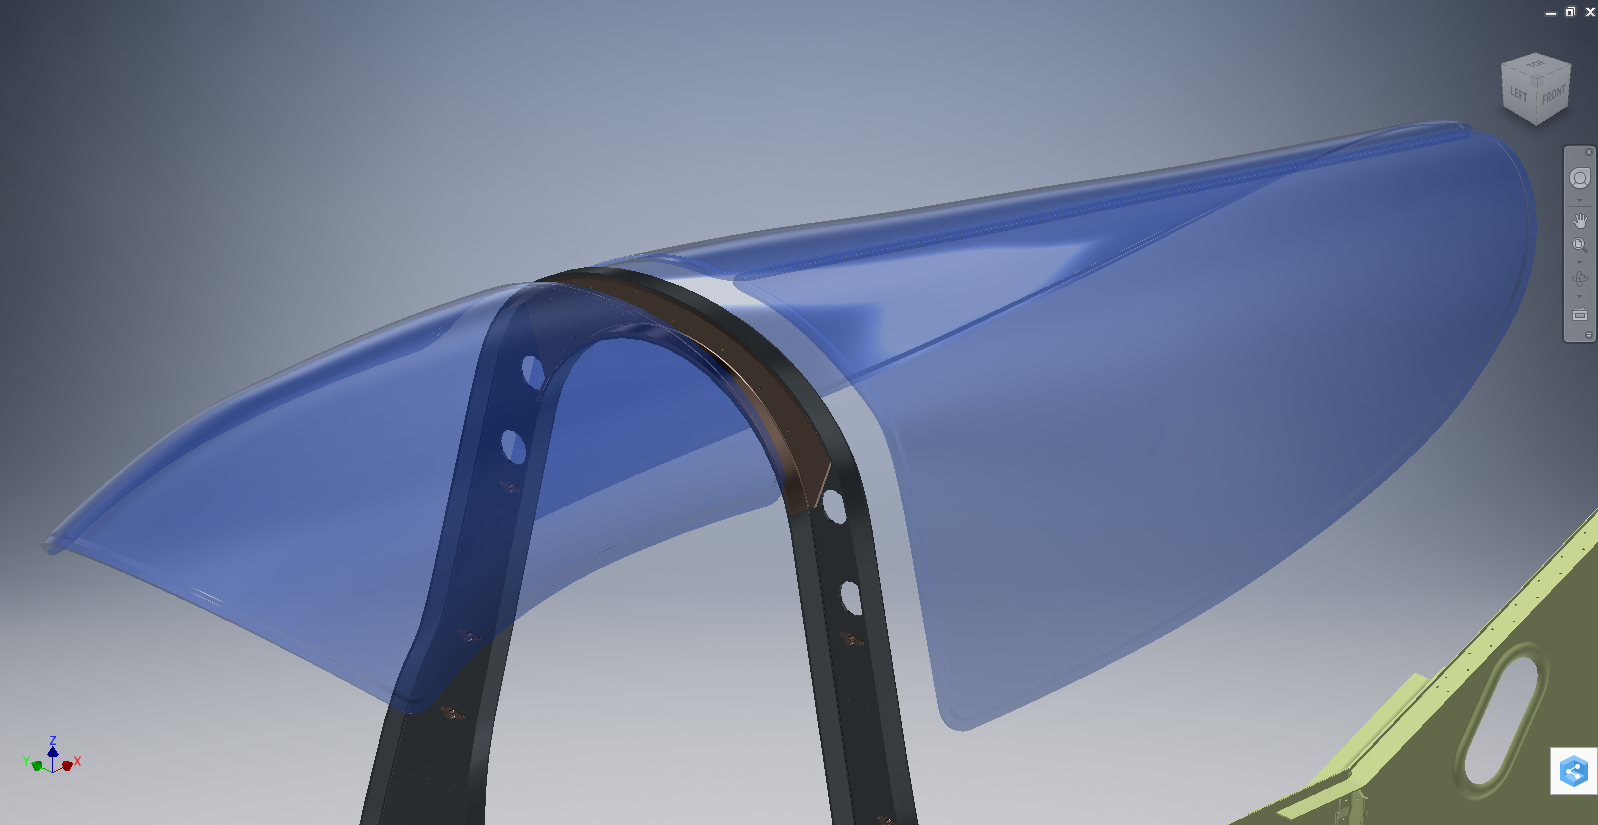
Modelling the Cockpit glass can be a challenge to achieve the correct curvature and create the inevitable jogged and profiled edges.

P-39 canopy

The Bell drawing lists all the ordinates to enable us to create the profile sketches from which to derive the required basic shape with two areas worth extra consideration in respect to the rounded corners and the jog along the perimeter edge.

We developed the initial extruded surface from the contour ordinates and then simply extruded a sketch to trim this surface to the basic shape.

P-39 c1

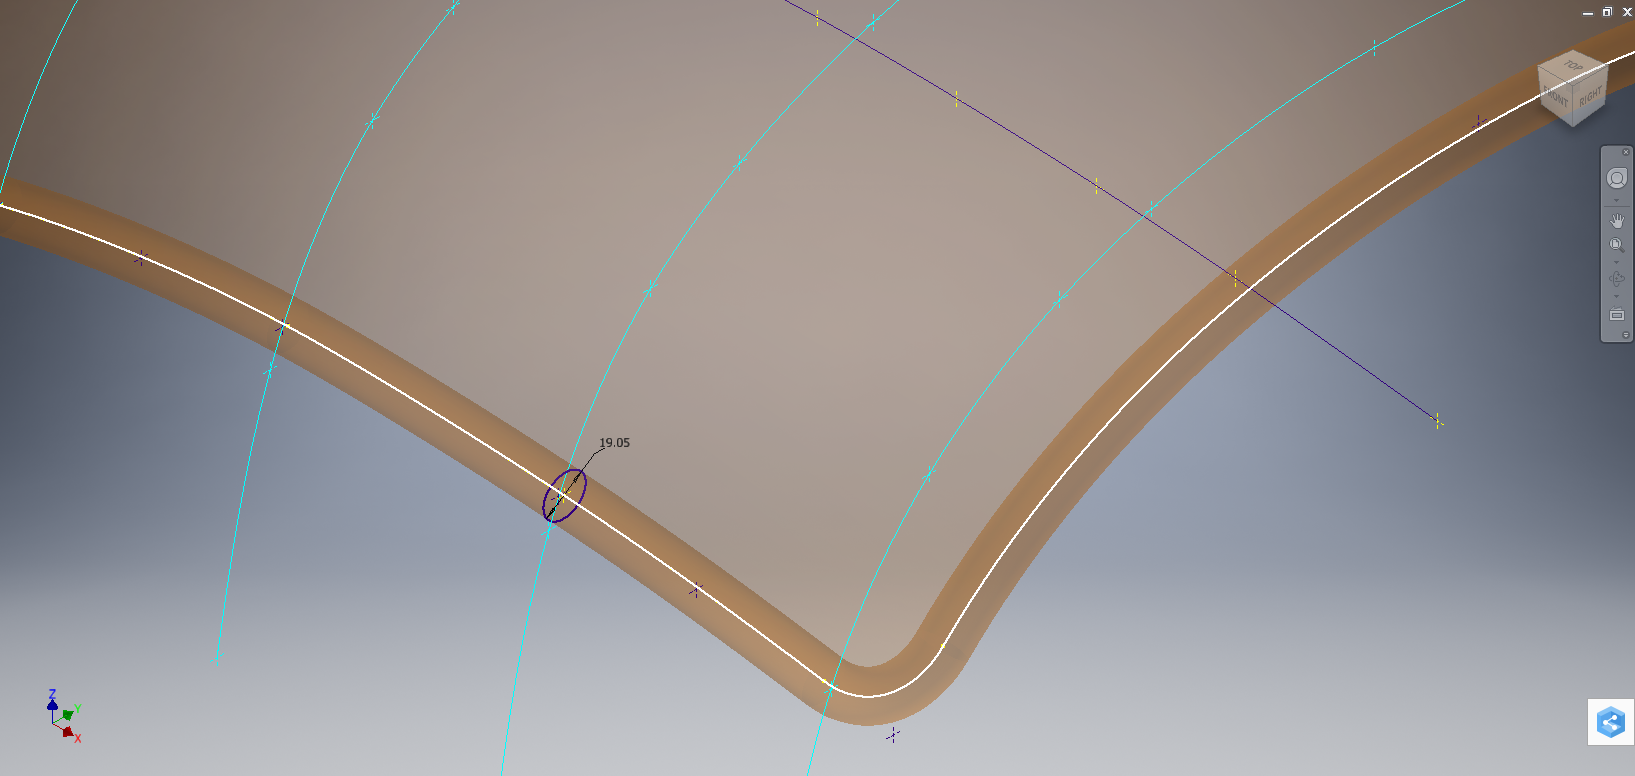
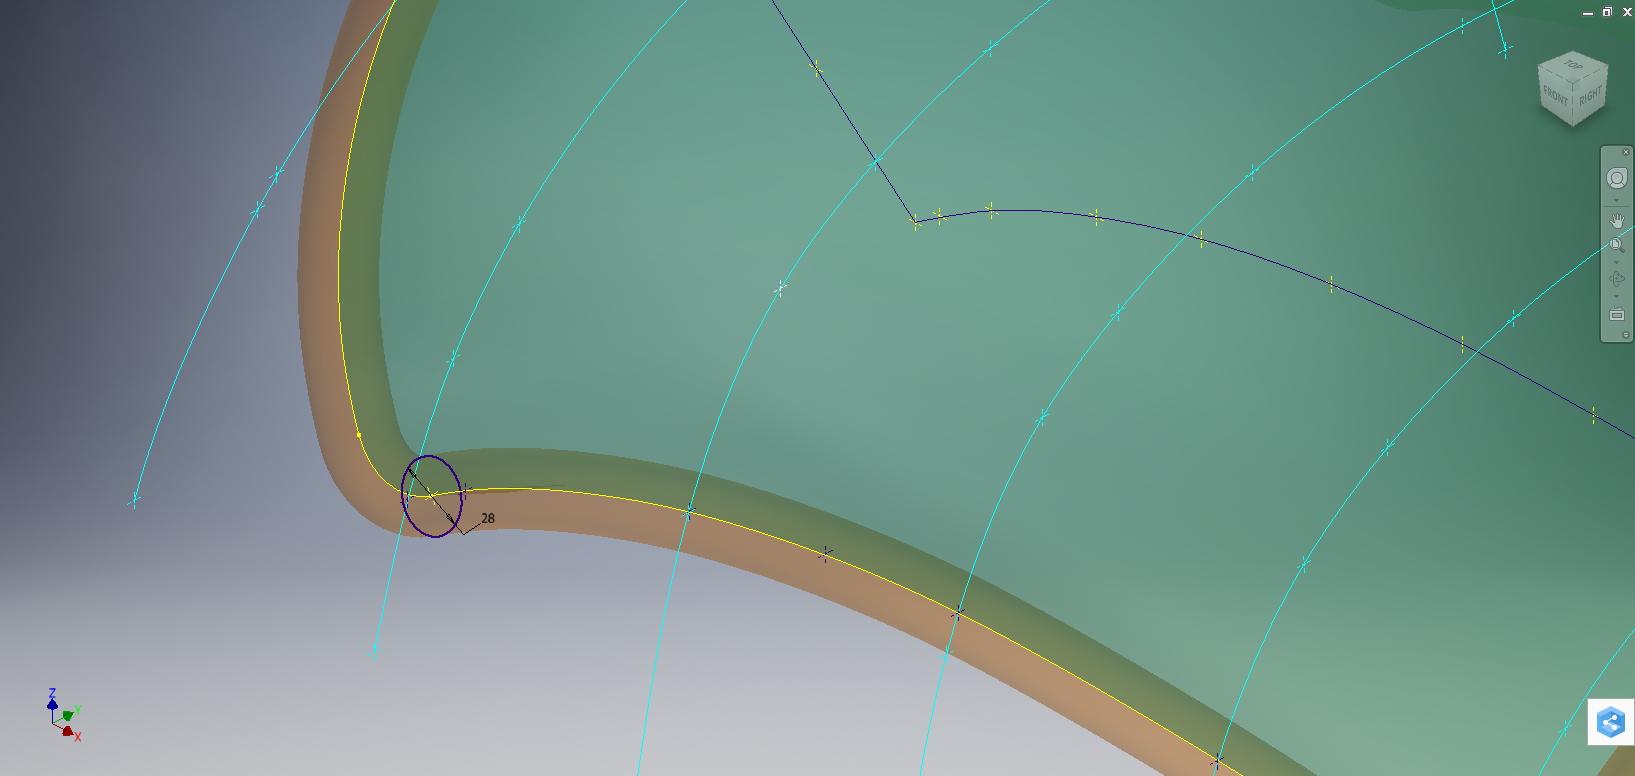
The first thing we need to do is to fillet the corners. In Autodesk Inventor we cannot fillet a single surface, though we could use various techniques to do this we decided instead to Thicken the surface an arbitrary amount ( it does not much matter how thick it is) and then apply a fillet of each corner of the solid which ensures correct tangency.

P-39 C2

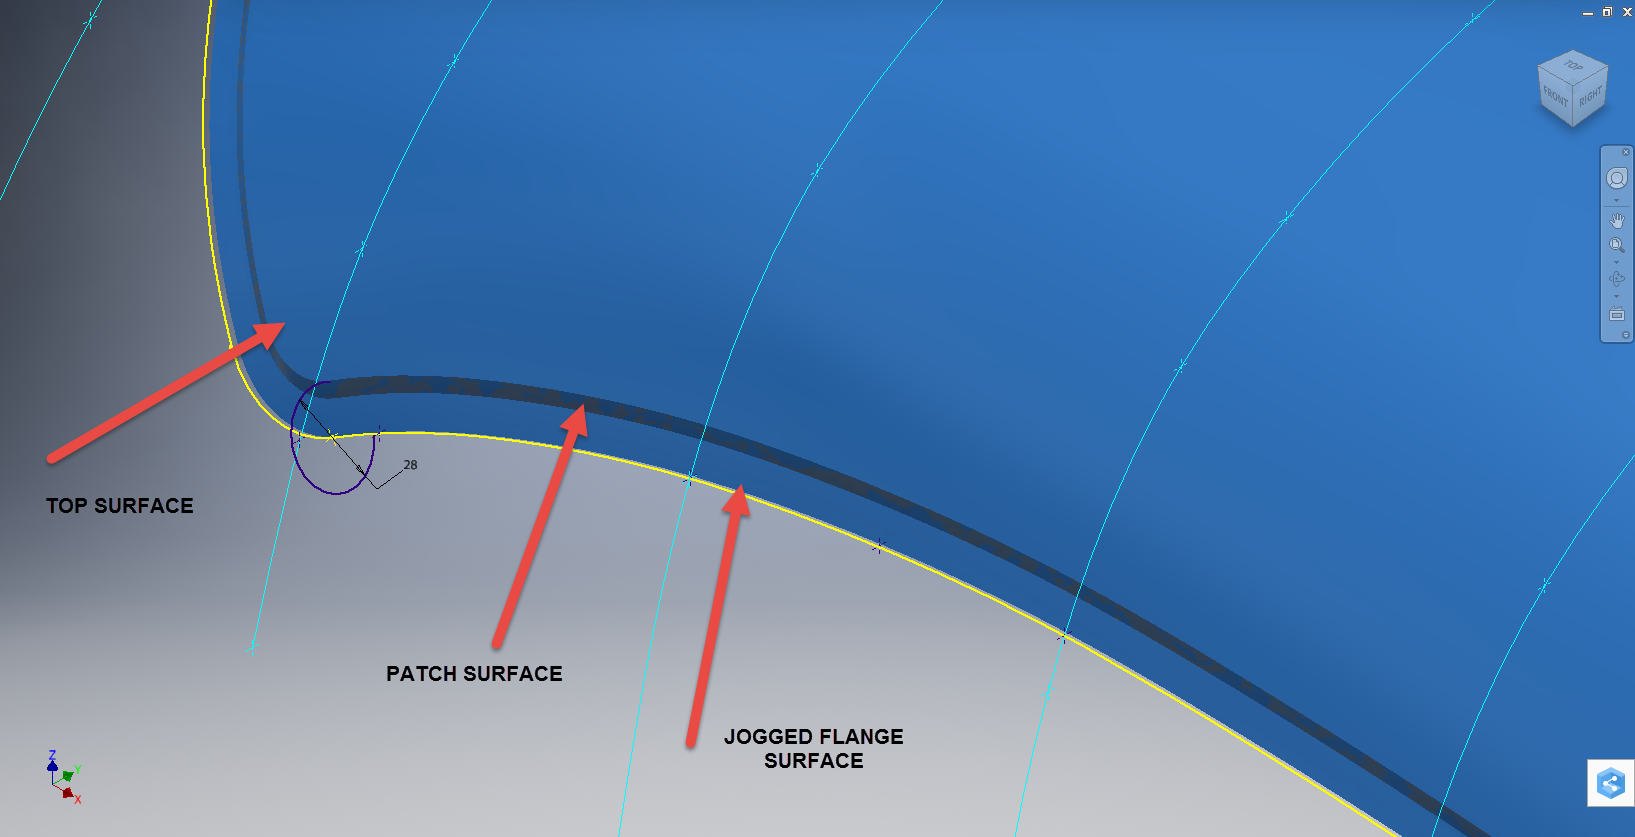
The jog along the edges is a bit tricky, given the nature of the surface. One way of doing this would be to sketch the jog profile and sweep the profile using the edge as the path. We tried this in several configurations but the result was not consistent.

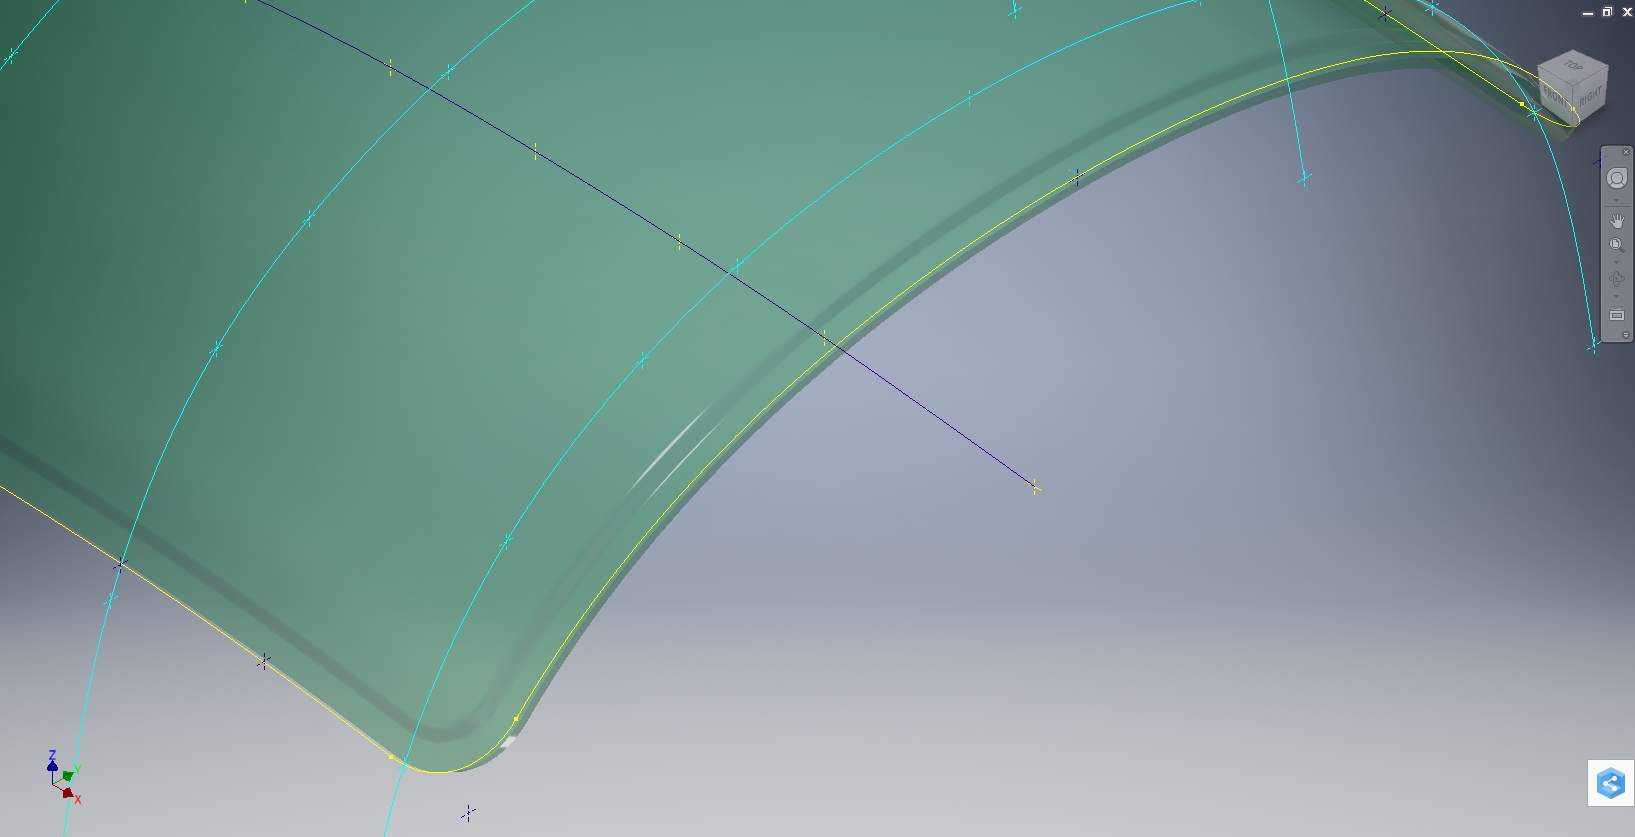
To solve this we need to consider what a solid comprises off in order to rethink our strategy. A solid is essentially a series of closed surfaces that are used to contain the solid properties. With this in mind, we started by offsetting the top surface to create a copy at the desired jog dimension inward. Along the edge of this new surface, we sketched a circle with a radius the same as the jog flat dimension and swept this along the perimeter of the new surface.

P-39 C20

By using a circle profile for the sweep we ensure that the resulting flange; which is trimmed from the copied surface; will be a consistent width throughout its length. Now we have a surface representing the exact dimensions of the jogged top face at 3/8 inch. We do something similar for the top surface which is selected from the solid with the circle set to a bigger dimension to facilitate the jog transition curves. This time simply trimming to remove the edge width.

p-39 c21

This gives us 2 surfaces, the lower surface for the top face of the jogged flange and the second, the actual main surface for the top of the canopy glass. To fill the resulting gap between the surfaces we used a patch surface.

P-39 CX

We have trimmed the surfaces of the solid body thus breaking the solid cohesion leaving a number of orphaned surfaces which can now be deleted. To finish we would stitch the surfaces and then thicken to the required amount.

p-39 c12

To achieve a smooth transition when applying a patched surface between 2 surfaces a good result can often be achieved by using the tangency option relative to each joining surface. In this particular instance, the patch size was too small to do this so instead we applied fillets to achieve the same results.

A Note on Curvature:

P-39 Canopyx

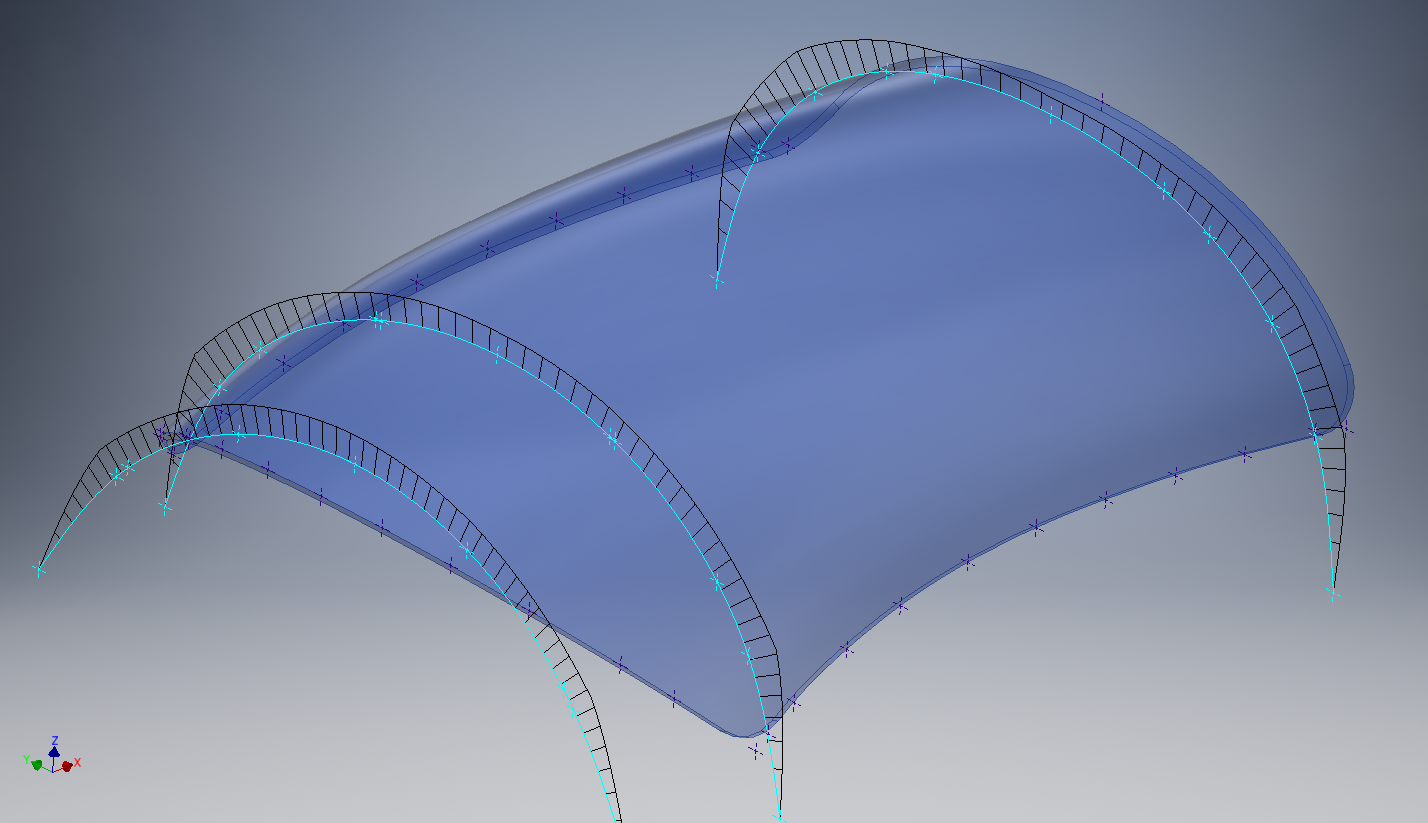
It is absolutely critical to manage the curvature of the sketch profiles prior to lofting to ensure the best possible surface. This usually requires marginal adjustment to the ordinate dimensions; generally fractions of a millimetre; to achieve a good result.There is a small shoulder on this glass panel thus accounting for the slight edge deviation. To improve further the definition of the finished surface we can convert to a freeform surface which will derive a new surface with G2 curvature.

P-39 Cockpit Glass

Another Quick Tip:

Sheet metal flanges are restricted in Inventor to straight edge segments whereas with Solidworks we can actually create a curved flange where there is continuous tangency. One workaround in Inventor is to sweep a profile along the edge of the sheet metal part to create a flange or alternatively use the Ruled Surface feature.

P-39-1

This feature provides a few functions for extending surfaces either perpendicular or tangential to an existing surface. In this example, we simply select the default and create a perpendicular edge without requiring additional sketches.

Thicken the resulting surface, convert to sheet metal part and apply a traditional flange!

FW 190/Ta152: Parts

Focke-Wulf 190 and Ta152 Parts.

Some sample images of components created as 3D models to support this project. These parts are dimensionally accurate, although not certified for fabrication I am confident they would be a useful reference resource. I should note that these components will be built according to the original fabrication drawings and not manipulated to ‘as-fitted’ condition (please see my earlier posts on ‘as-fitted’ conditions).


8-190.9015-2646 8-190.140-08-156

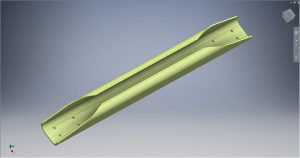
8-190.9015-2646                                                                                          8-190.140-08-156

8-190.105-4024 8-190.105-1422

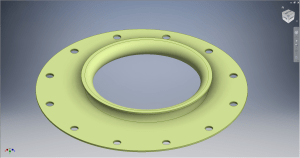
8-190.105-4024                                                                                          8-190.105-1422

8-190.105-01107 8-190.105-01105

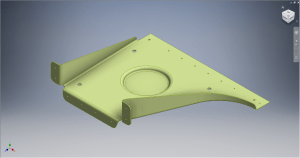
8-190.105-01107                                                                                    8-190.105-01105