Technote: Sheetmetal; Avoid Bend Stress Points

Technote: Sheetmetal; Avoid Bend Stress Points:

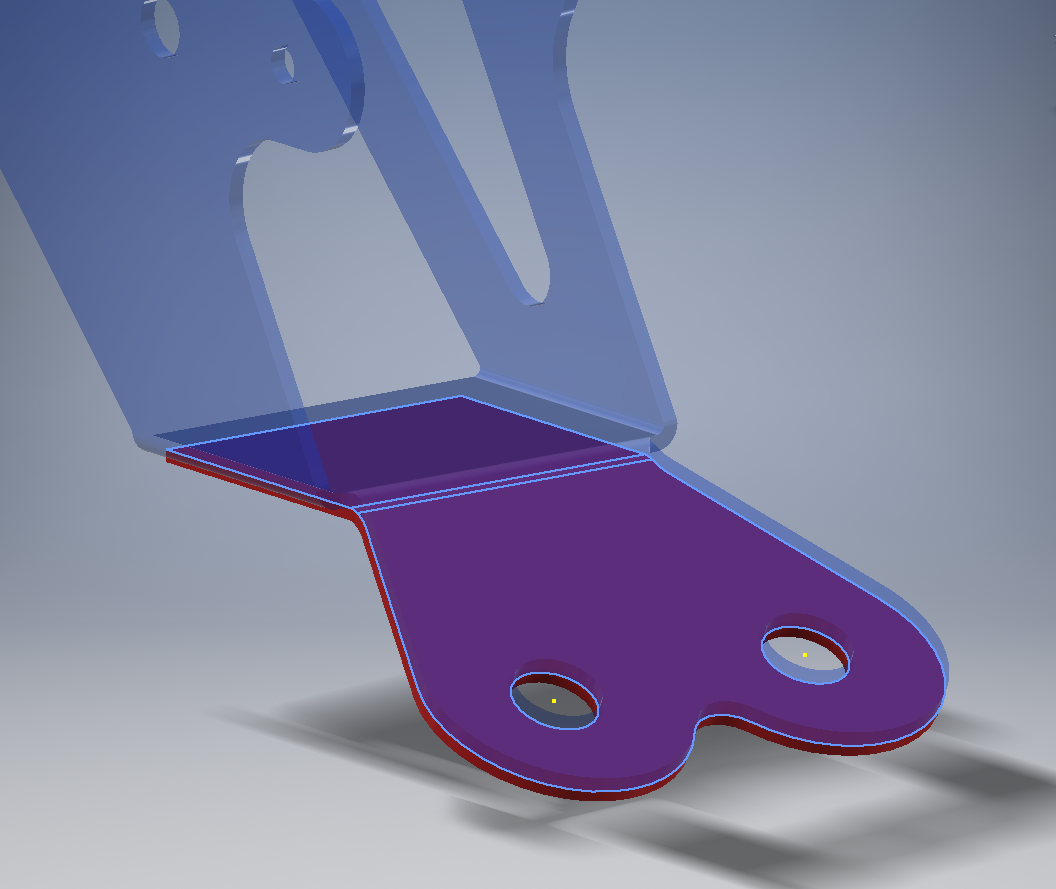
This is a sheet metal part for the P-39 Airacobra (#12-509-052) sent to me by a fellow enthusiast for comment. Before I get immersed in discussion on this subject I would just say that this part is a cable cover that is unlikely to be under any substantial stress and thus would probably be fine as modelled.

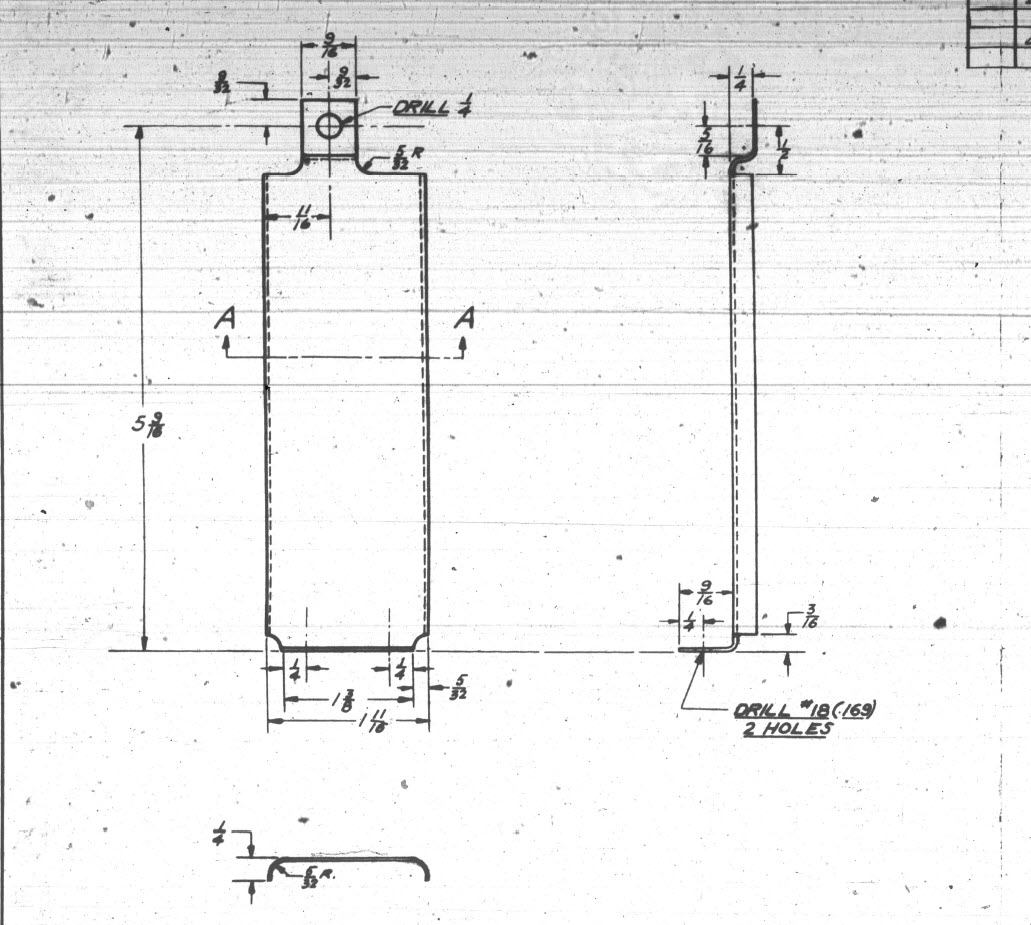
The part comprises 2 tabs, one on the top and one on the bottom. It is the fillet radius that I will focus on. The first bend is offset from the edge of the plate. The drawing specifies a 5/32″ (4mm) radius for the fillets at the intersection of the top tab and the main body which overlaps the sheet metal bend. The originator has taken this literally and attempted to create a finished fillet of 5/32″.

I suspect that the drawing is actually referring to a 5/32″ radius as it would be for the developed flat pattern because doing so otherwise; due to the bend being offset as illustrated on the cad model; this introduces stress points.

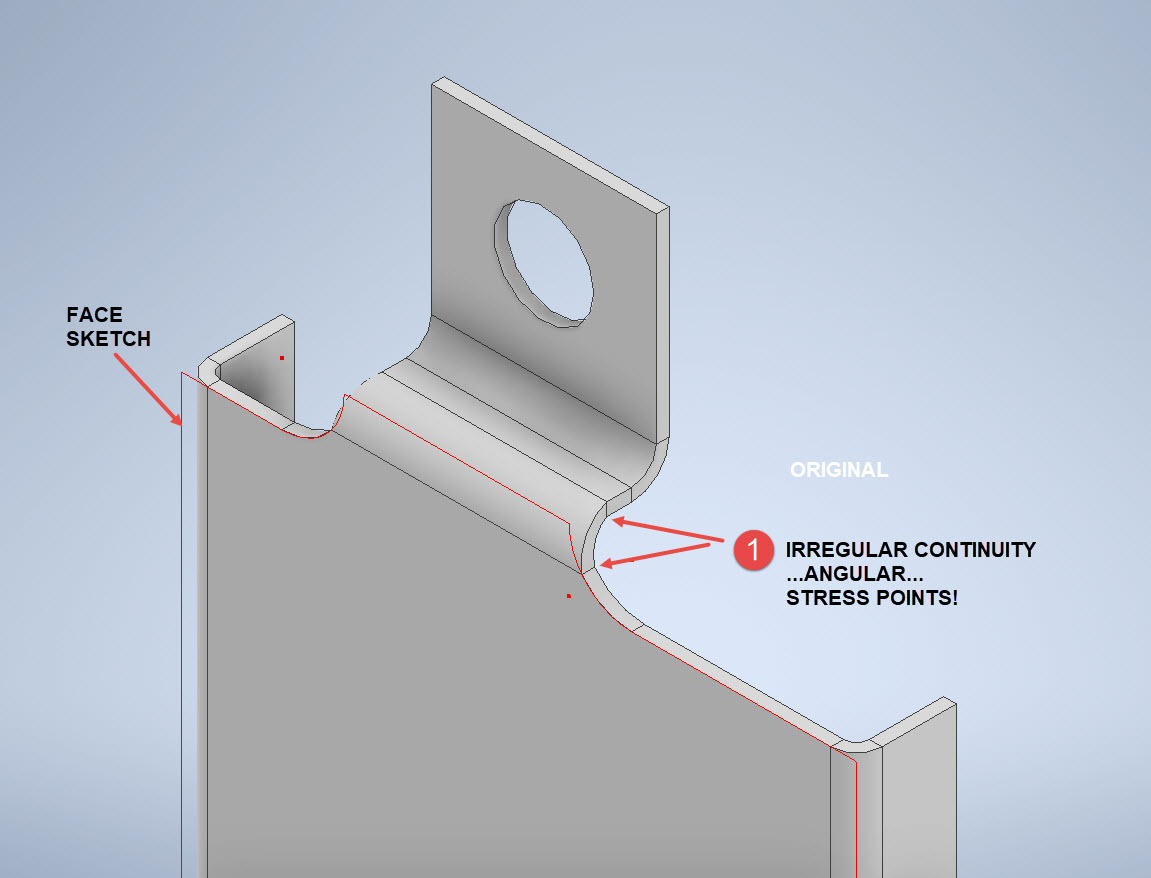
The images show the irregular continuity which creates angular edges that essentially become focussed stress points. It is often best to try to achieve smooth continuity both for bending purposes and of course when in use. What they did was sketch a face profile; which included the specified radius (#1)and then proceeded to adopt the standard commands to build the flanges. Technically it is not wrong but as the manufacturer’s drawing does not contain a developed flat pattern it is often misinterpreted…the radius should perhaps be applied to the pattern before bending.

Similarly, at the bottom tab, we also have irregular continuity as shown at #2.

I rebuilt this model to address these issues and you can see how a small change in modelling technique can obviate some of these issues.

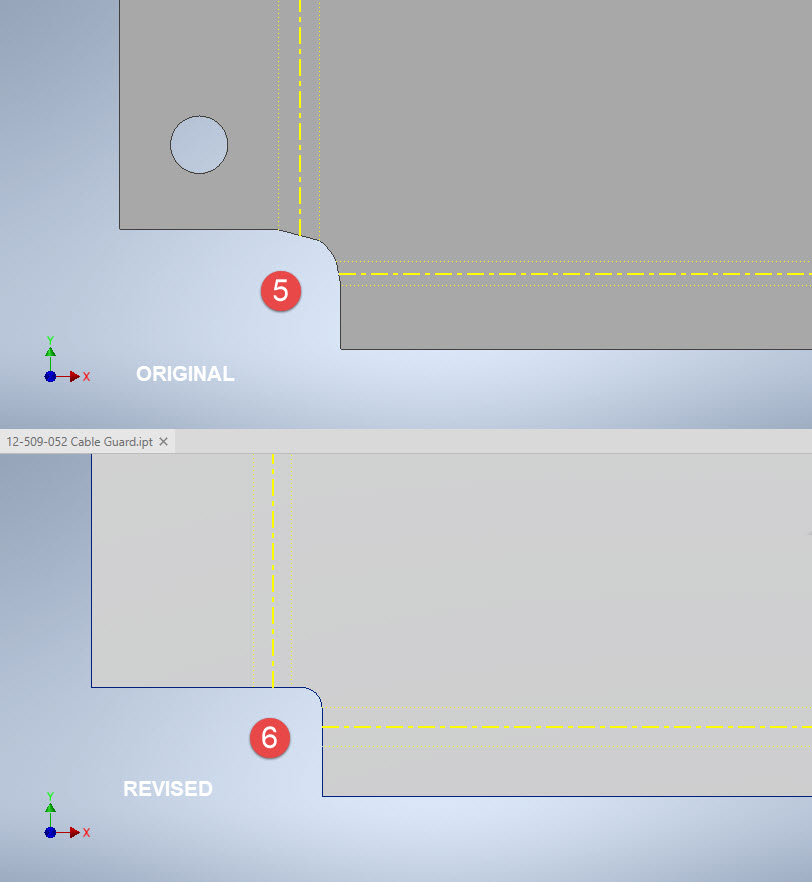
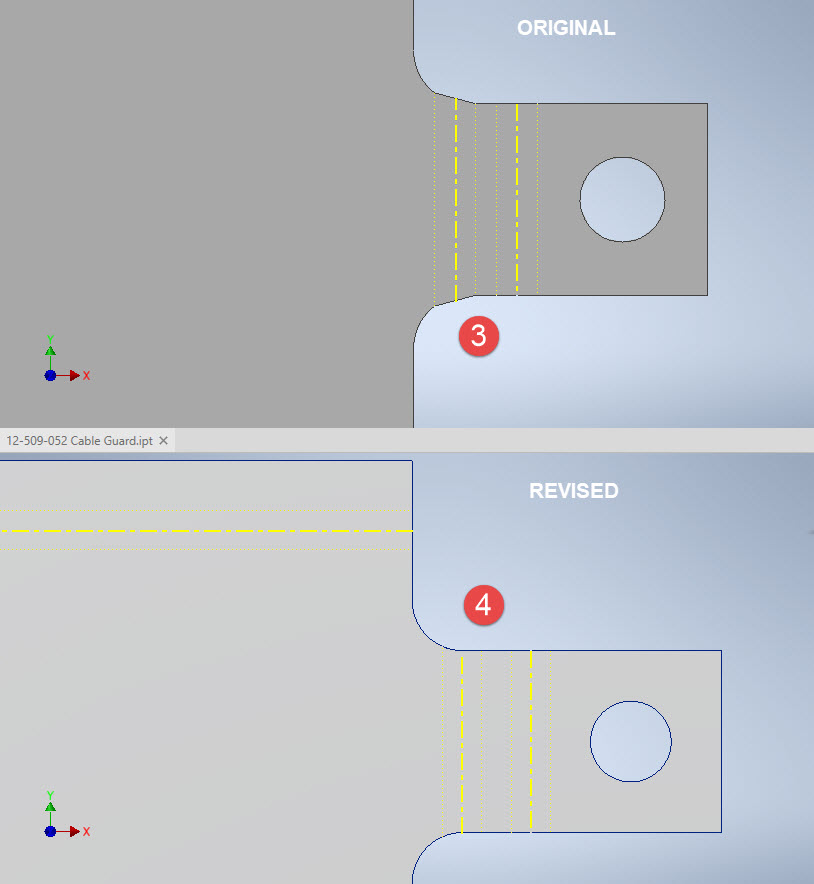
The images show the developed pattern with the original cad model on the top and the new version on the bottom. At #3 the outline of the tab would be difficult to cut with the small taper before the fillet, whereas the lower profile at #4 is easier to cut with no stress points. Similarly for the base tab at #5 and #6. I should note that the bottom tab radius is not specified so I opted for the default minimum which fits nicely before the bend lines.

There are several ways to do this with the easiest being accomplished by using the Unfold command on a square flange and then applying the fillet before refolding. The option I have used here is first to draw an extended flange as part of the initial face sketch, create the first part of the model as a Face then apply the 5/32″ fillet before bending along a predetermined bend line sketch.

The sketched tab outline is a lot bigger than is required which of course can be trimmed once the tab is complete. You can see the extents of the tab on the initial sketch…you only need to add a plane at that point to trim. The resulting fillet is a smooth continuity with no obvious stress points.

Understandably the designers wished to increase the amount of material at the bend to maximise strength so it is advised to try to achieve those goals. As I said before, for a cover like this it is probably not too critical if we only applied a small fillet but for framing and structural elements, it may be critical.

One quick note on the 2 vertical flanges…the drawing specified an internal radius of 5/32″ which to be honest is unworkable as the resulting bend would overlap the bottom tab…in this case, I opted for the minimum specified.

At the end of the day, it is down to the interpretation of the designer intent. For the majority of sheet-metal drawings, they often do not include developed flat patterns but may contain information that is actually applicable to the flat pattern and not necessarily the finished folded profile.

Sopwith Pup: Technote

Sopwith Pup: Spar Clip Technote

The Sopwith Pup is a single seater biplane built by the Sopwith Aviation Company, another aircraft in my archive, though not one that I have done much work on. This is just a quick technote; so not a new project; my priority still lies with the P-39 Airacobra.

I received an email from a close friend and he asked if I could help him out with this model for the main spar clip, item number 1393-1 from the Sopwith drawings. The area in question was the cable lug at the base of this clip, which comprises 2 parts.

The problem related to matching the profile of the top part to the profile of the lower part, without extensive or complex modelling. For the lower part, I decided to use the sheet metal features to create this as a multi-body part which I would then use as a template to profile the upper section that is essentially an extension of the main model.

What he was trying to do was project a sketch from the each face of the lower part, extrude each sketch and then fit a bend to connect the two extrusions. He reckoned this was more complicated than it should be and asked me if there was better way of doing this.

He was actually not that far from achieving a simpler solution, he just needed to adapt the process a little bit.

sc-03

In a previous article for the P-39 cabin glass I discussed the merits of selecting the solid surfaces as a means to modelling the jogged edges. I have used a similar technique here for developing the upper part of the lug.

Simply by selecting the top surfaces of the lower part as shown above; we then apply a thickness to this selection and opt to merge with the upper part as shown. There we have it; an exact match and fit between lower and upper lug parts in one step!.

It looks simple and often the best solution is, but occasionally it is easy to overlook the fact that we can manipulate the surfaces of a single solid model to create new separate parts without too much effort.

sp-05

Squaring the Edge:

The Sopwith drawings for this part and many other similar parts are a little misleading given that they show the edges of these components as beveled. This is normally not good practice, particularly when metal meets timber. Ideally we need to square the edges to negate this problem and to facilitate the cutting of the developed sheet metal pattern.

sc-06

These brackets are an awkward shape which requires some careful planning to ensure that the model is correct and can be manufactured. So to achieve this I occasionally use surfaces to set-out the basic cut profile shape and then thicken.

Thickening a surface model is actually a good way of working due to the thickness being applied normal (perpendicular) to the surfaces, thus by definition achieving a good square edge to the developed pattern.

As you can see in the image on the right the edges are square and easy to cut.

The other way of doing this is using the cut option feature from the sheet metal command.

sc-10

By selecting the “Cut Normal” option in the dialogue this will ensure that each of the edges from this extrusion will be square to the surface when flattened.

Whilst we are on this subject; the weld seam at the top of this bracket is something I would consider improving by having a thin continuous metal strip either side of the seam instead of 3 smaller widths (top image) which may distort the metal, something like this (A):

sc-11

Notice I have tidied up the bend at (B)…this gives a much cleaner profile when the draft angle is quite small. I should note that I don’t normally take liberties wth the manufacturer’s details, but occasionally exploring options to see how things could be improved can be quite an interesting exercise.

I should note that it is normally good practice to state on the 2D manufacturing drawing a “Break Edge” minimum size anyway for all edges even when square cut.