Grumman F4F/FM2 Wildcat Update

Grumman F4F/FM2 Wildcat Update:

Following on from my previous posting regarding the Excel Transpose function; wherein I mentioned the updates to the Grumman F4F/FM2 Cad/ordinate dataset; I thought I would share a few screenshots of progress so far.

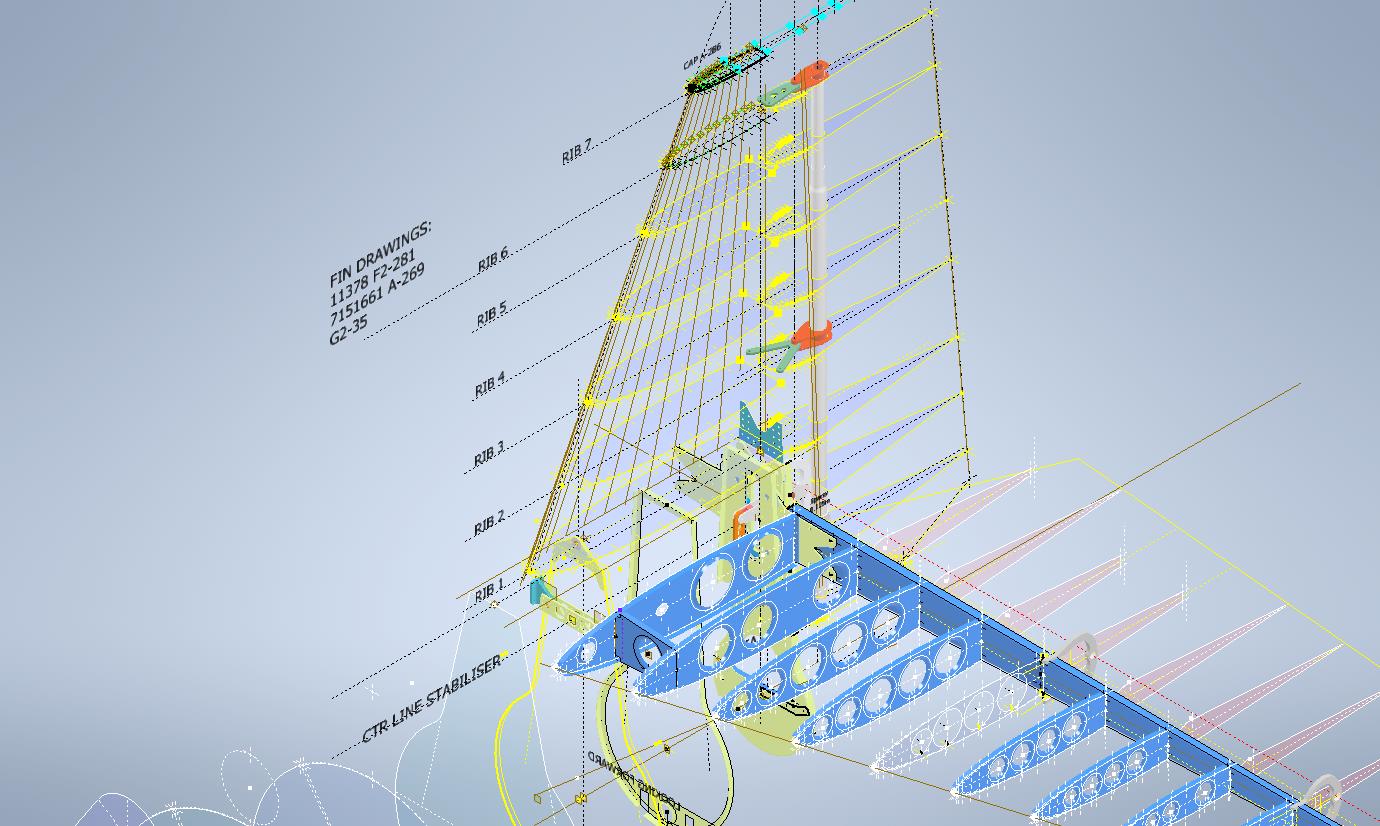
As you can see the aircraft is partially 3D modeled…there is actually a good reason for this other than the fact I enjoy the 3D modeling! I have found that on the main assembly layout drawings, the dimensions are often shown to one side of the spar whereas the actual connecting part is defined to the other side. To ensure I get this stuff right I would model the main spar to correct material thickness and check alignments. Admittedly I did get a bit carried away with modelling some of the ribs.

The wing is probably the most complex assembly to do due to the main ribs being in 3 parts…the leading edge, mid-section, and the trailing edge. Each profile will be recorded separately; as per the Grumman drawings and then compiled to provide full rib profiles at each station. The wing also has 5 datum lines that are occasionally misidentified in the part drawings which can be really frustrating alongside incorrectly placed dimensions…generally wrong vertical dimensions are associated with the wrong rib station, more common than I would like.

Still some work to do to finish these main areas as well as the cockpit canopy, fuselage, and front cowl. I haven’t looked at the undercarriage as yet… development of that will be dependent on available information…we will see!

It is not my intention to fully 3D model this aircraft but where it helps check associativity between parts then I will. The project will fully develop all key profiles for ribs and frames which will be fully documented on Excel spreadsheets as a permanent dimensional record. I plan to have this update completed by the end of September.

The aim of these cad/ordinate datasets is to produce the most accurate dimensional records available anywhere for the various aircraft…nothing is assumed or taken for granted.

If you can help me with the spiraling costs of these projects please consider making a small donation. As usual for all enquires please get in touch at hughtechnotes@gmail.com

Technote: Excel Transpose Row to Col.

Technote: Excel Transpose Rows to Columns:

I am currently updating the F4F (FM-2) Wildcat Ordinate dataset which required transposing Excel Rows to Columns so I figured I should write a quick Technote on the process involved.

Before I get into the detail it is necessary to appreciate that I could have saved myself a bunch of work if I simply created the table in the first place with the columns and rows reoriented to better suit the required end goal. When I develop these tables it is important that the layout is the same as the original data so that ongoing cross-referencing and updating are much easier to achieve. As you can see in the screenshot of the original drawing the tabulated information is not very clear, in fact, some of it is completely illegible… which incidentally is the primary reason why I do this in the first place…initially, I develop the coordinates as best I can and then create the profiles whereupon any variations can be visualized and therefore corrected…essentially working from what we know to determine what we don’t know.

Getting back on track. What I need to do is to create a live link to the rows (highlighted) but in a columnar format to list the required X, Y coordinates for each profile. You could of course just simply copy the rows and use the Paste Special function to transpose the values to a column…however, the copied data is not linked so any changes will not be apparent in the column values. The best way I found is to use the INDEX function.

With the INDEX function, you first need to establish a range of values to be indexed…in this case, it is the values from the table shown in the red border… which give us the range from L64 to P90 (press F4 to lock that in).

The value A1 after the Column and Row values is related to the first entry in the range…it does not relate in any manner or form to the actual cell A1. I have shown alphabetically in the first image above how this A1 would change according to the values selected. So you would write this formula at the top of the column where you want the values transposed, select this cell, and use the + sign at the bottom right to pull the values down. For each column you would have a different starting point…for example, in the very first column (X-Coord) the Formula would be written as follows:

It is alphabetically the 3rd row from the first selected cell in the specified range and numerically in the first column. For each group of values you need you would adjust the starting point of the selection to the first value in the row required. When you get the CAD/Ordinate dataset for the F4F Wildcat the spreadsheet is fully editable and you will see for yourself how this was done.

As usual for further details get in touch hughtechnotes@gmail.com